
OVERVIEW
FEATURES
INTEGRATION
SUPPORT
The API node lets a Flow talk to your own systems mid-conversation — looking up data with a GET request, or sending data with a POST request. This reference covers how to configure it and what to expect back.
We’ll use an Order Tracking flow to demonstrate how the API node works.
When a customer sends a message like “Track my order”, the flow asks for their Order ID. It then calls a GET API to fetch the order details from your system and stores the response. The flow uses those details (such as the order status) to send a message back to the customer.
If the customer later chooses to Cancel Order, the flow calls a POST API to send the cancellation request to your system and update the order accordingly.
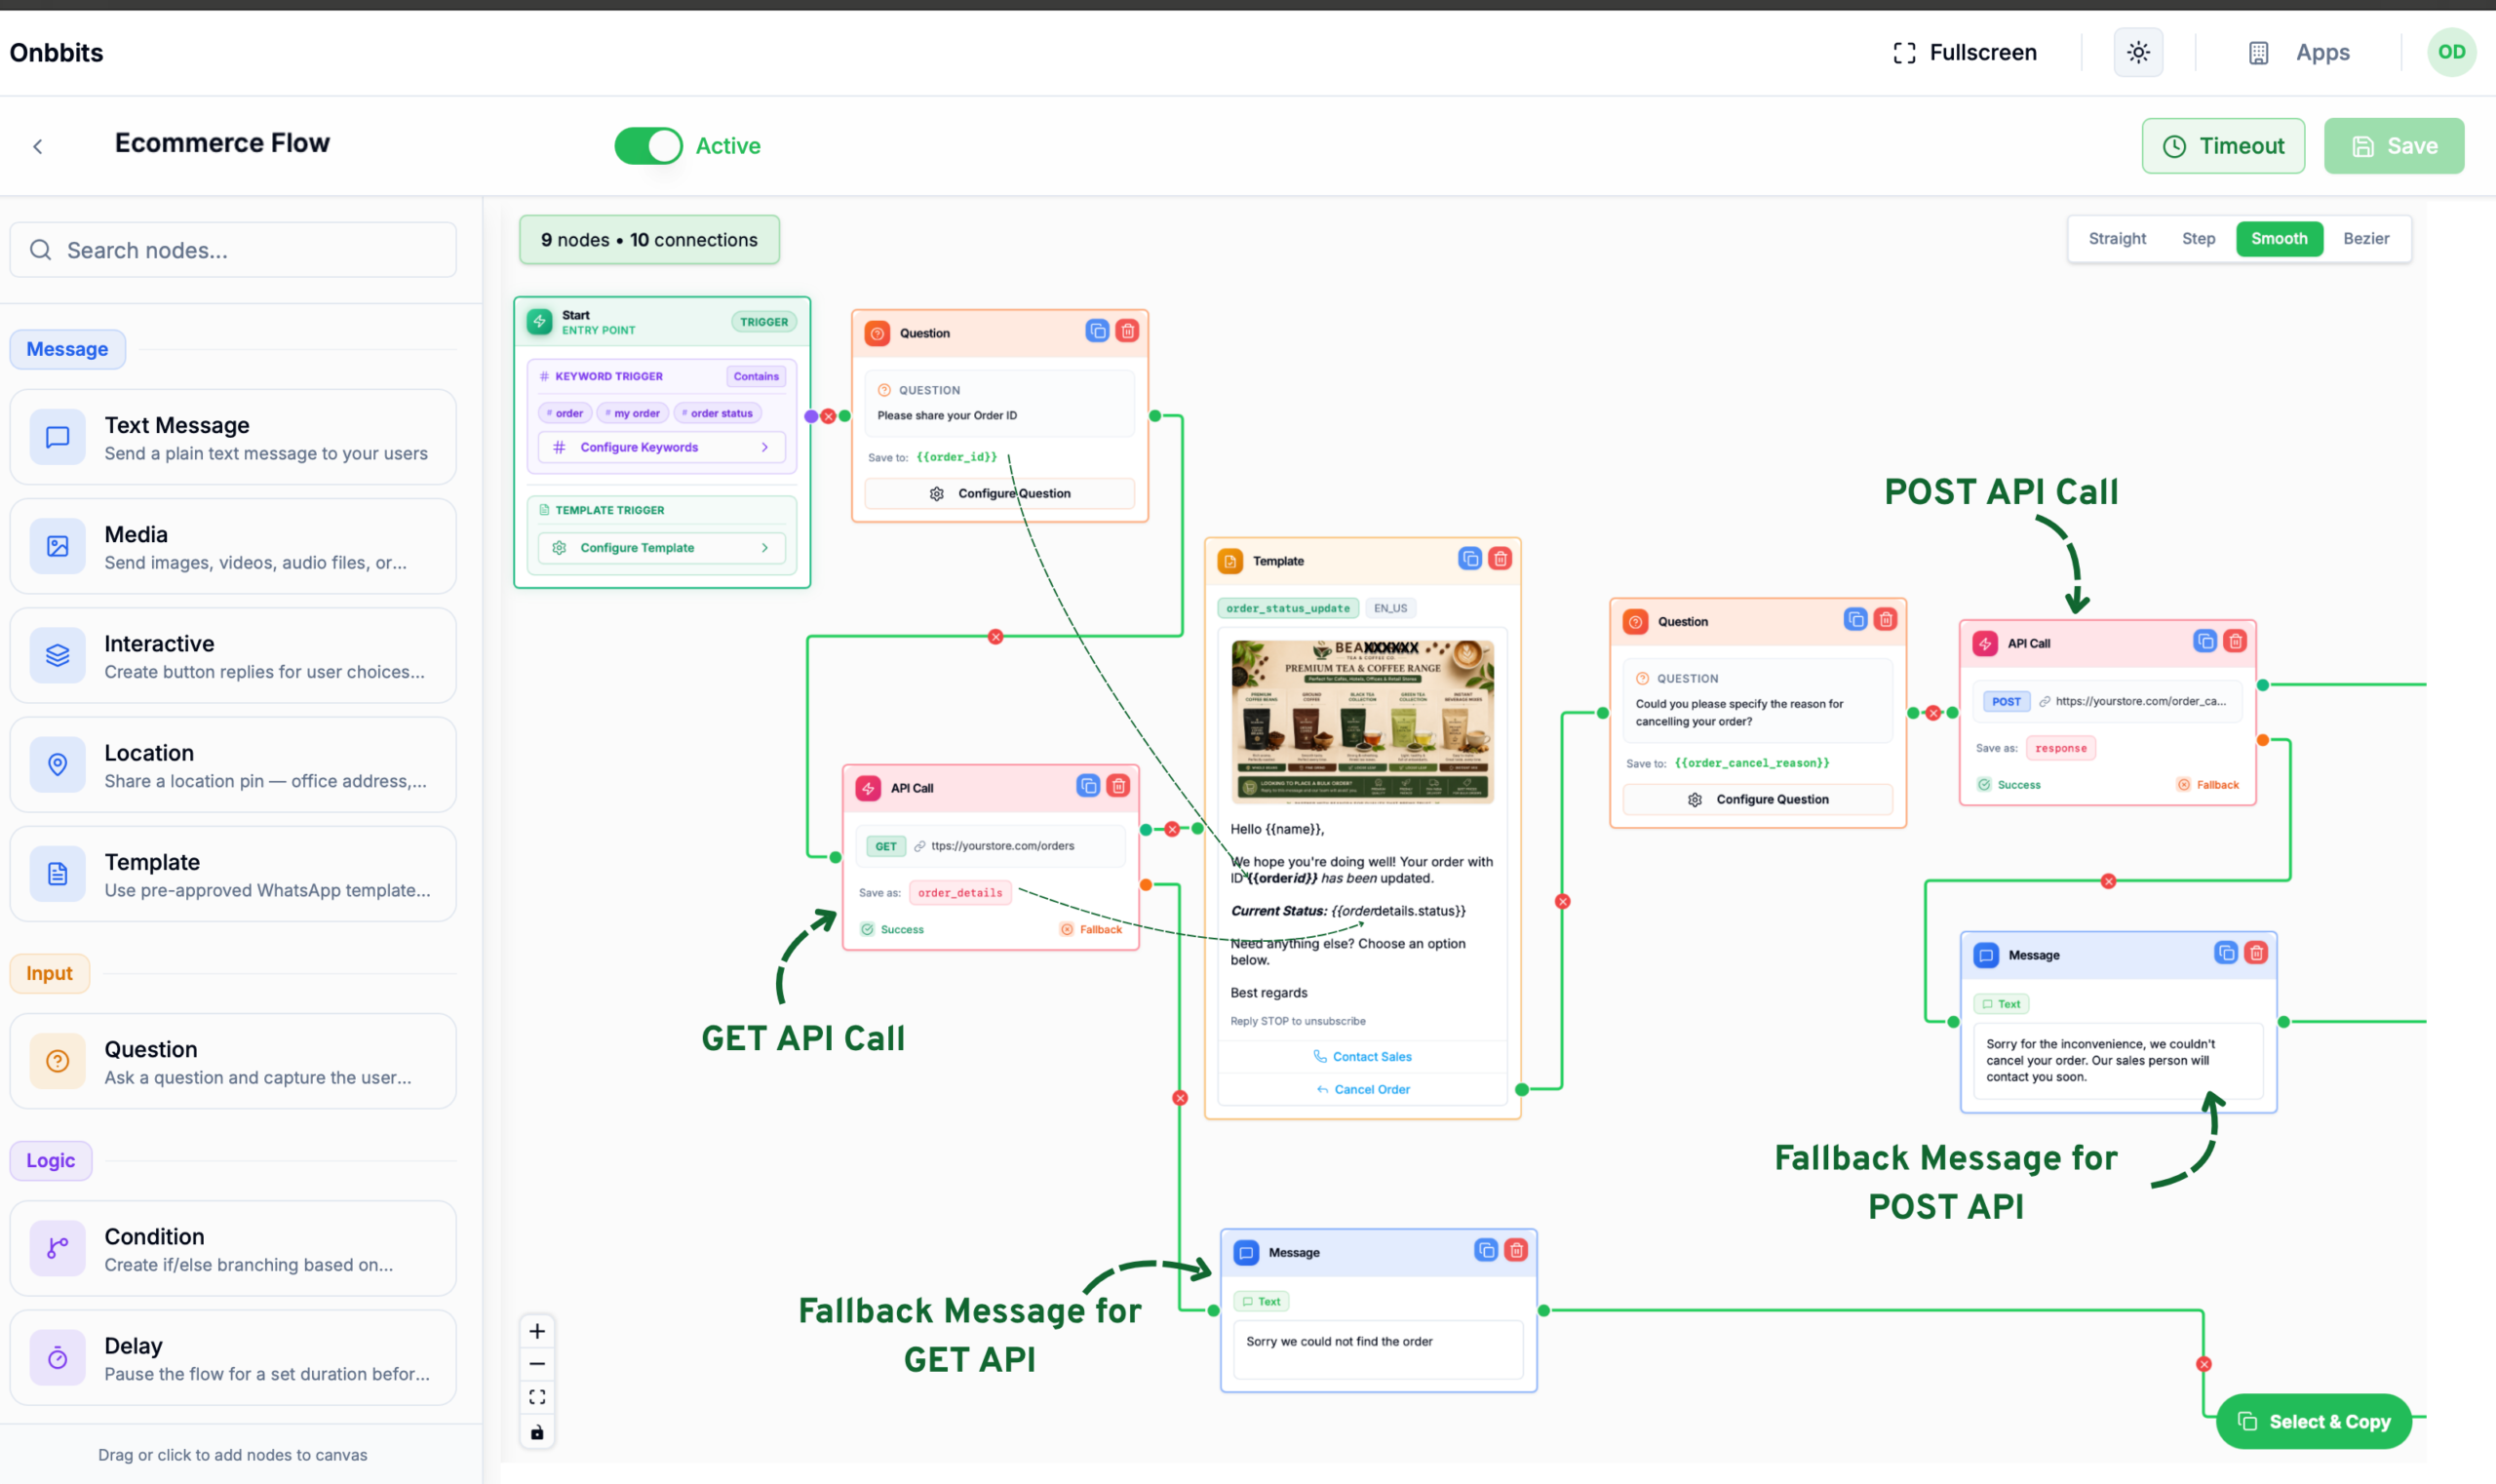
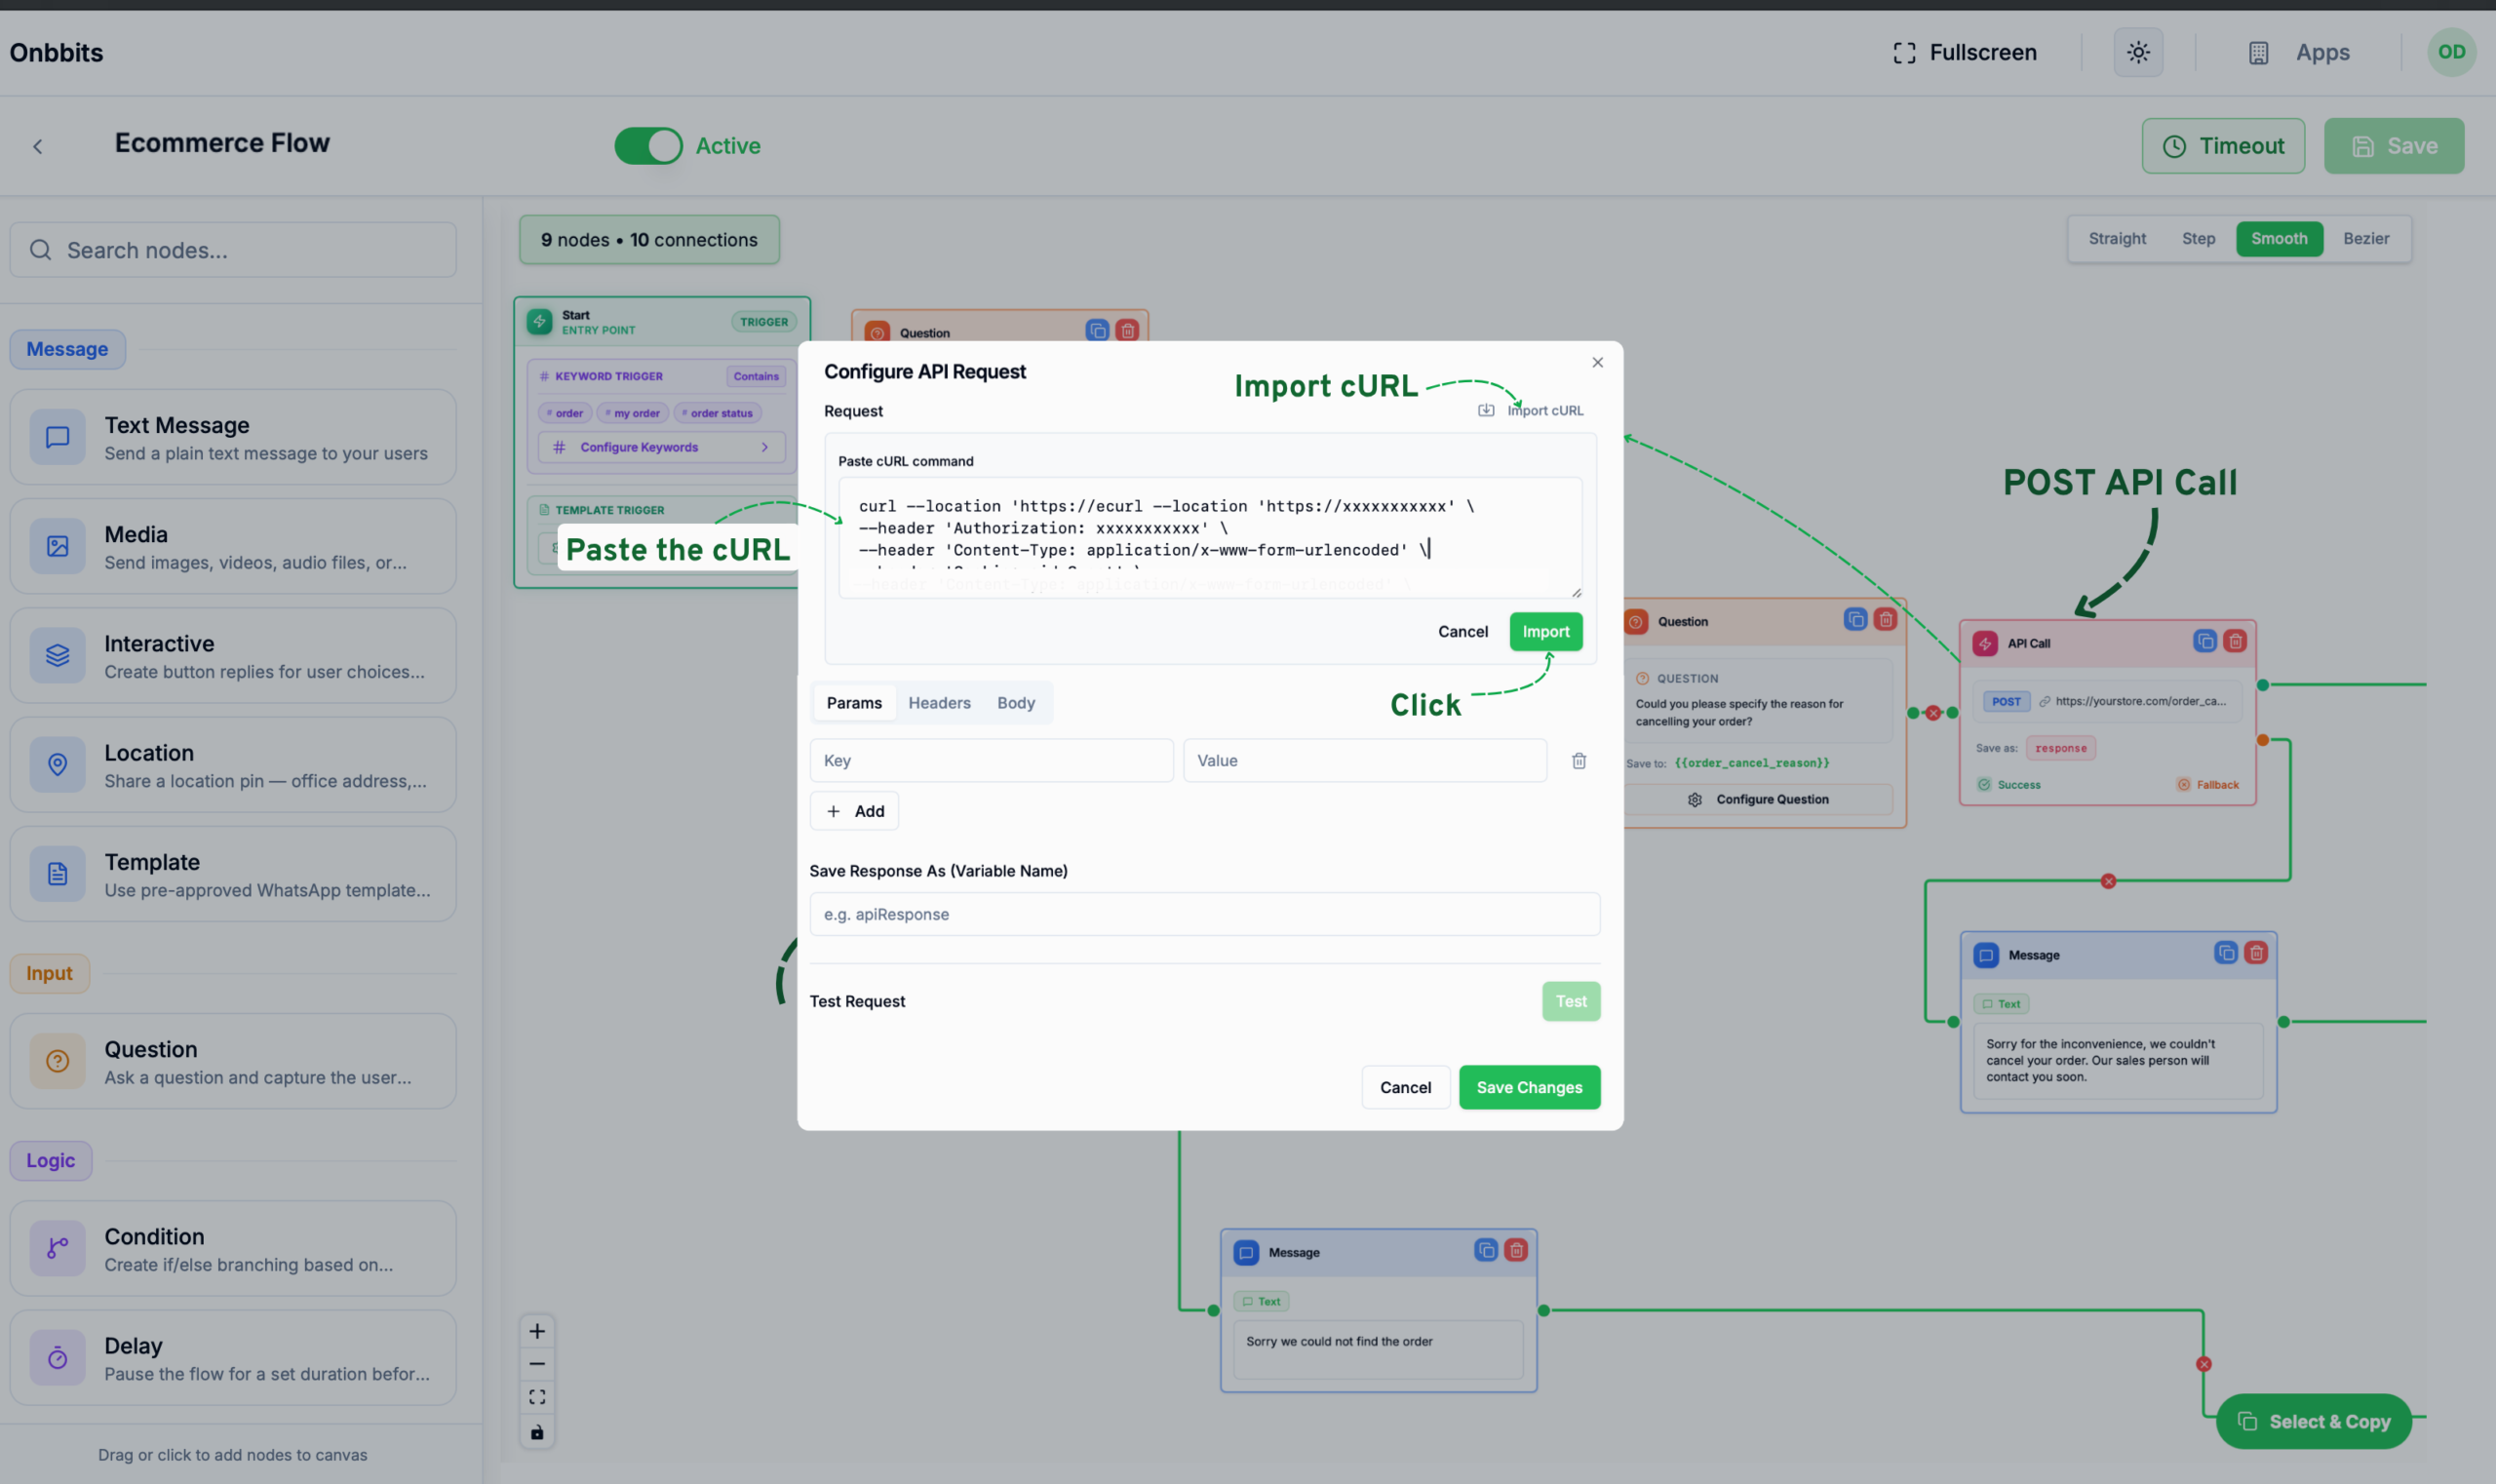
Use GET to fetch data — for example, looking up an order’s status. Add any values your endpoint needs under Params, as key-value pairs. You can use Flow variables as values, so the request reflects real data from the conversation:
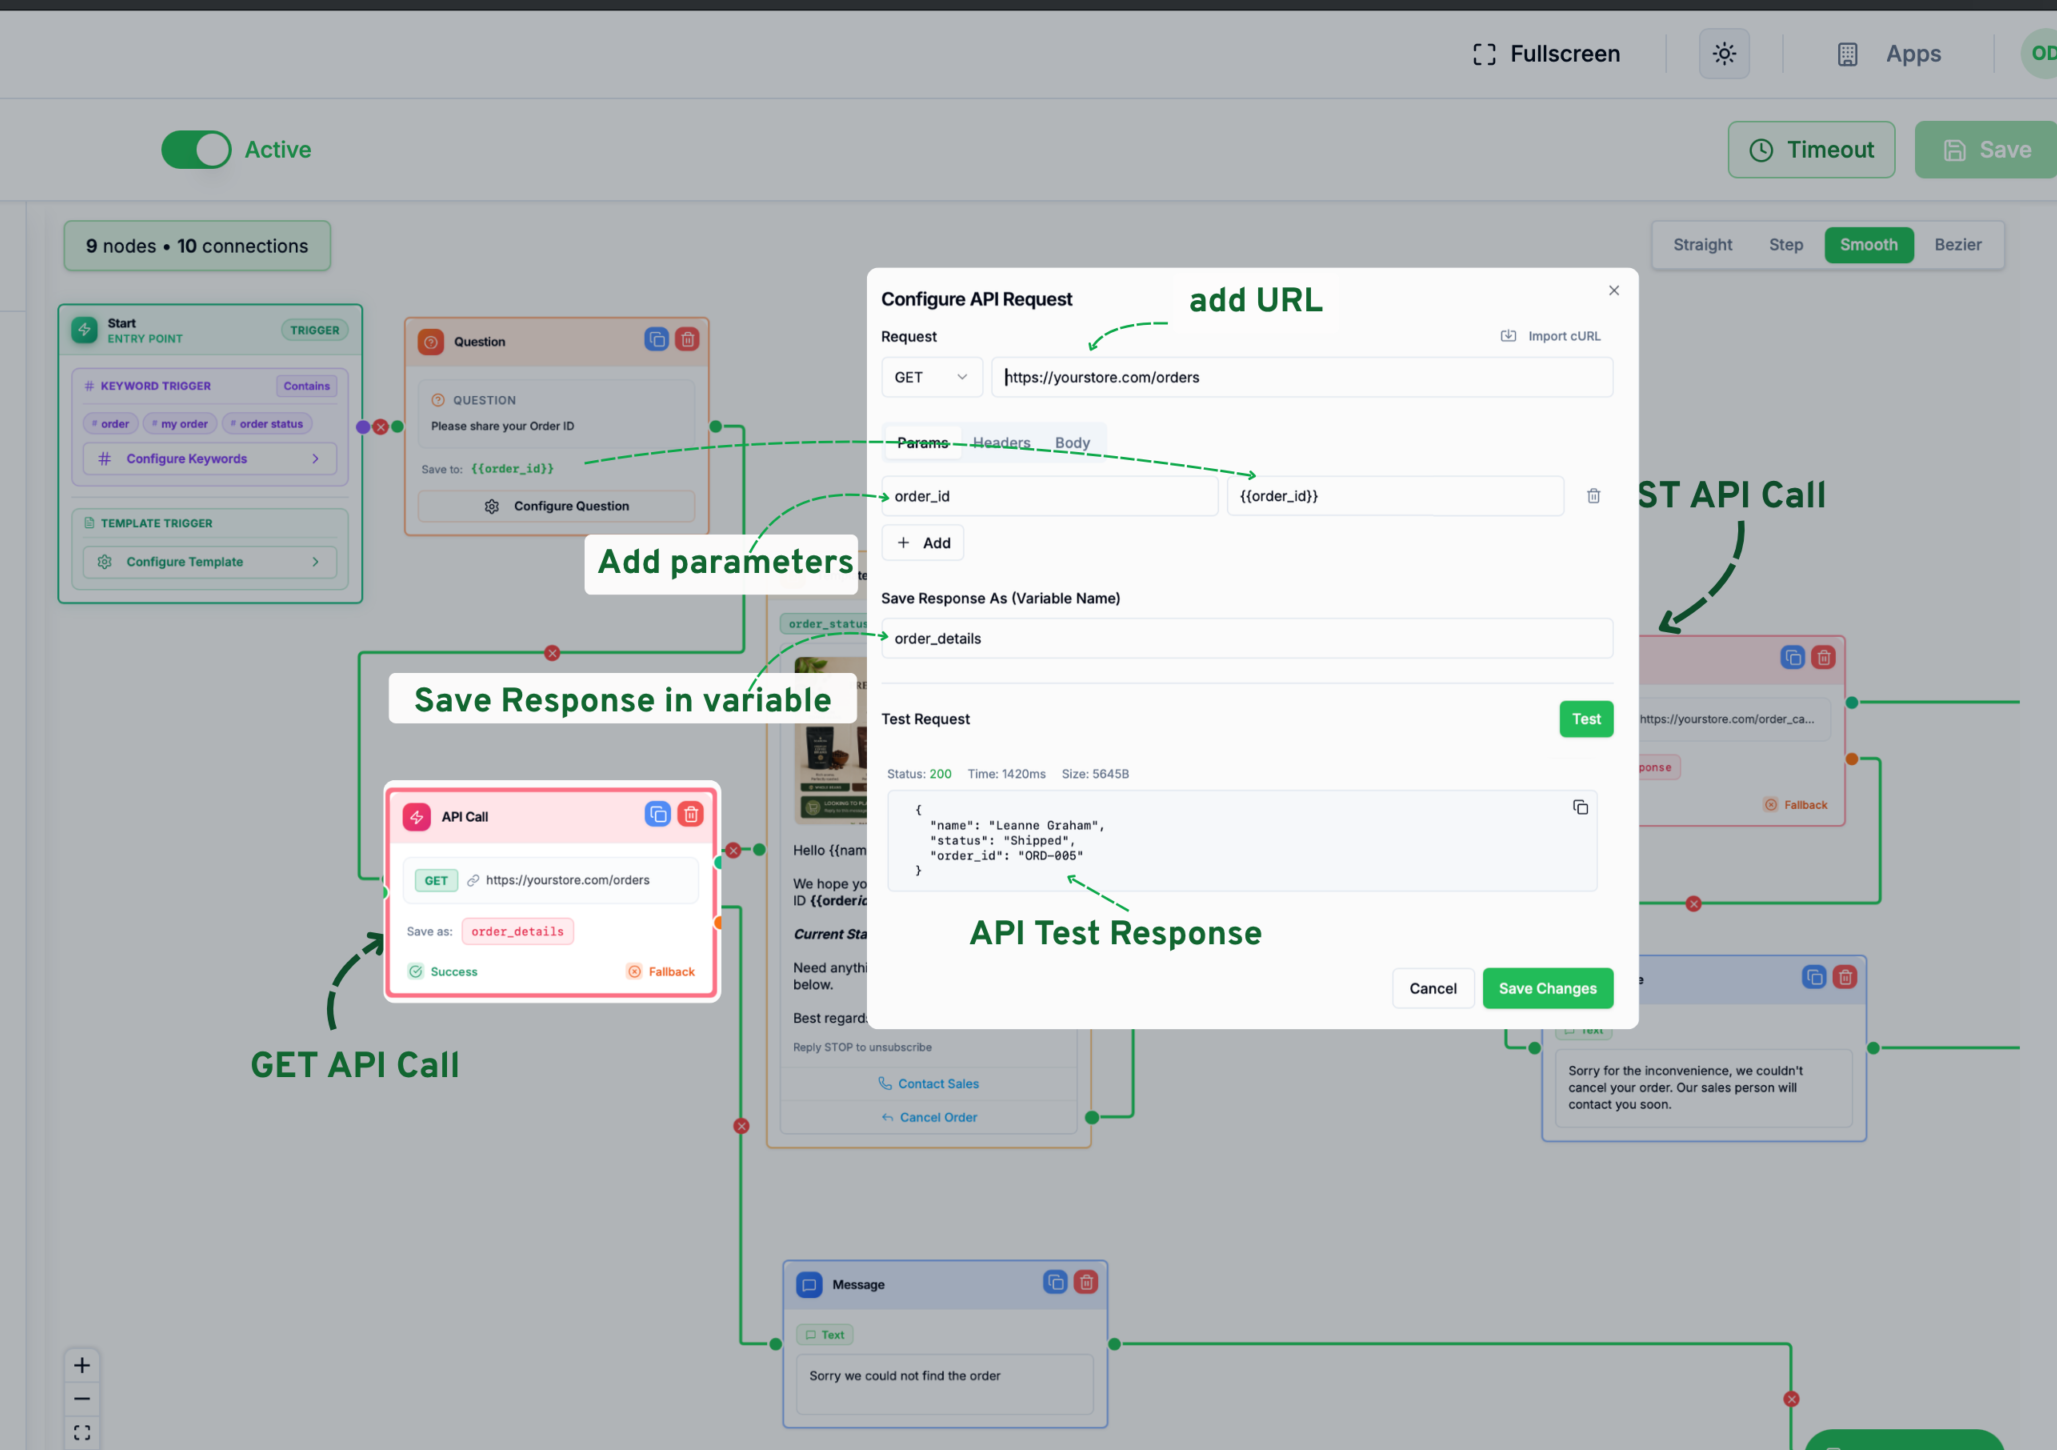
Use Test with static values to try the request and confirm it works before saving. The node has two outgoing paths:
Add authentication or other headers under the Headers tab — for example, a Key of authorisation and a value of your token.
Use POST to send data — for example, cancelling an order or creating a support ticket. Build the request body as JSON under the Body tab, using Flow variables anywhere you need real conversation data:
					{
  "customer_name": "{{name}}", // Contact name from Onbbits
  "phone_number": "{{phone}}", // Customer's WhatsApp phone number
  "order_id": "{{order_id}}", // Variable from the Question node
  "cancel_reason": "{{order_cancel_reason}}" // Variable from Question node
}
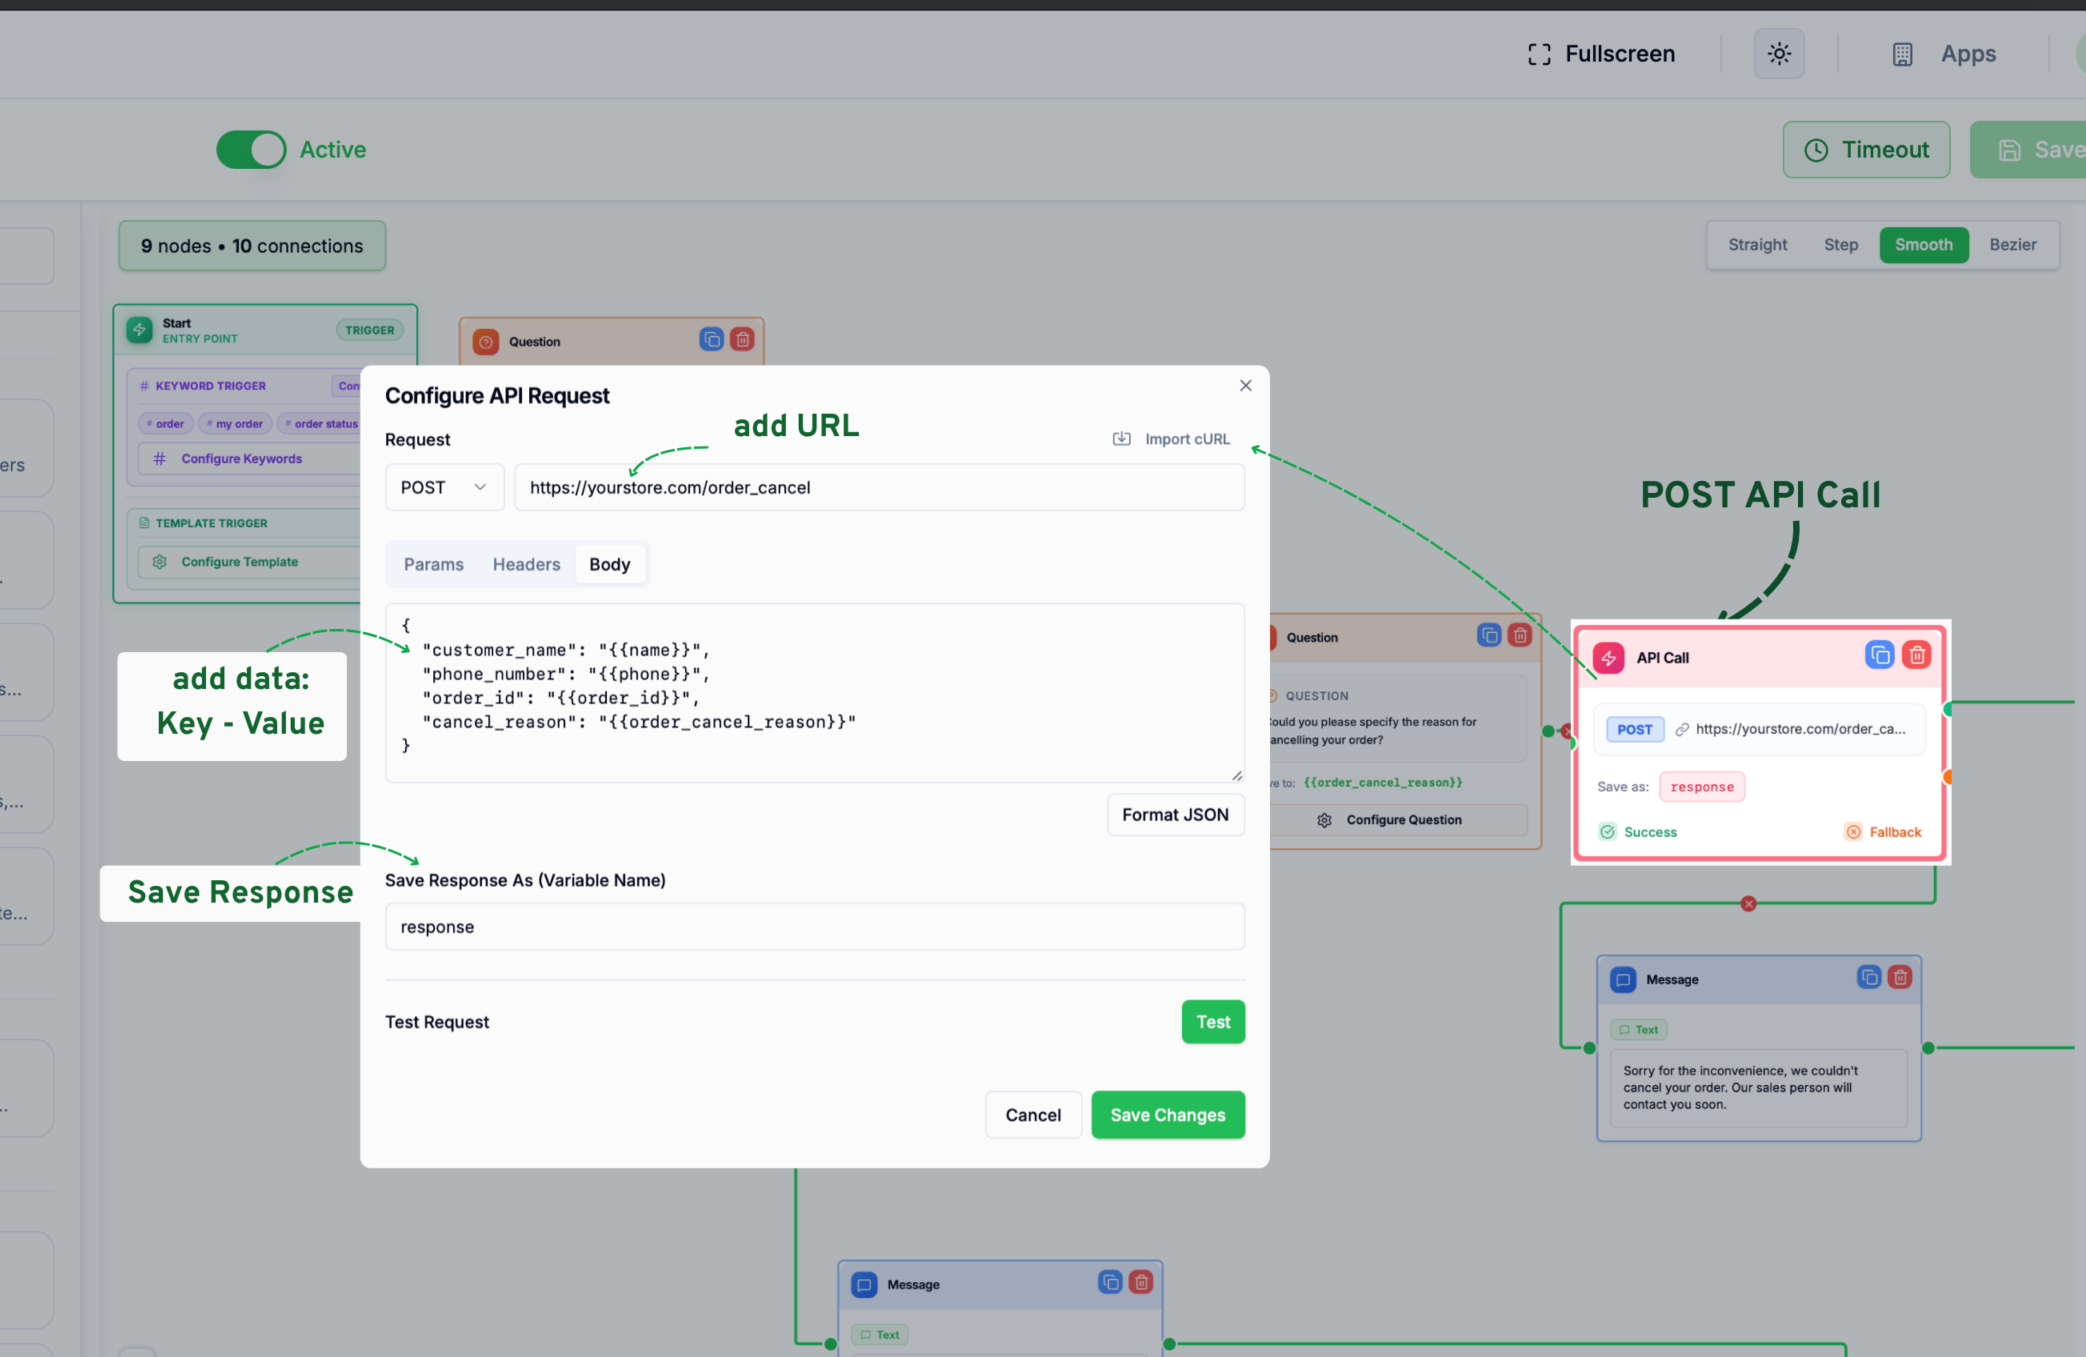
Click Format JSON to clean up the body’s formatting. Like GET requests, add any required authentication under the Headers tab.
Under Save Response As (Variable Name), name the variable that should store your endpoint’s response, so it can be reused later in the Flow — for example, in a Condition node or a Text Message.
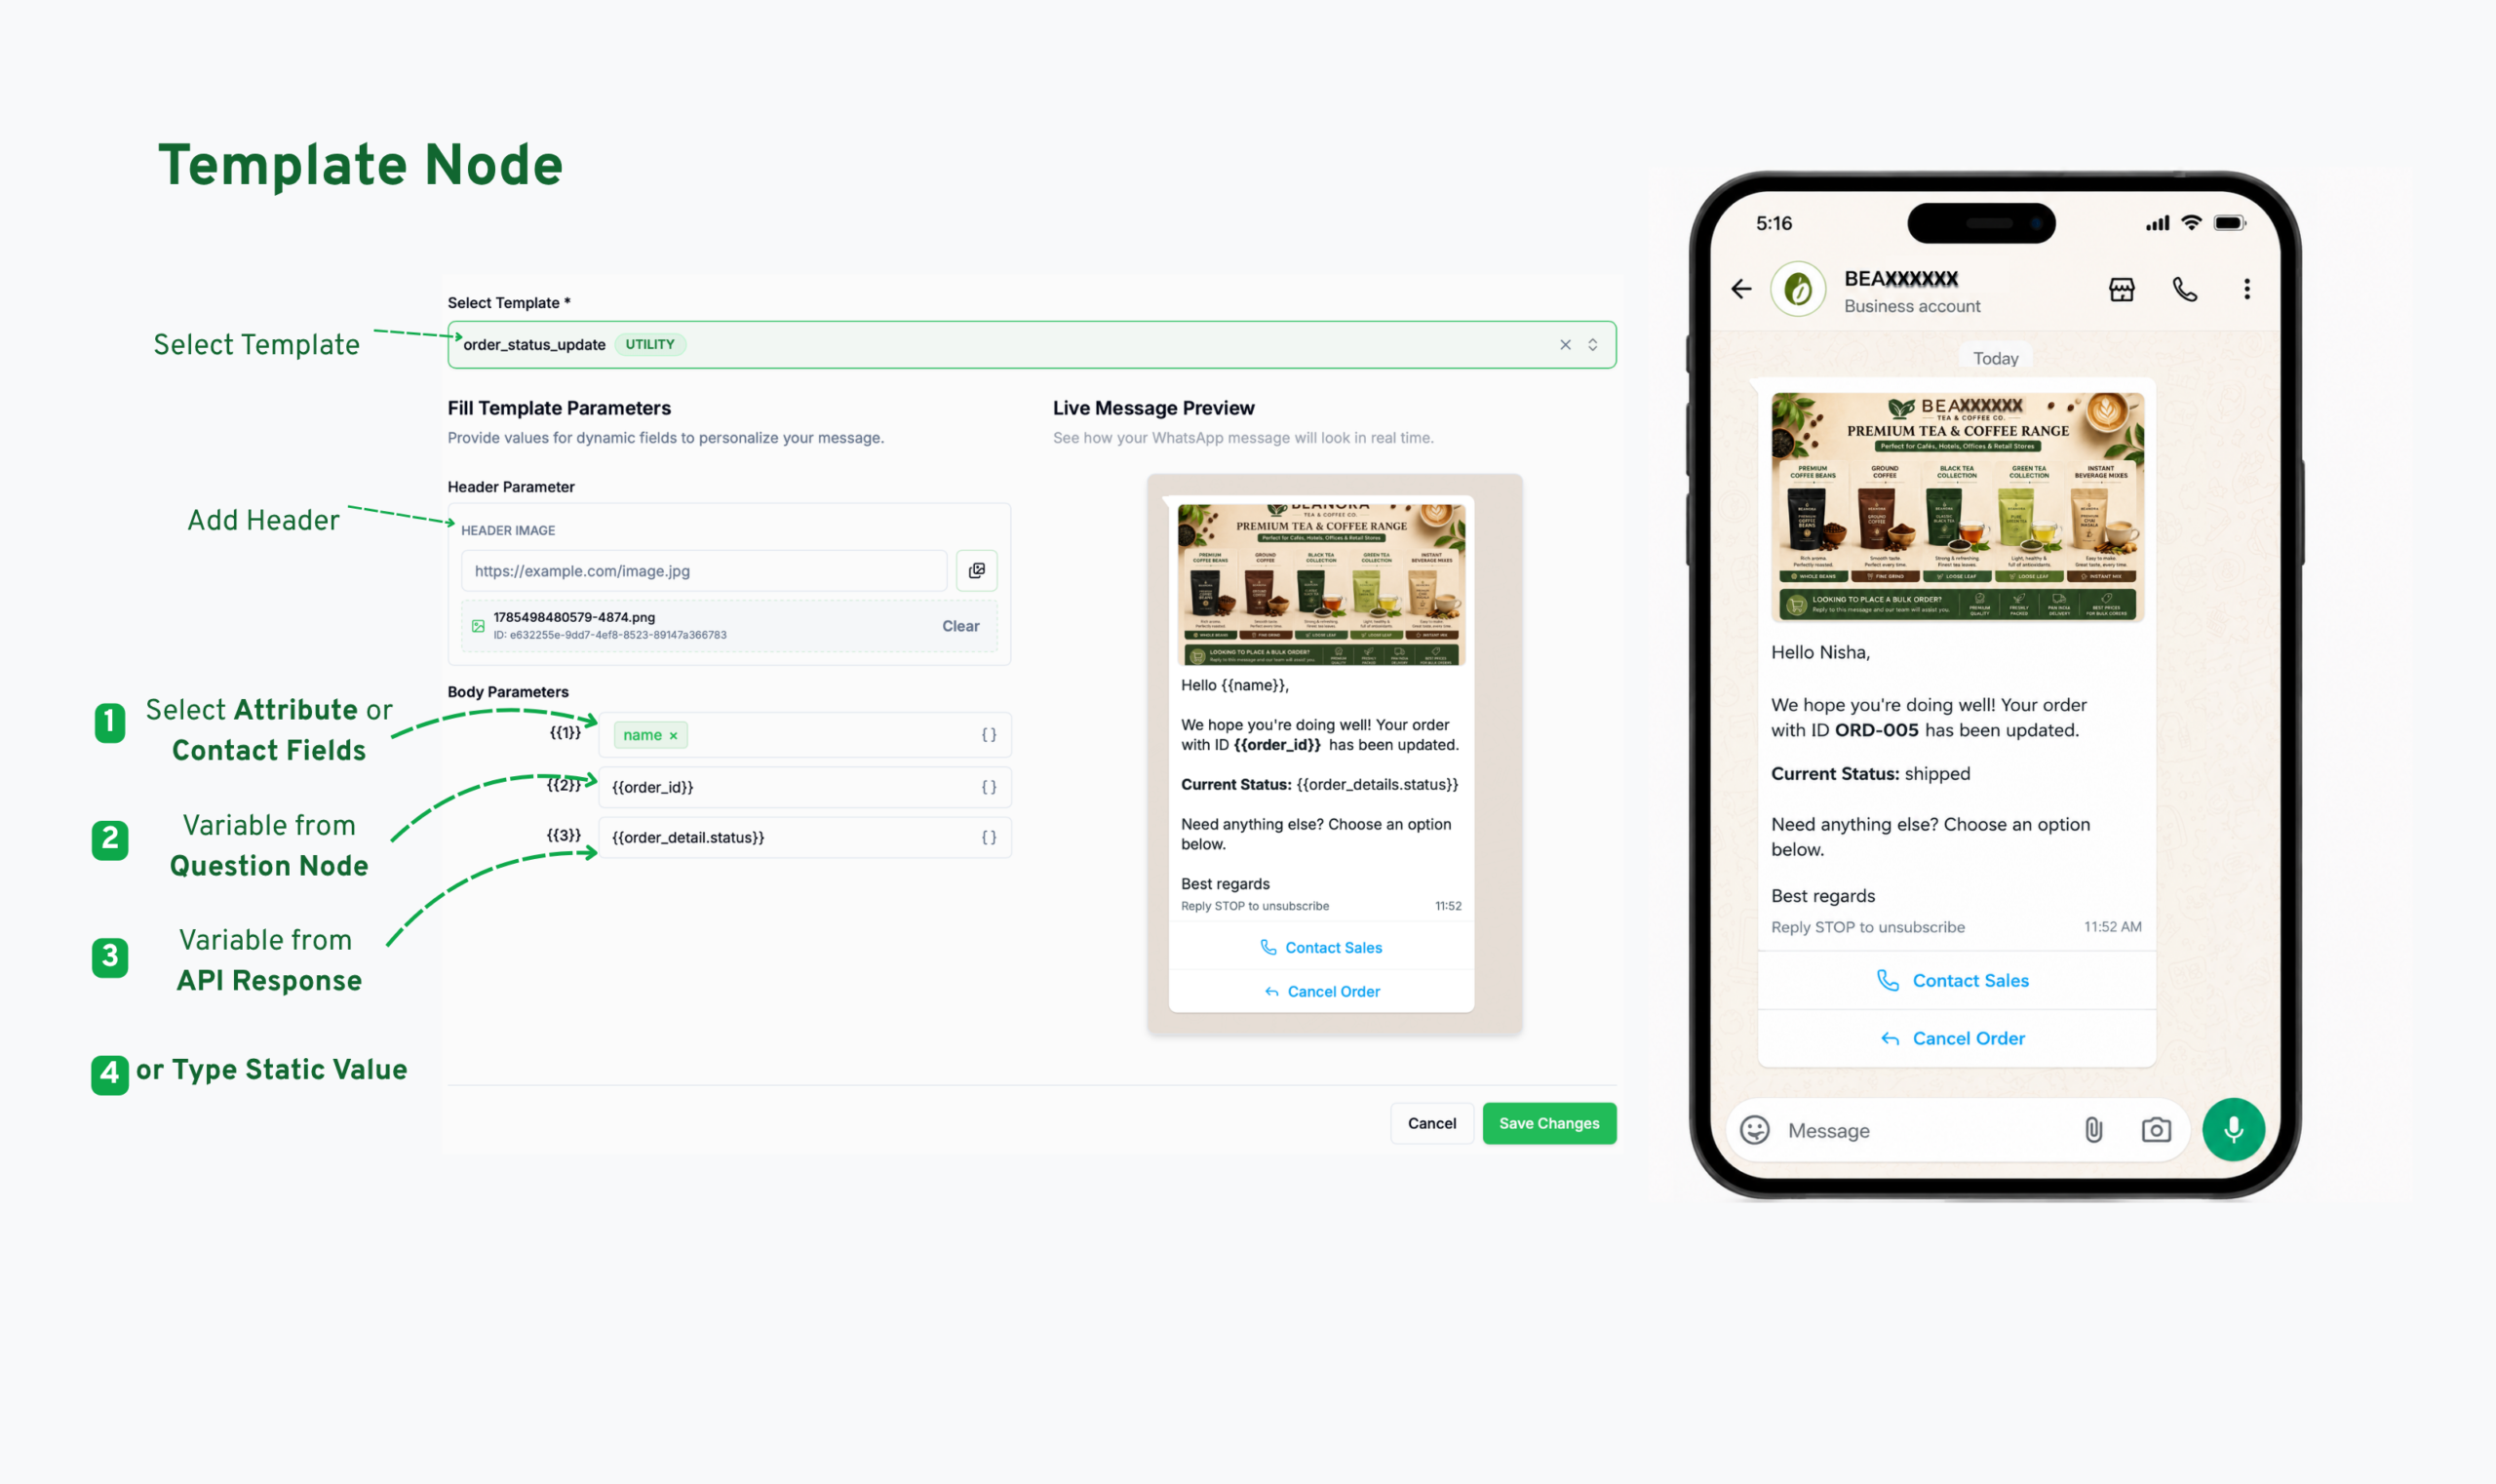
For example, you can use the order details returned by the API in a Template Message. The response contains the order status; so you can add {{order_details.status}}.
Our support team is ready to assist you.
© 2026 ONBBITS. All rights reserved.