Create & Edit a WhatsApp Template

This guide walks you through creating a WhatsApp template in Onbbits, from filling in the basic details to adding buttons, and shows you how to edit it before you submit it for approval.

Before You Begin

Make sure you know which category your template belongs to, since this affects what content you can include. If you’re not sure which one fits, check Template Categories & Approval Rules first.
  1. In your Onbbits sidebar, open Templates.
  2. Click + Add Template
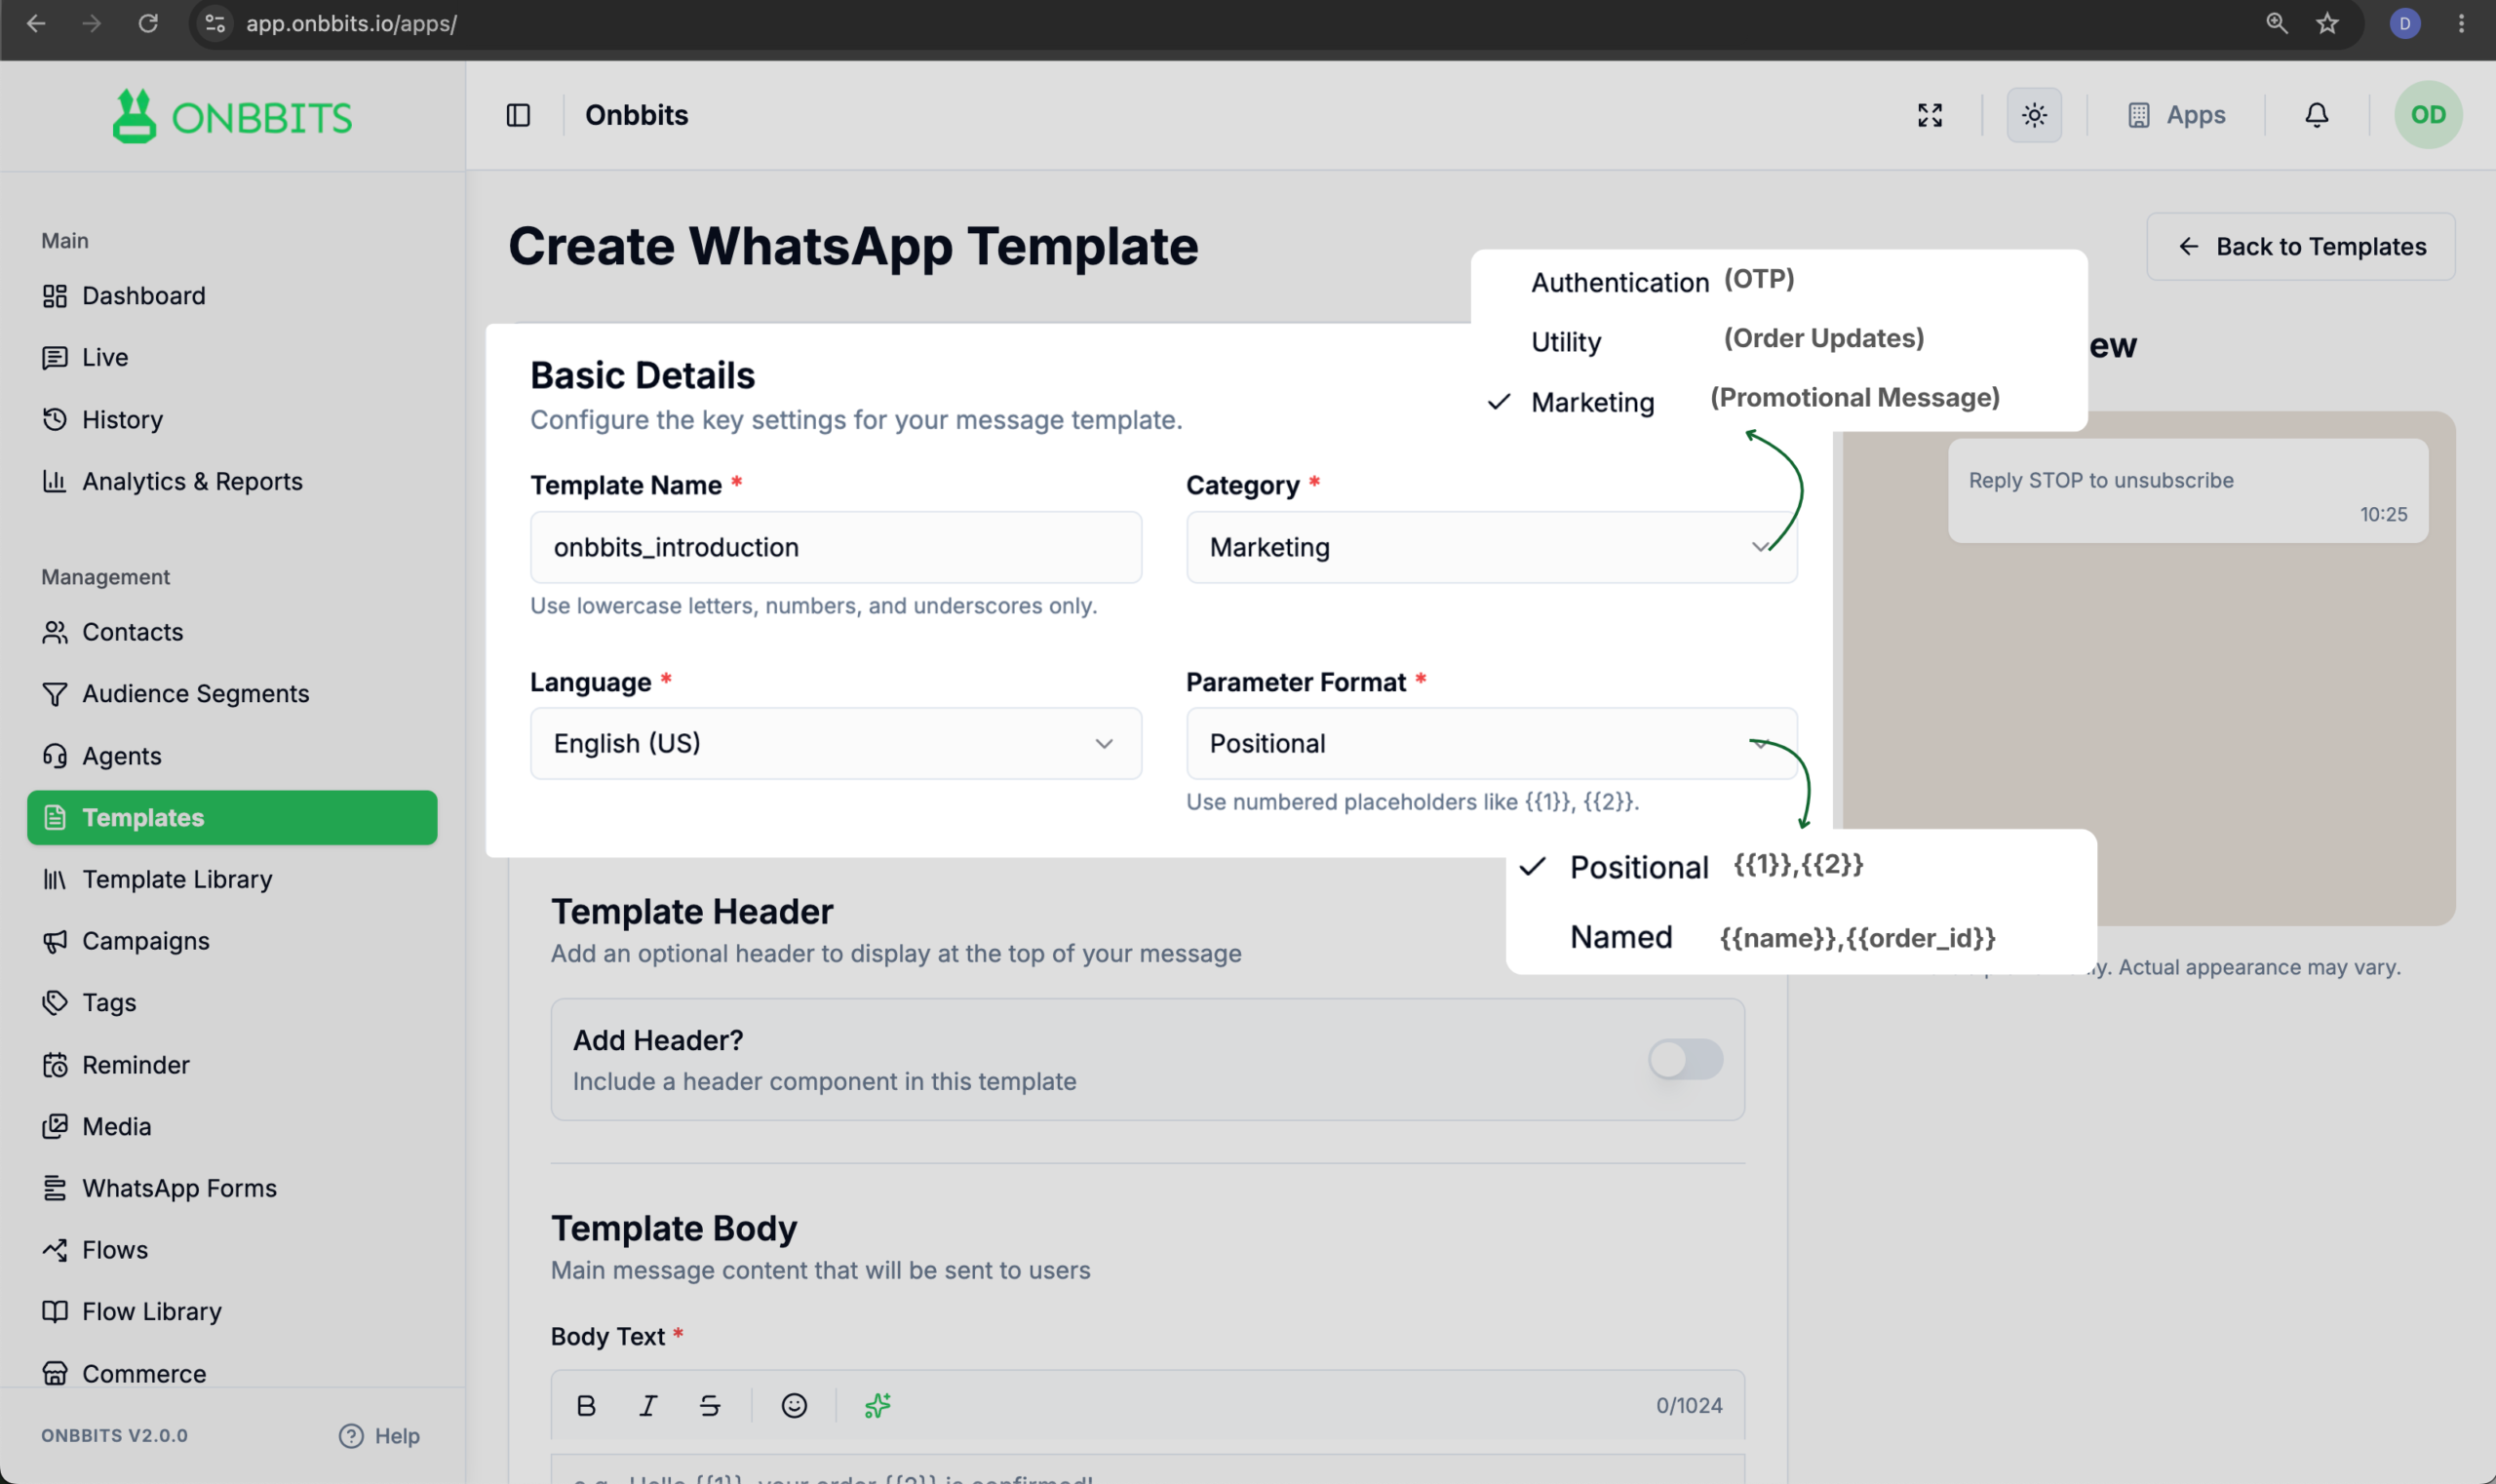
  3. Under Basic Details, fill in:
  • Template Name — use lowercase letters, numbers, and underscores only (for example, order_confirmation).
  • Category — Marketing, Utility, or Authentication.
  • Language — the language your template will be sent in.
  • Parameter Format — choose Positional if you want variables like {{1}}, {{2}}, or Named if you want variables like {{customer_name}}.
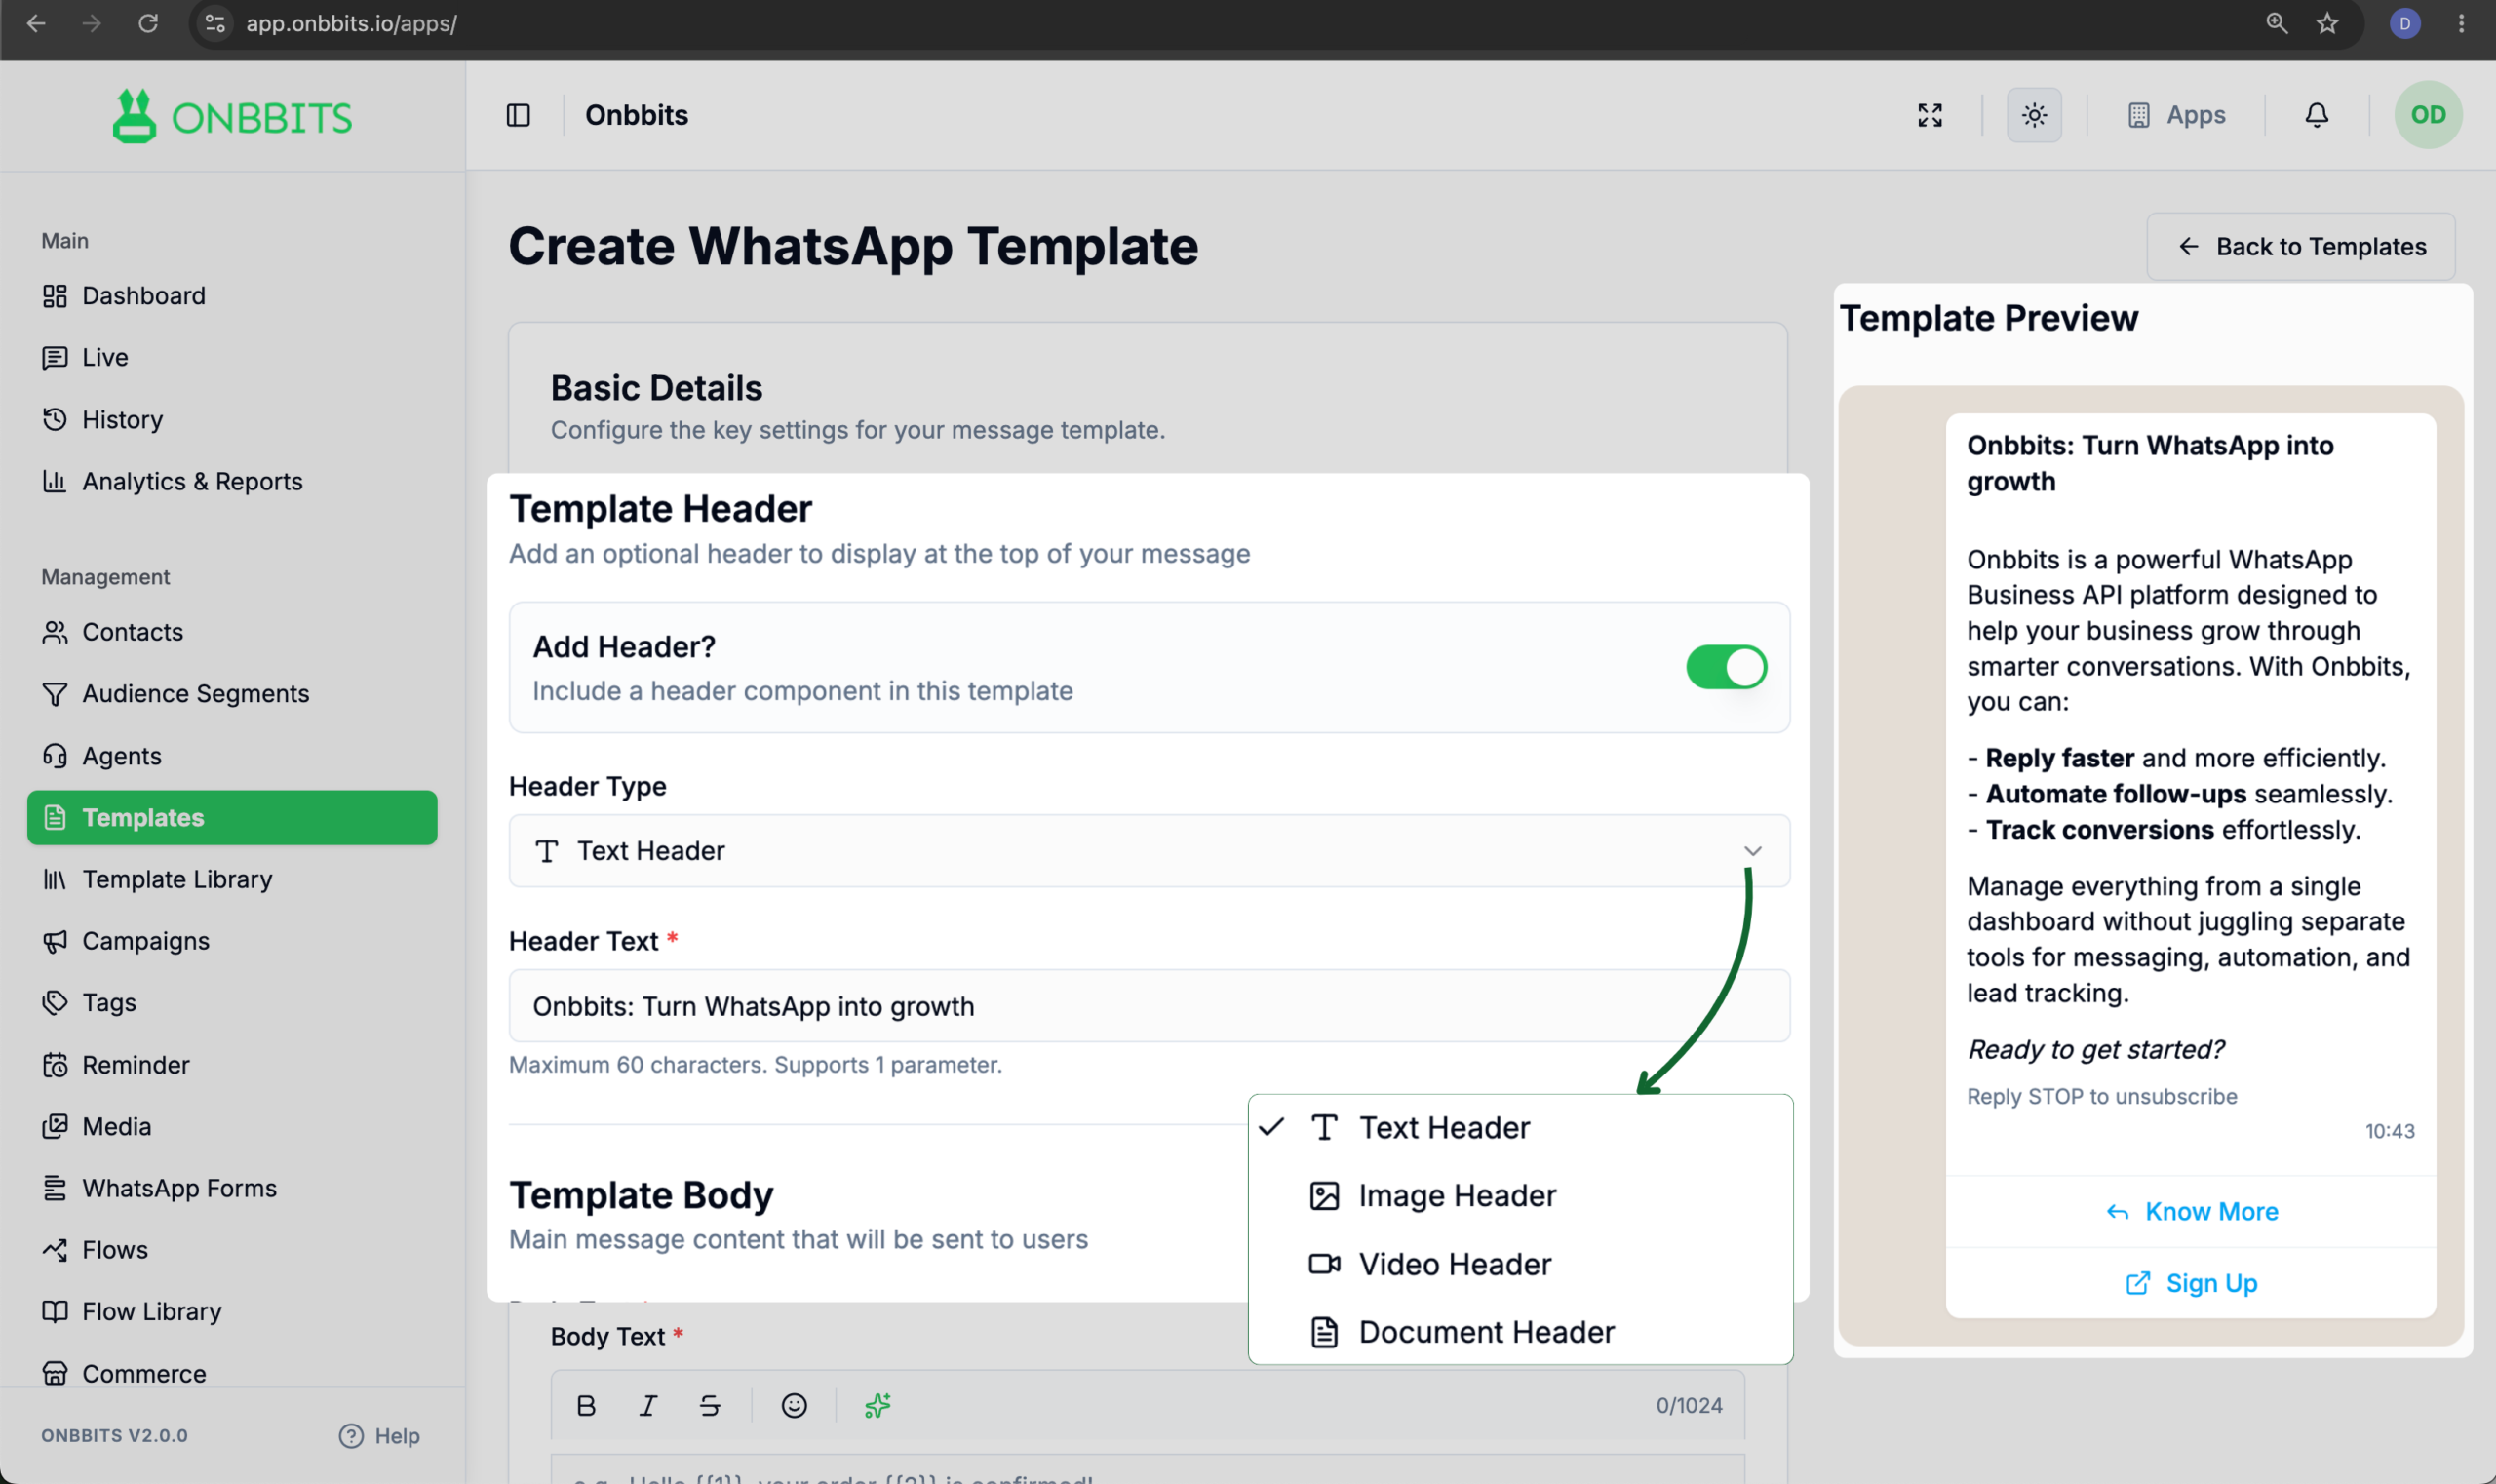
  1. (Optional) Add a header. Toggle Add Header? On, then choose a Header Type: Text Header, Image Header, Video Header, or Document Header.
  • For a Text Header, type the header text directly.
  • For Image, Video, or Document headers, you don’t upload the actual file at this stage — you’ll attach the media later, when you send the template.
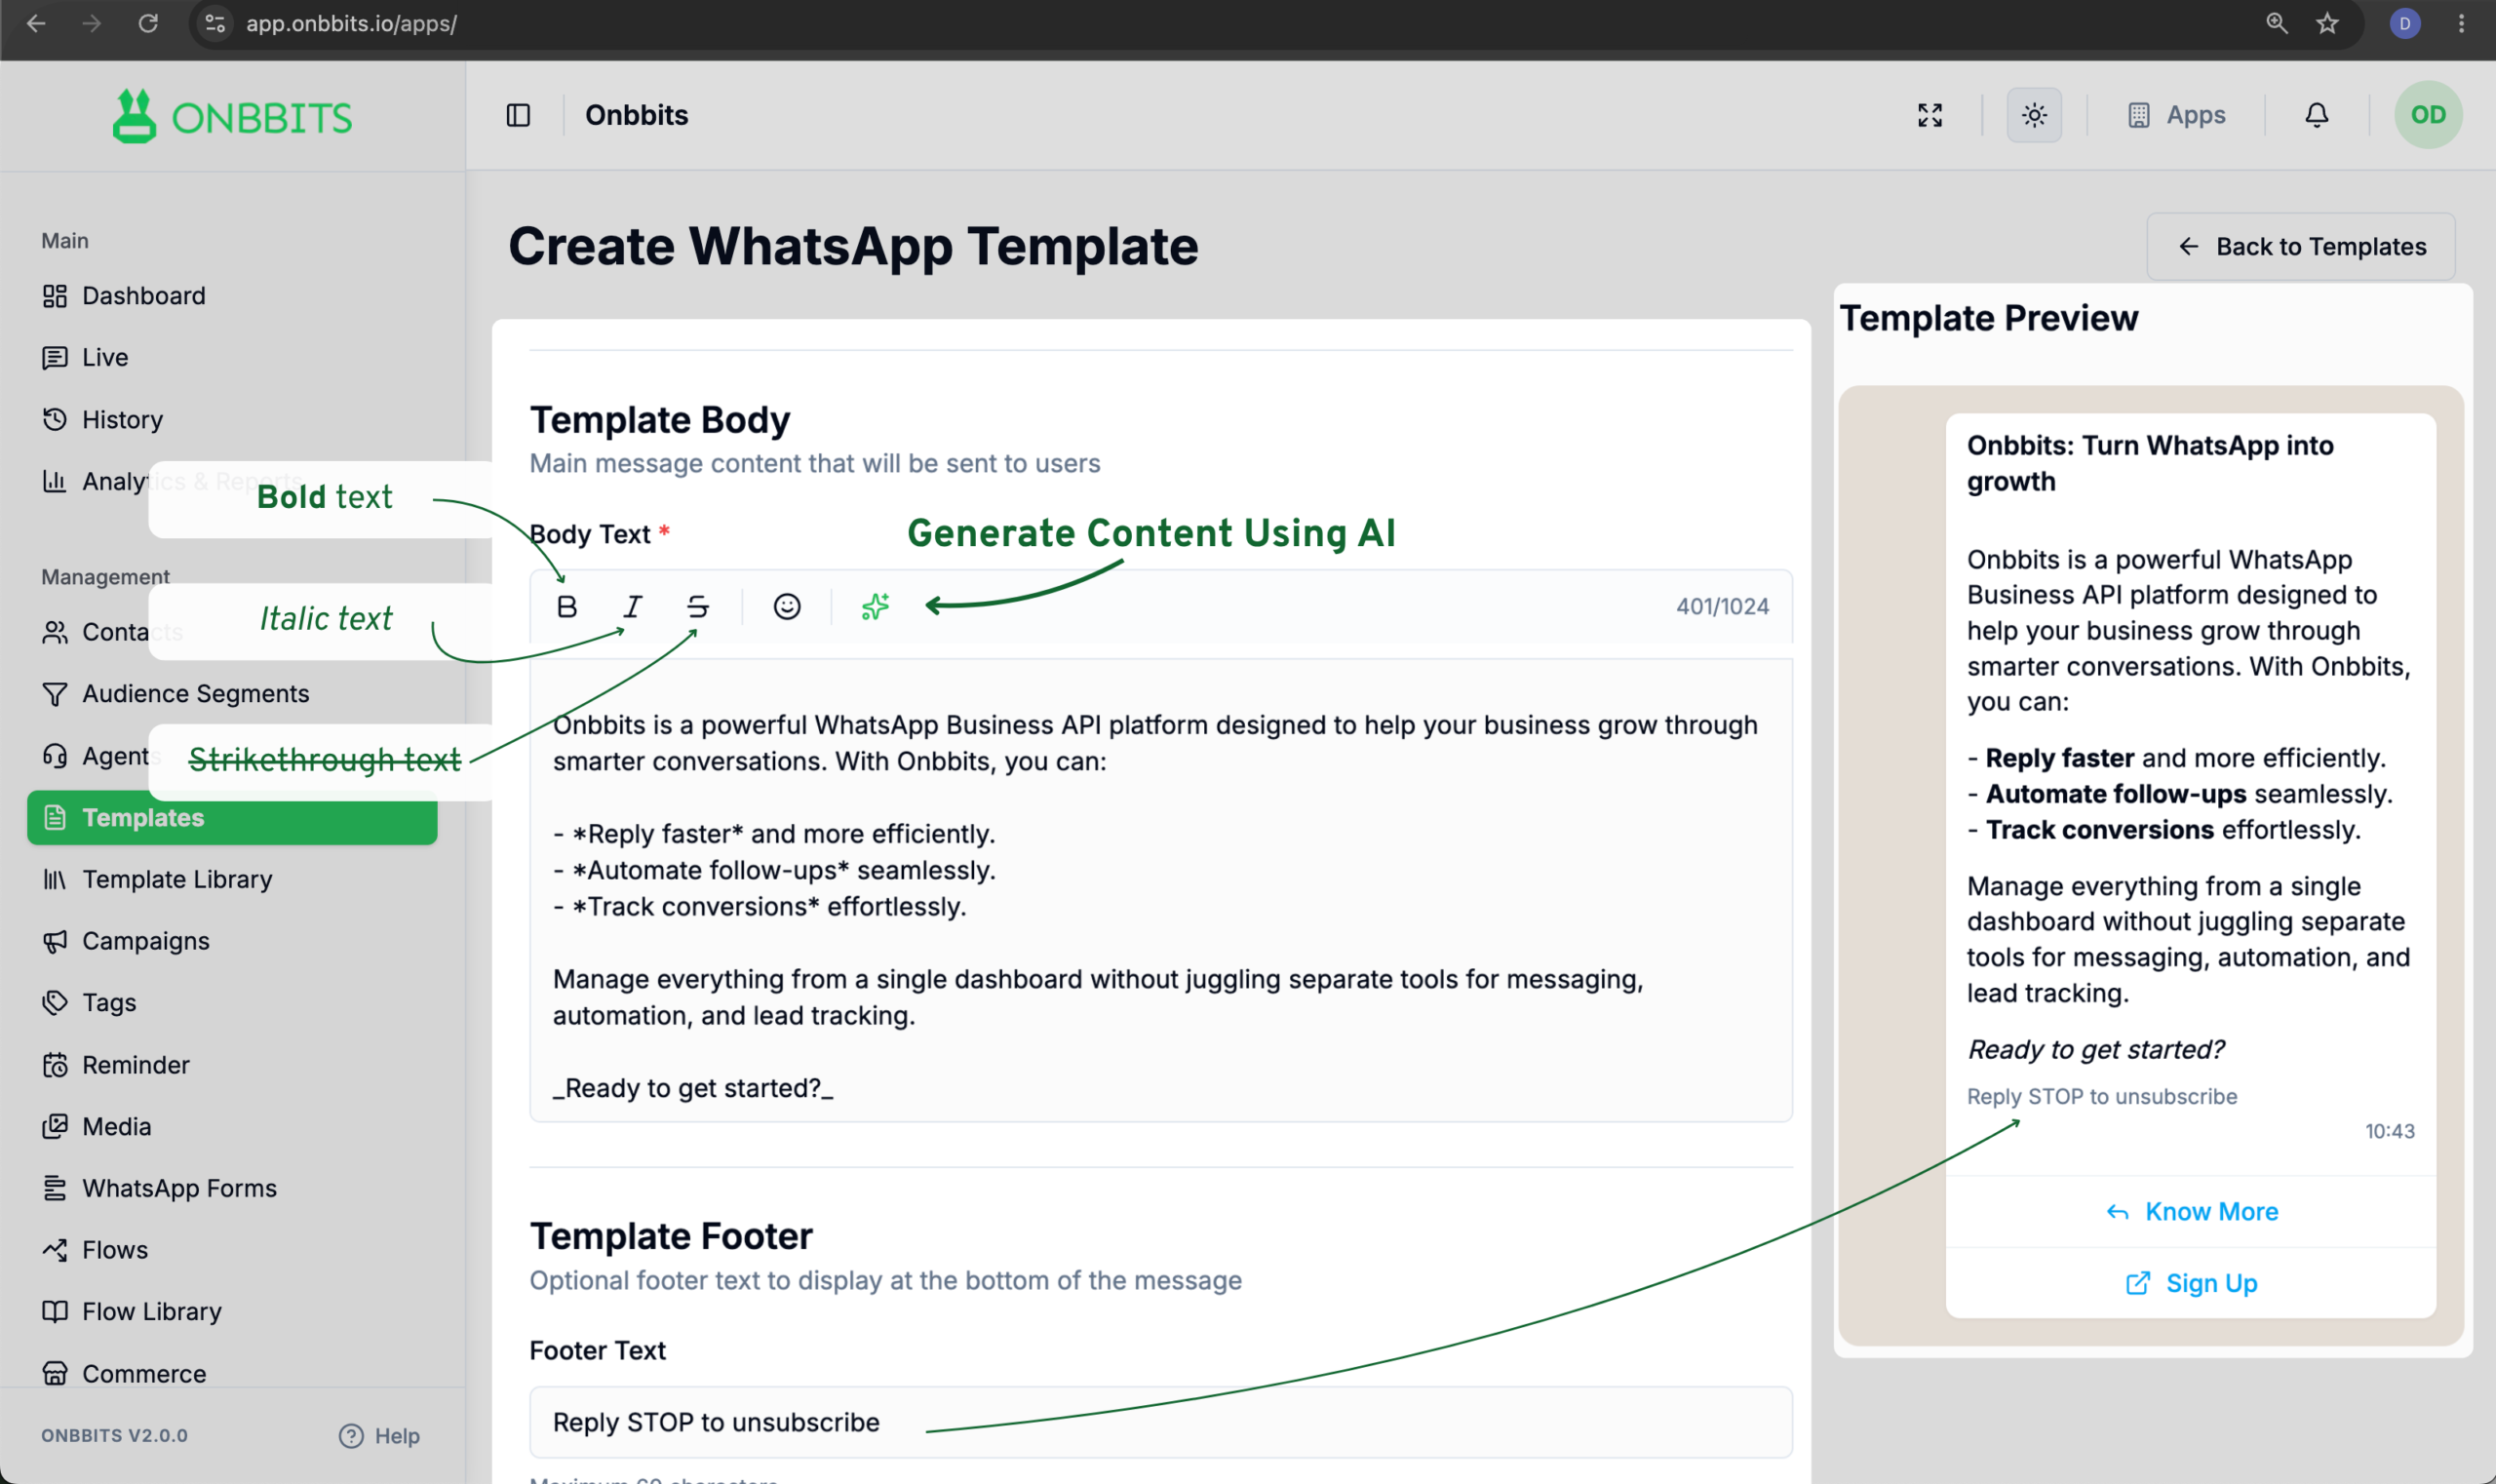
  1. Under Template Body, write your Body Text (up to 1024 characters). Add variables based on the Parameter Format you chose in step 3. You can format text using Bold, Italic, or Strikethrough, and use the AI content generation button next to the emoji icon if you’d like Onbbits to draft the body for you based on a short description.
  1. (Optional) Add Footer Text (up to 60 characters) — commonly used for lines like “Reply STOP to unsubscribe.”
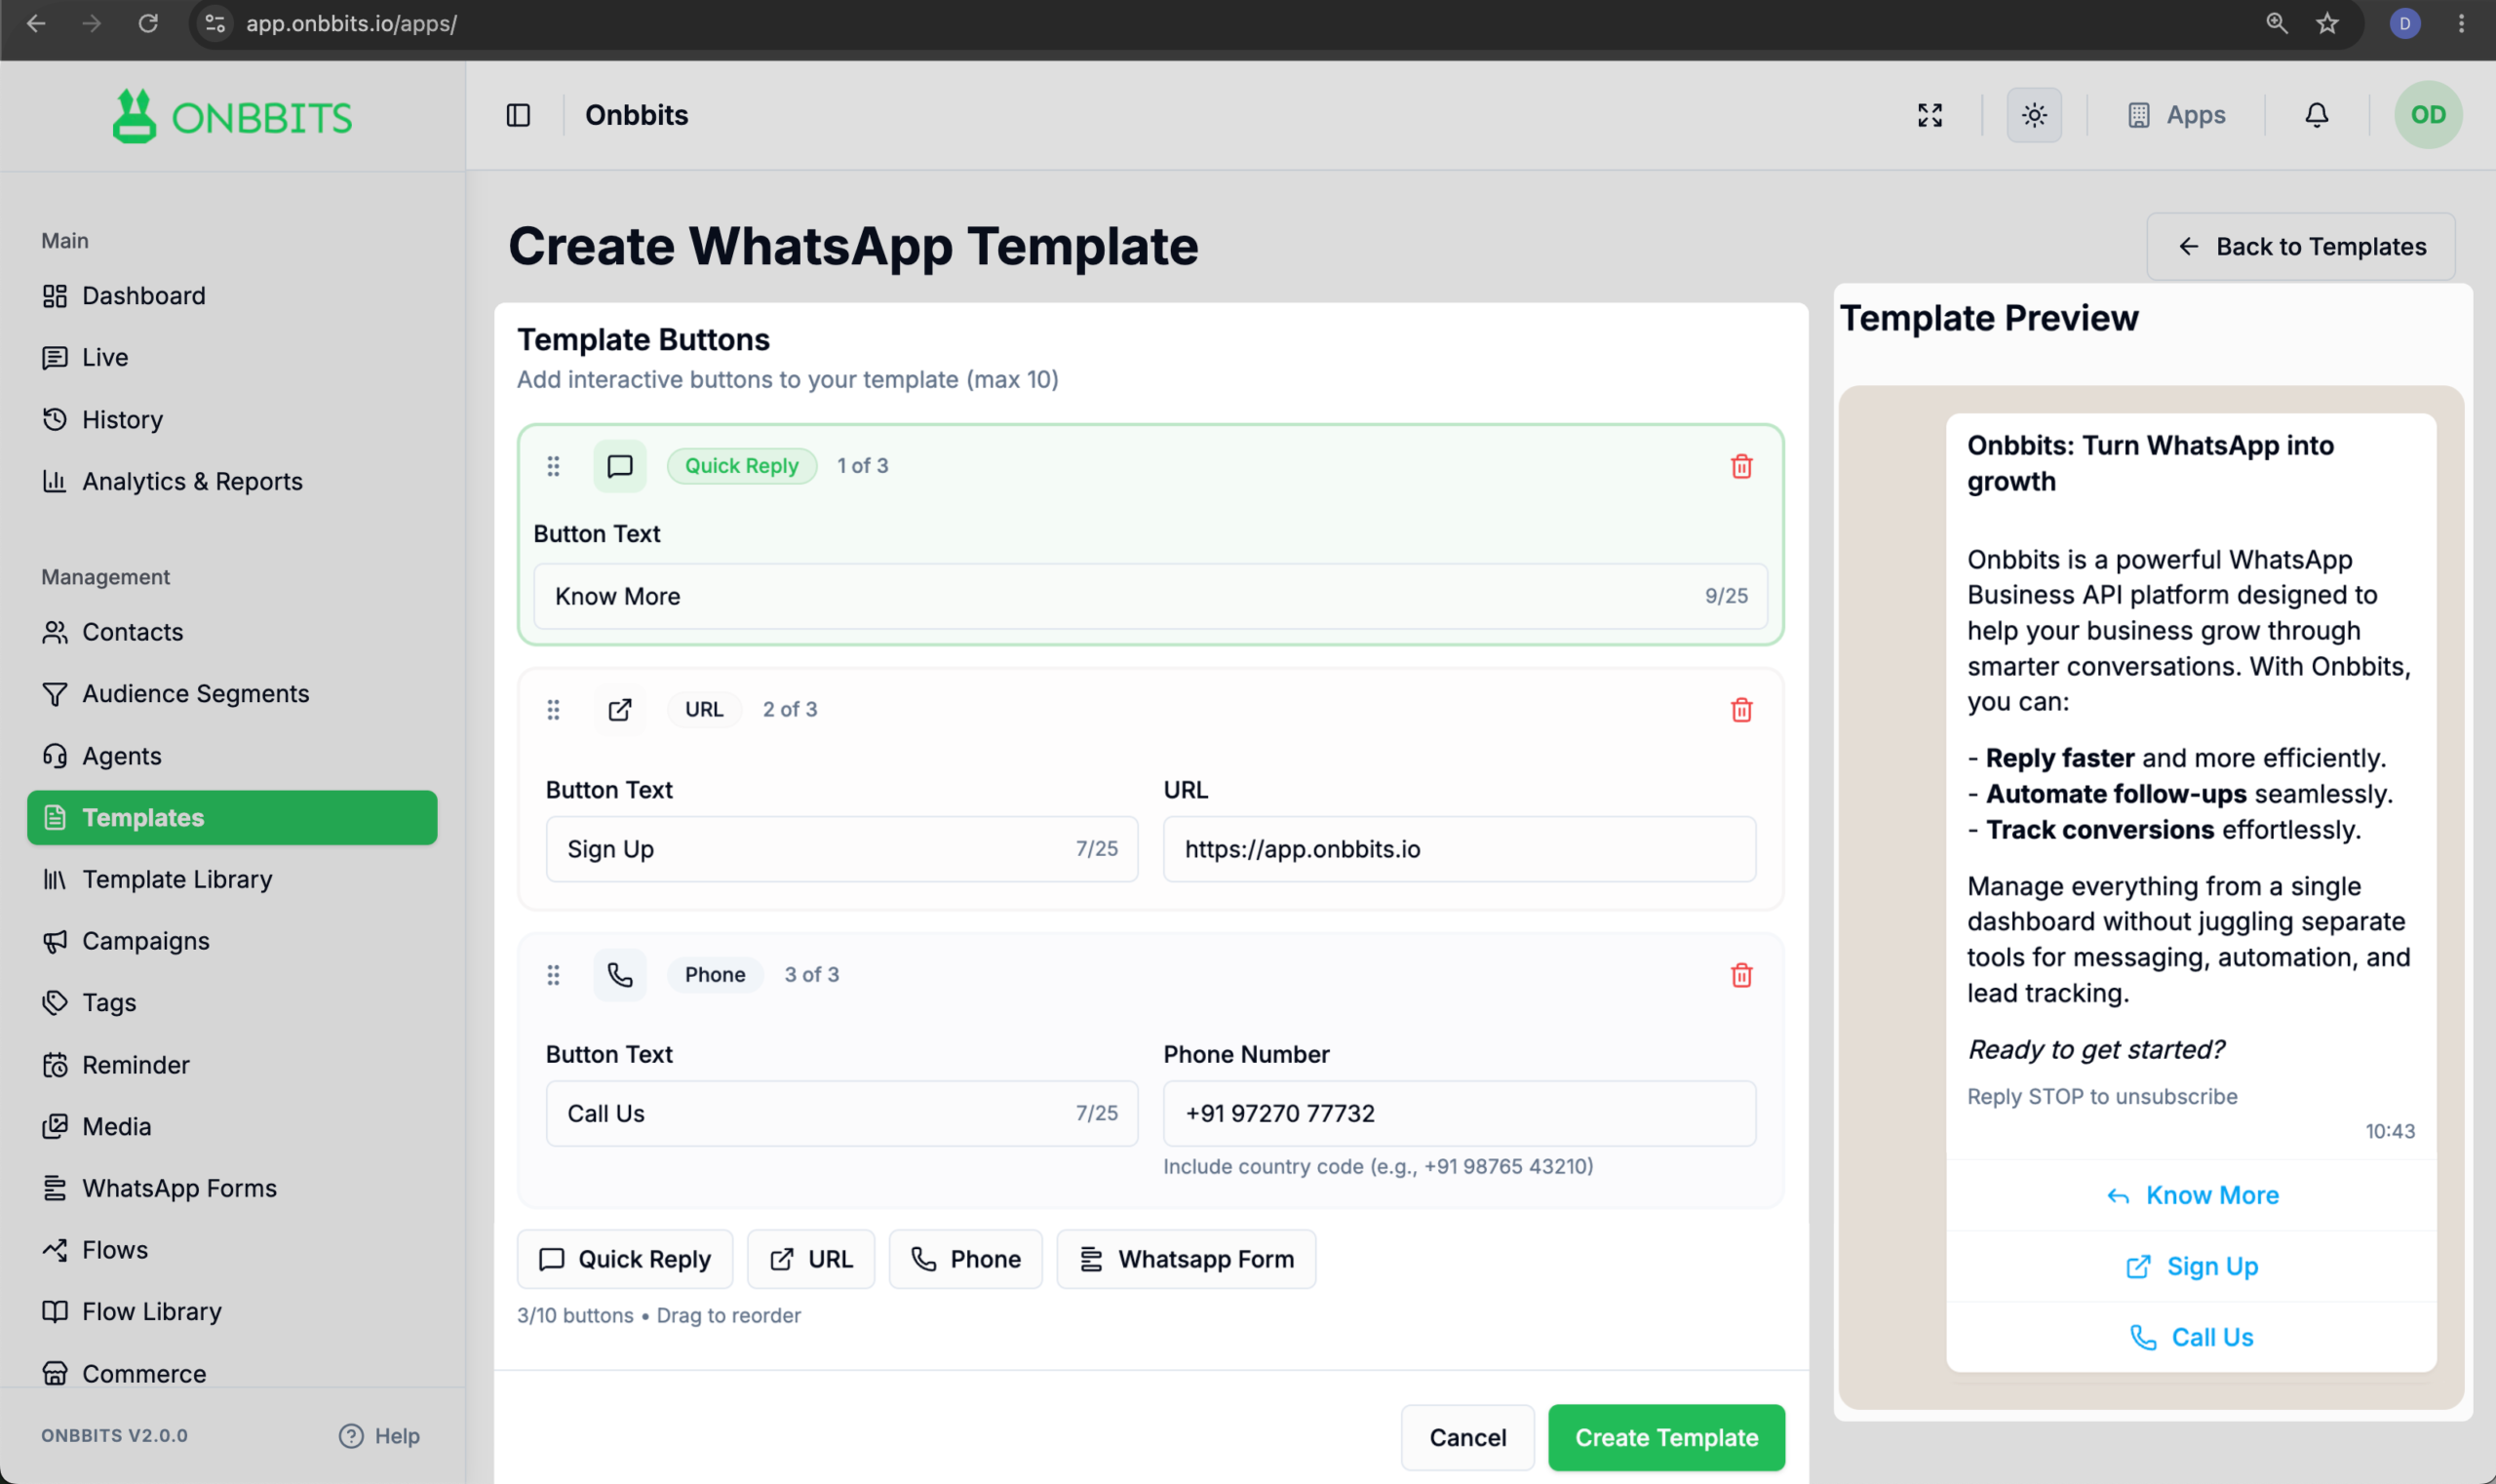
  2. (Optional) Add up to 10 buttons under Template Buttons. Choose from Quick Reply, URL, Phone, or WhatsApp Form (this sends a form, like an appointment booking form, when the customer taps it). Drag buttons to reorder them.
  3. Check the Template Preview panel on the right to see how your template will look.
  1. Click Create Template at the bottom of the form.

This saves your template as a Draft and takes you back to the Templates dashboard.
Submitting a Template for Review

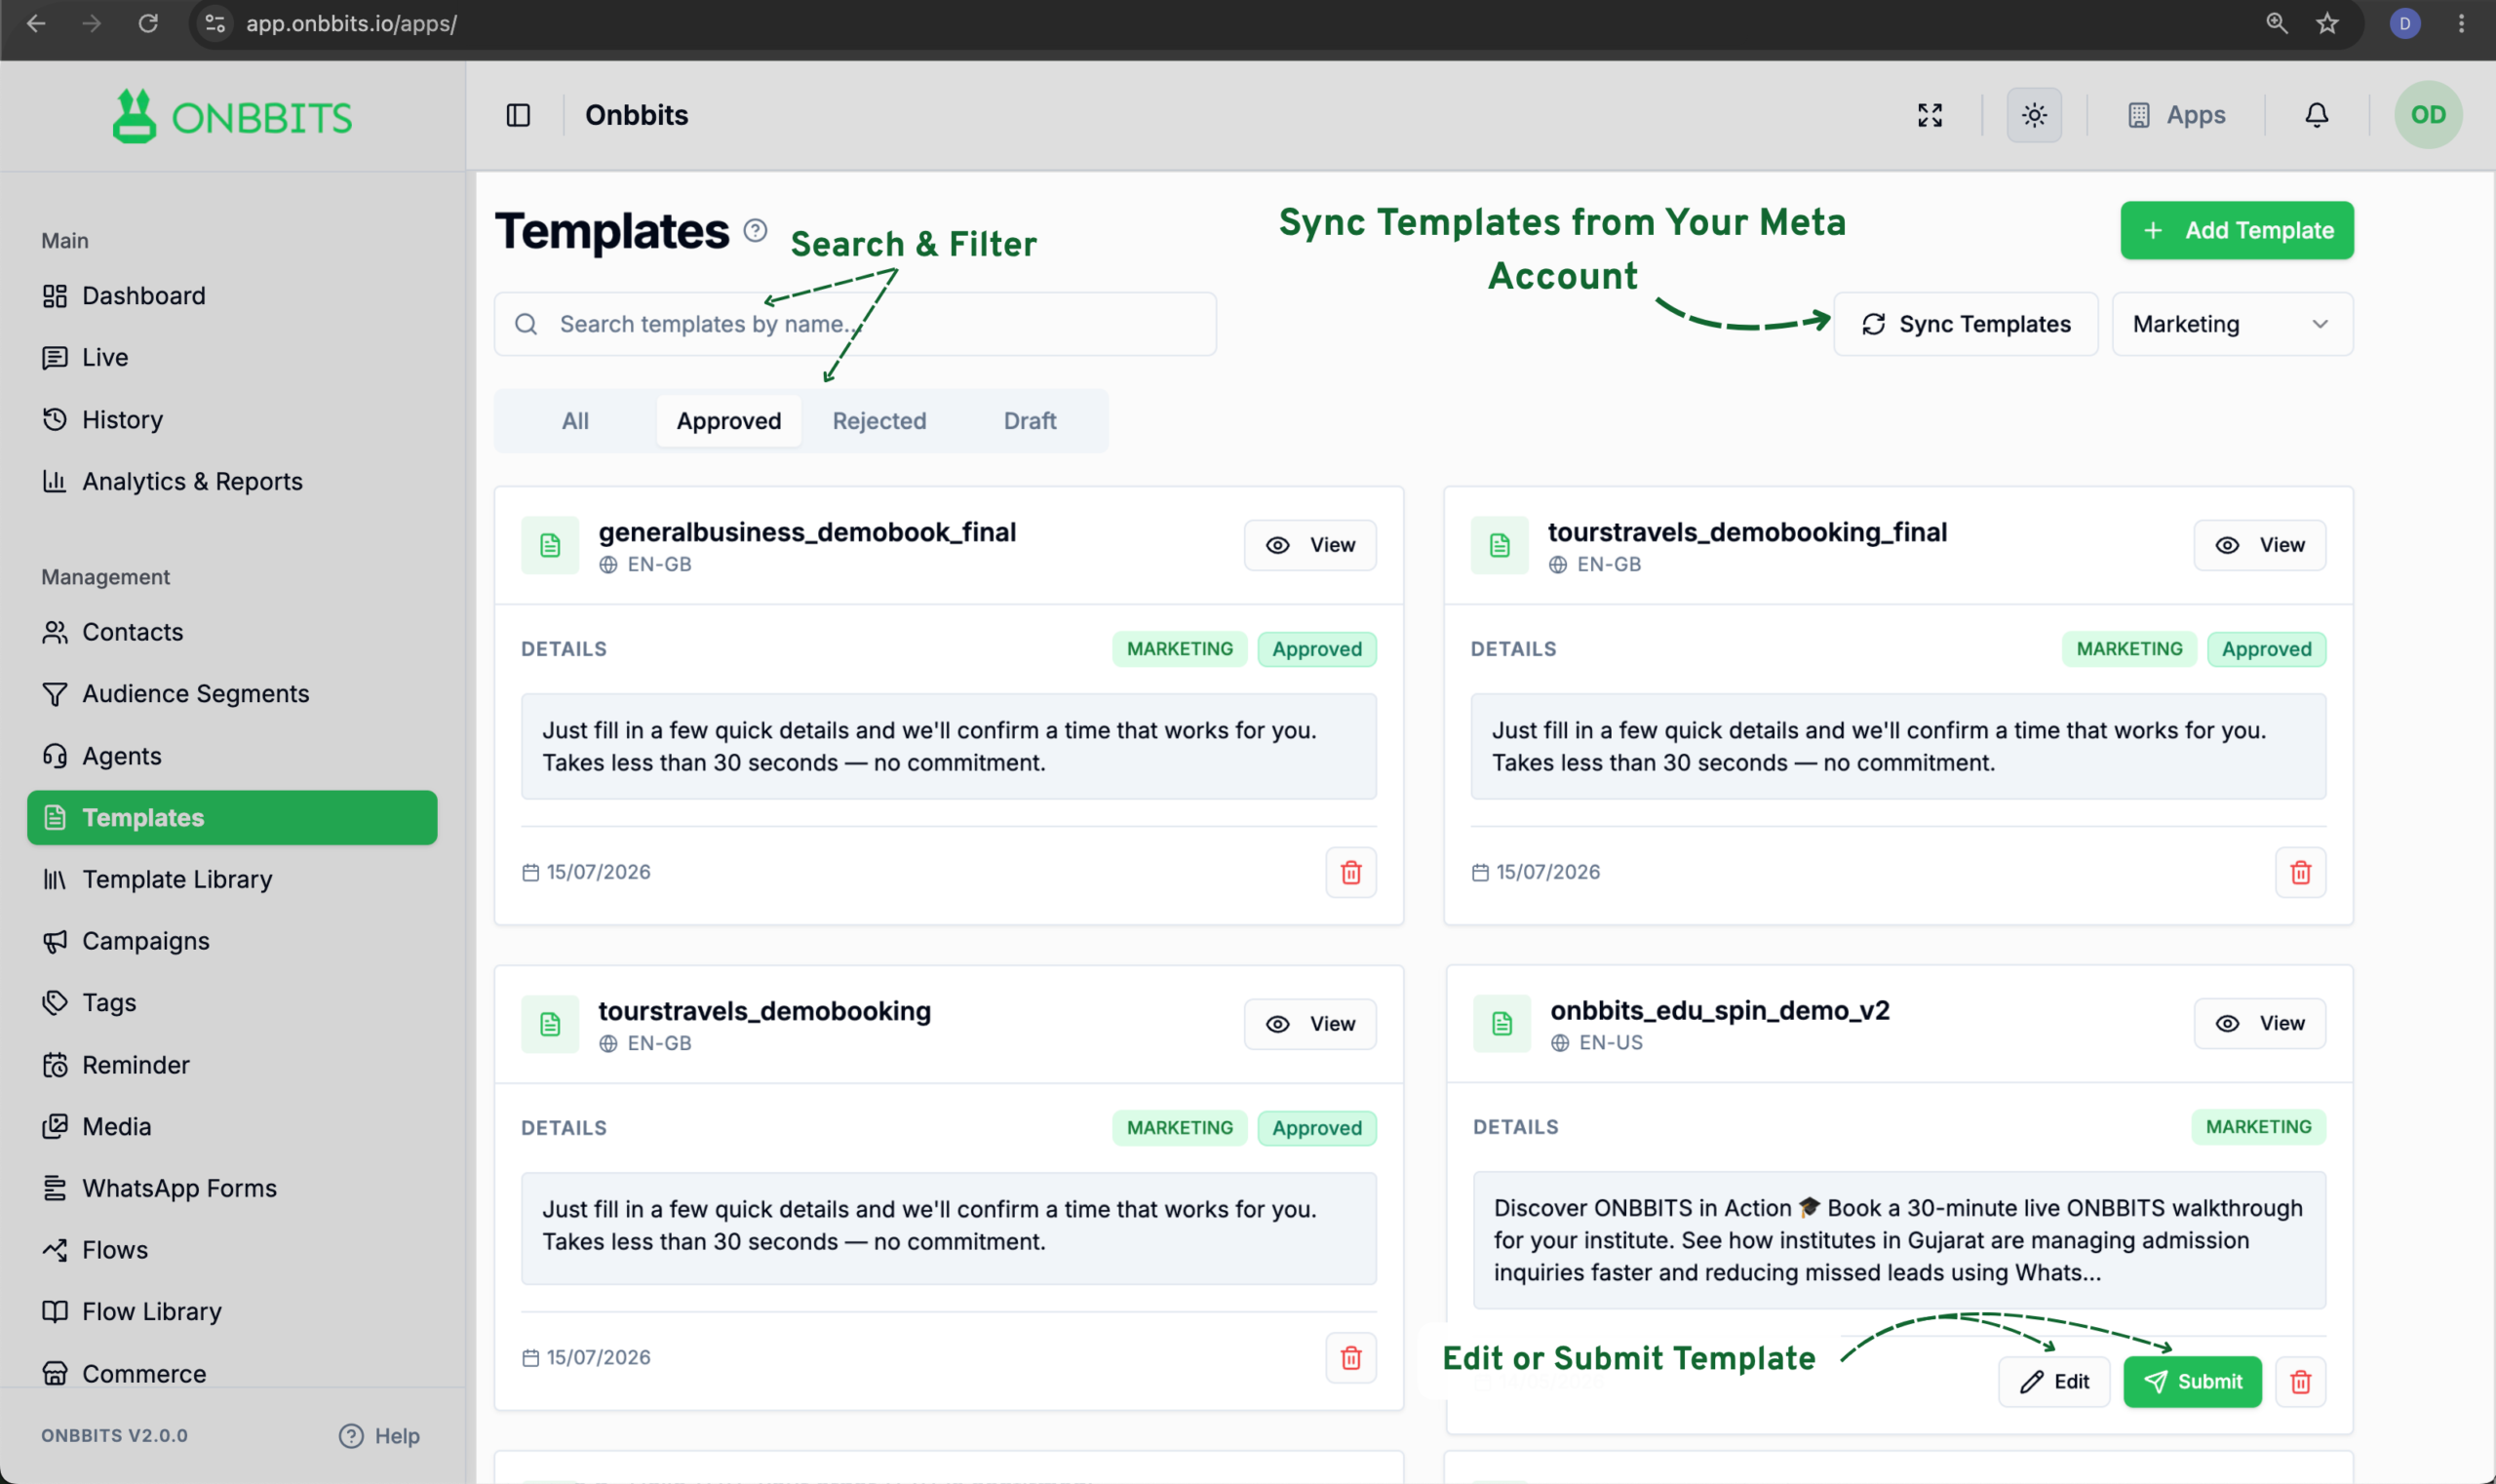
  1. On the Templates dashboard Click Submit on the template card.

Your template’s status changes to Pending Review while Meta reviews it. You can track this in Template Categories & Approval Rules.

Editing a Template

You can only edit a template while it’s still a Draft. To edit one, click Edit on the template card — this reopens the same form you used to create it, with all your details already filled in.

Related Articles

What Are Templates?

Template Categories & Approval Rules

Send a Template

Still need help?

Our support team is ready to assist you.

© 2026 ONBBITS. All rights reserved.