
OVERVIEW
FEATURES
INTEGRATION
SUPPORT
The Onbbits Integration app connects your ERPNext or Frappe system to Onbbits, allowing ERP events such as new orders, support tickets, and invoices to automatically trigger WhatsApp updates.
This part happens on your ERPNext or Frappe server, using the Bench CLI. It’s a one-time setup step, usually handled by whoever manages your ERP environment.
Replace your-site-name with your actual ERPNext site name. If you’re not comfortable with the command line, ask your ERP administrator or developer to complete this step.
Once the app is installed, you’ll connect it to your Onbbits app using your API Key.
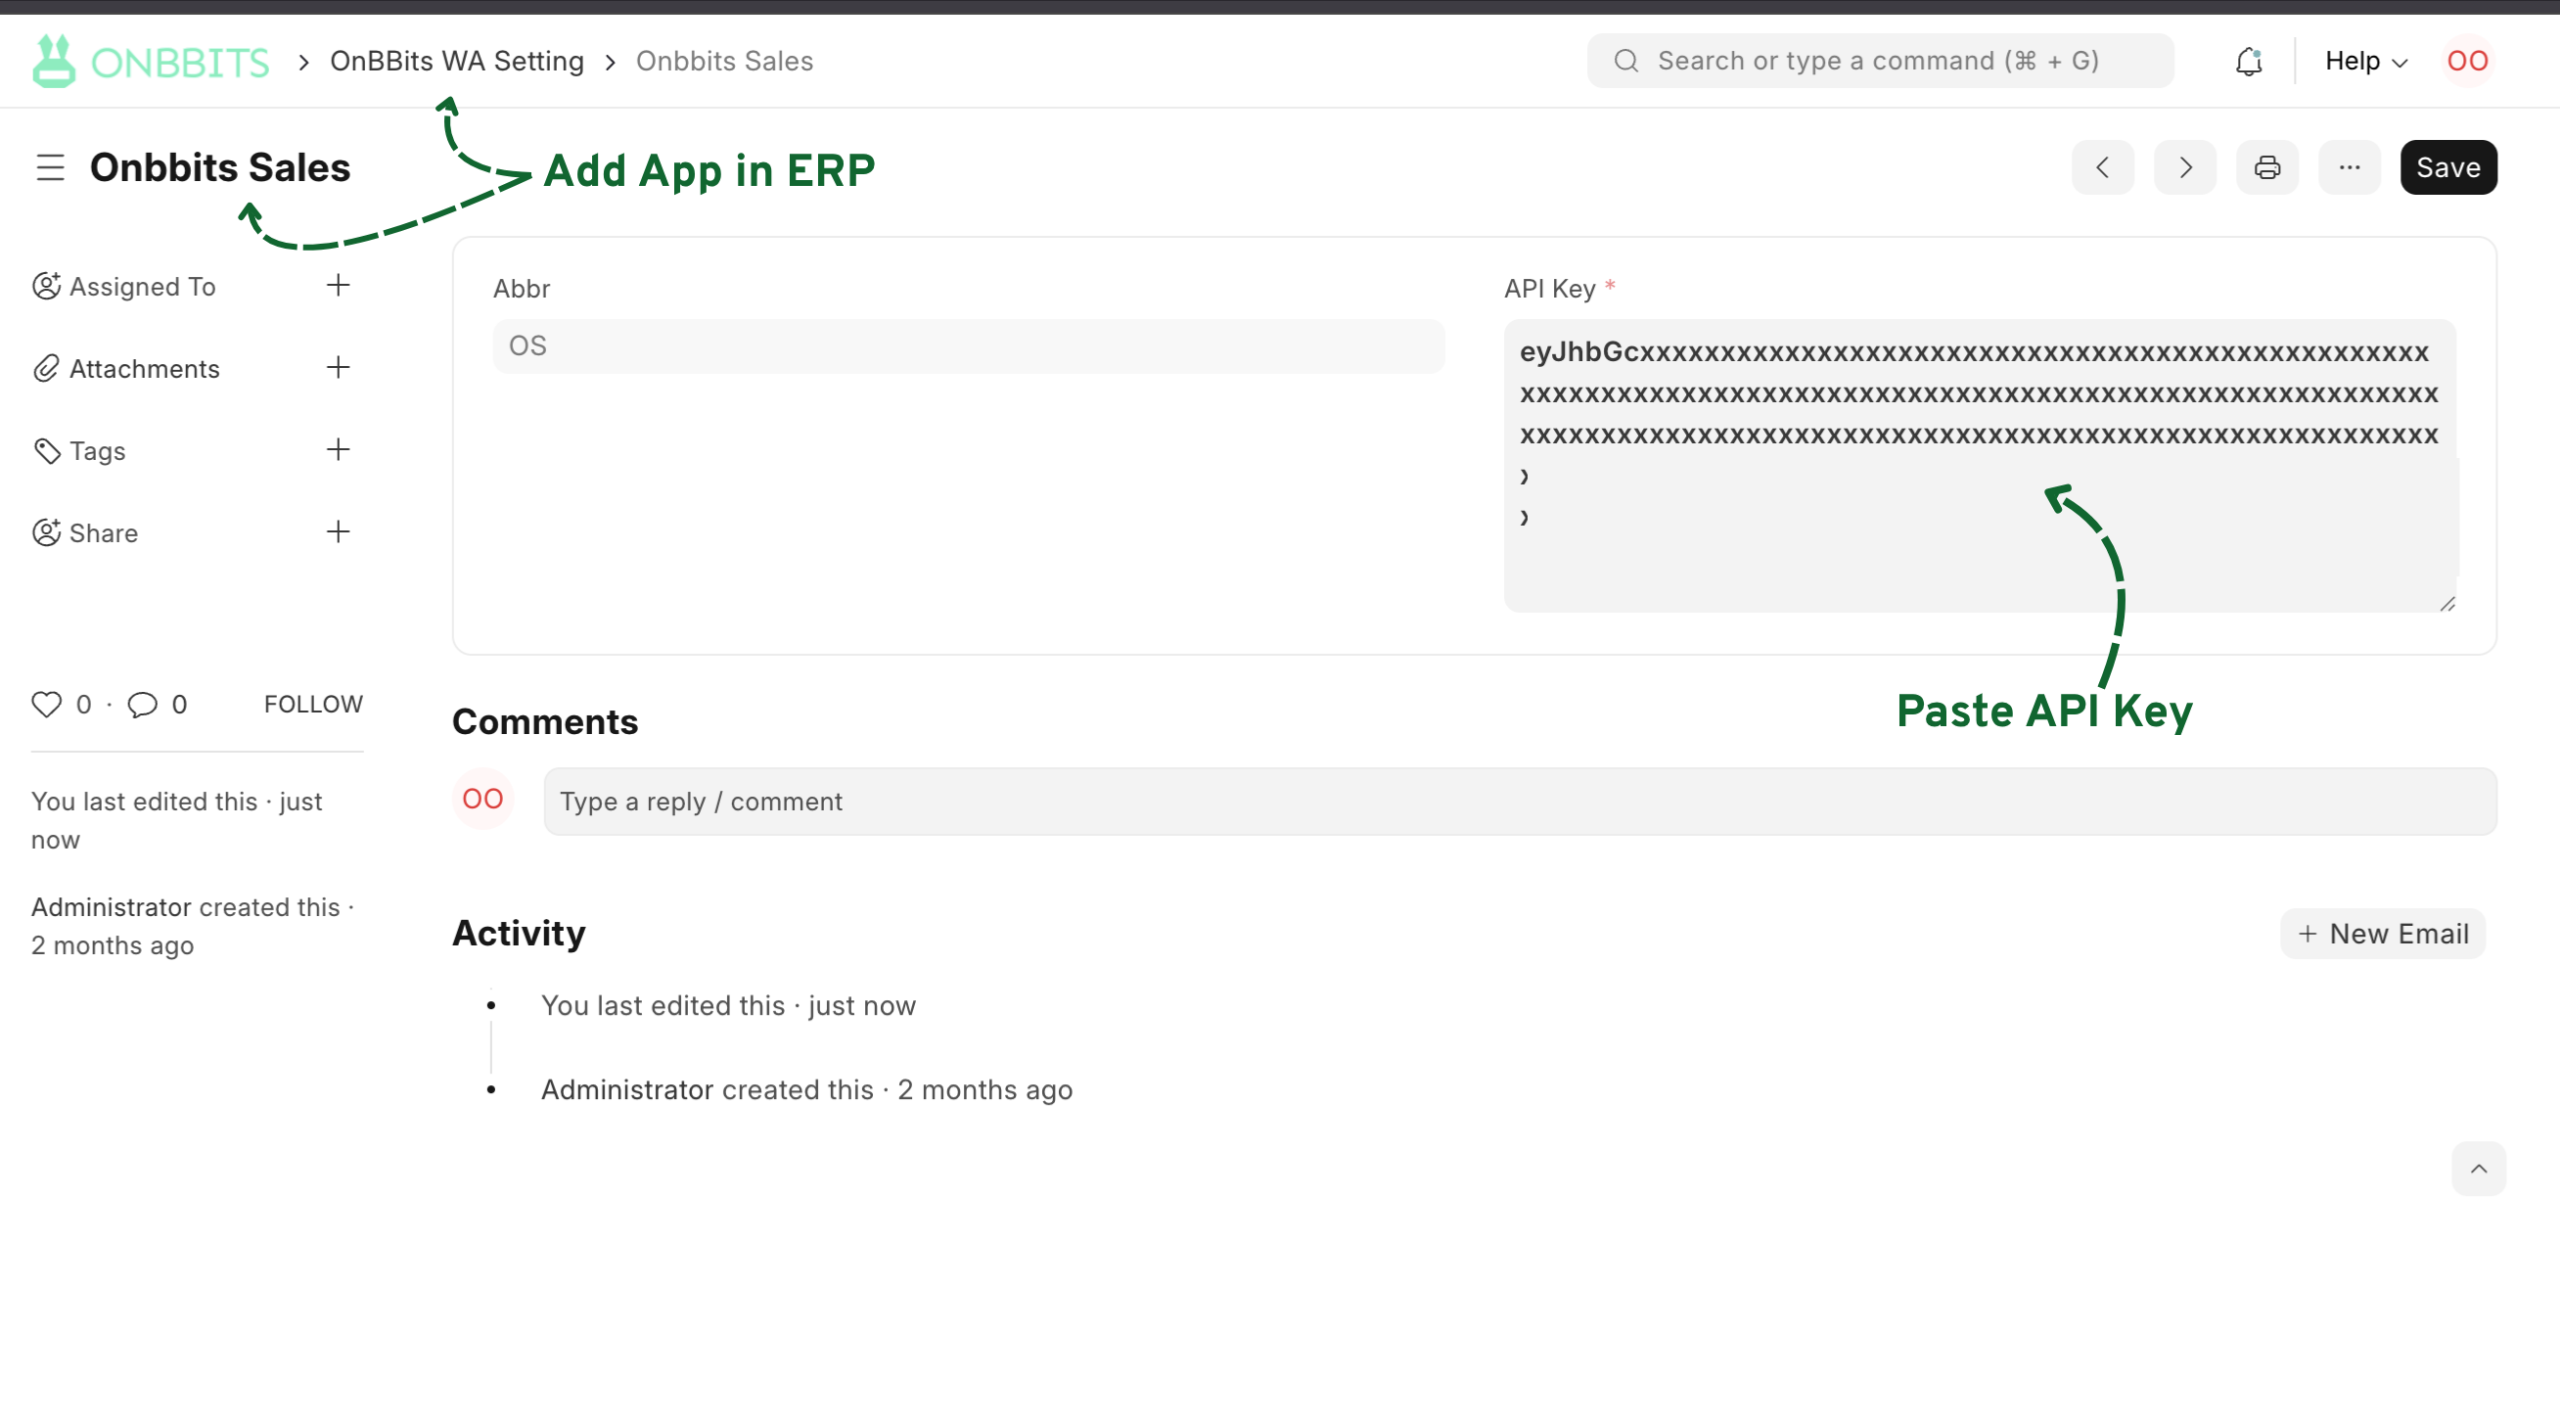
You can connect more than one Onbbits app from this same settings screen. Each connected app gets its own entry with its own API Key and Abbr (a short label you choose to tell them apart).
Your WhatsApp templates live in Onbbits, but you’ll need them available inside ERPNext so you can attach them to triggers. Syncing pulls your approved templates into ERPNext
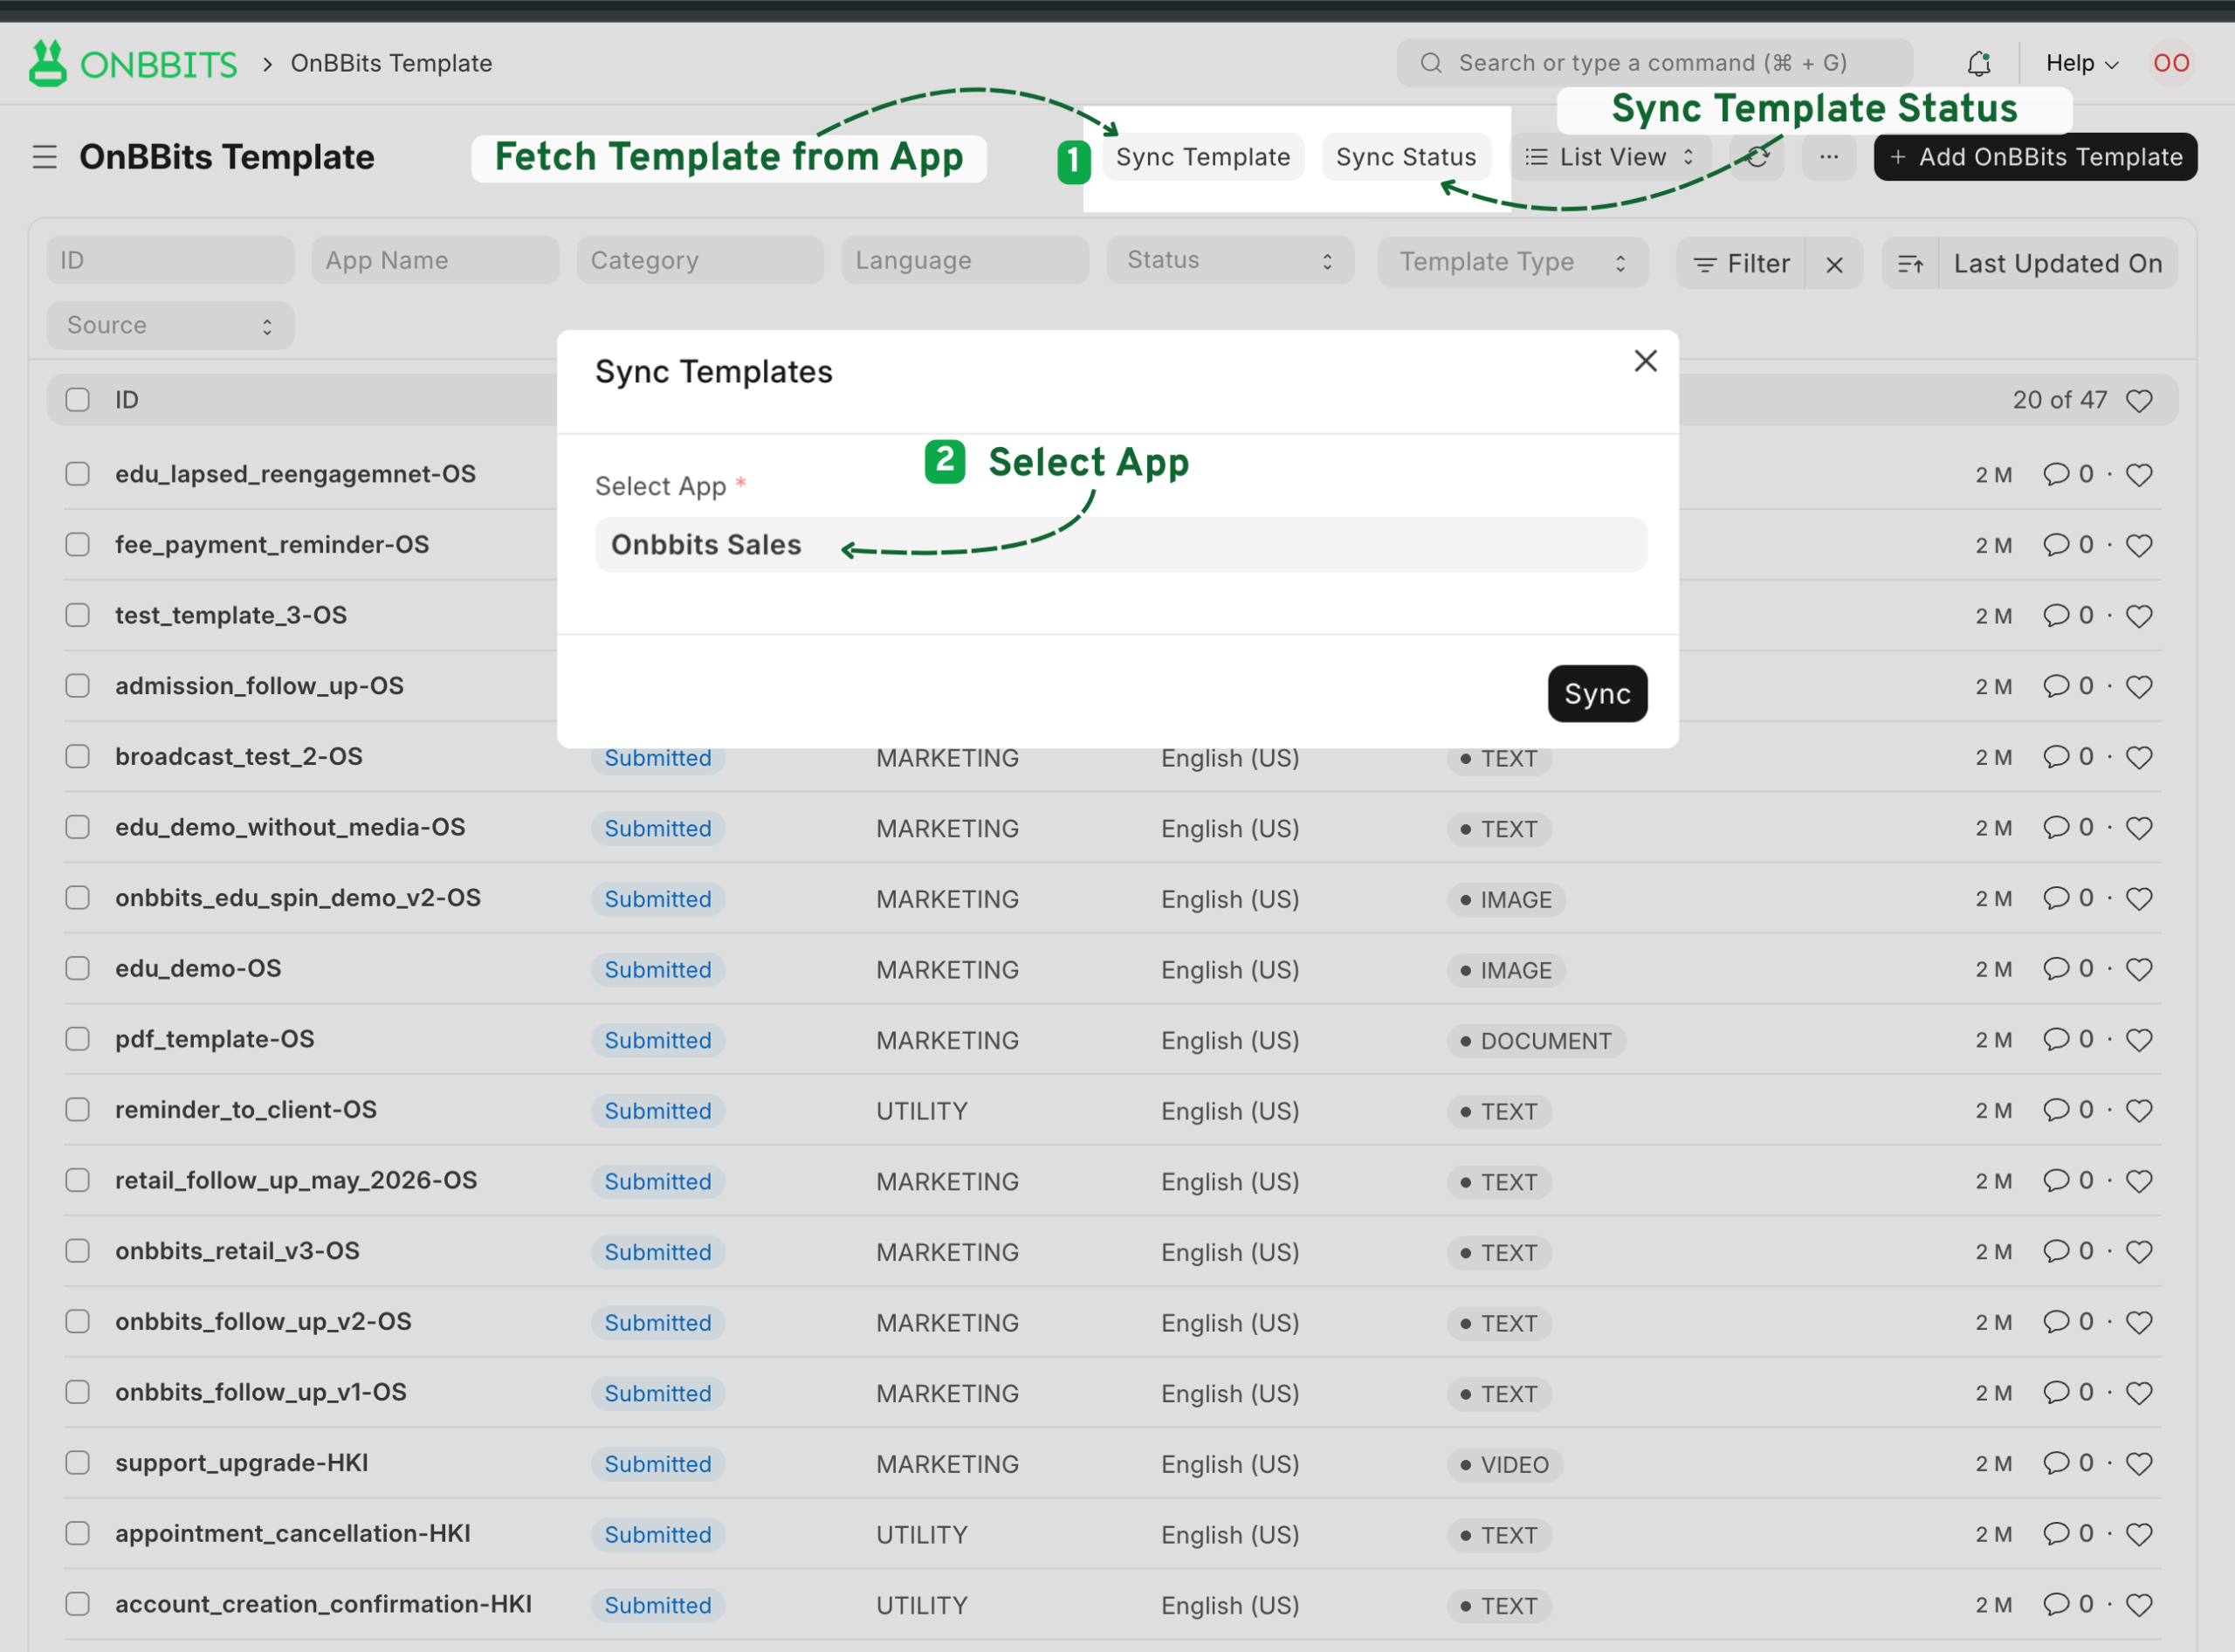
Once synced, each template shows its name, language, category, type, and approval status right in the OnBBits Templates list.
Template approval status also stays current automatically — Onbbits checks for updates every hour. If you need the latest status right away, open the template and click Sync Status to check manually
A Template Trigger tells Onbbits exactly when to send a message and which document data to include. This is where the automation actually comes together.
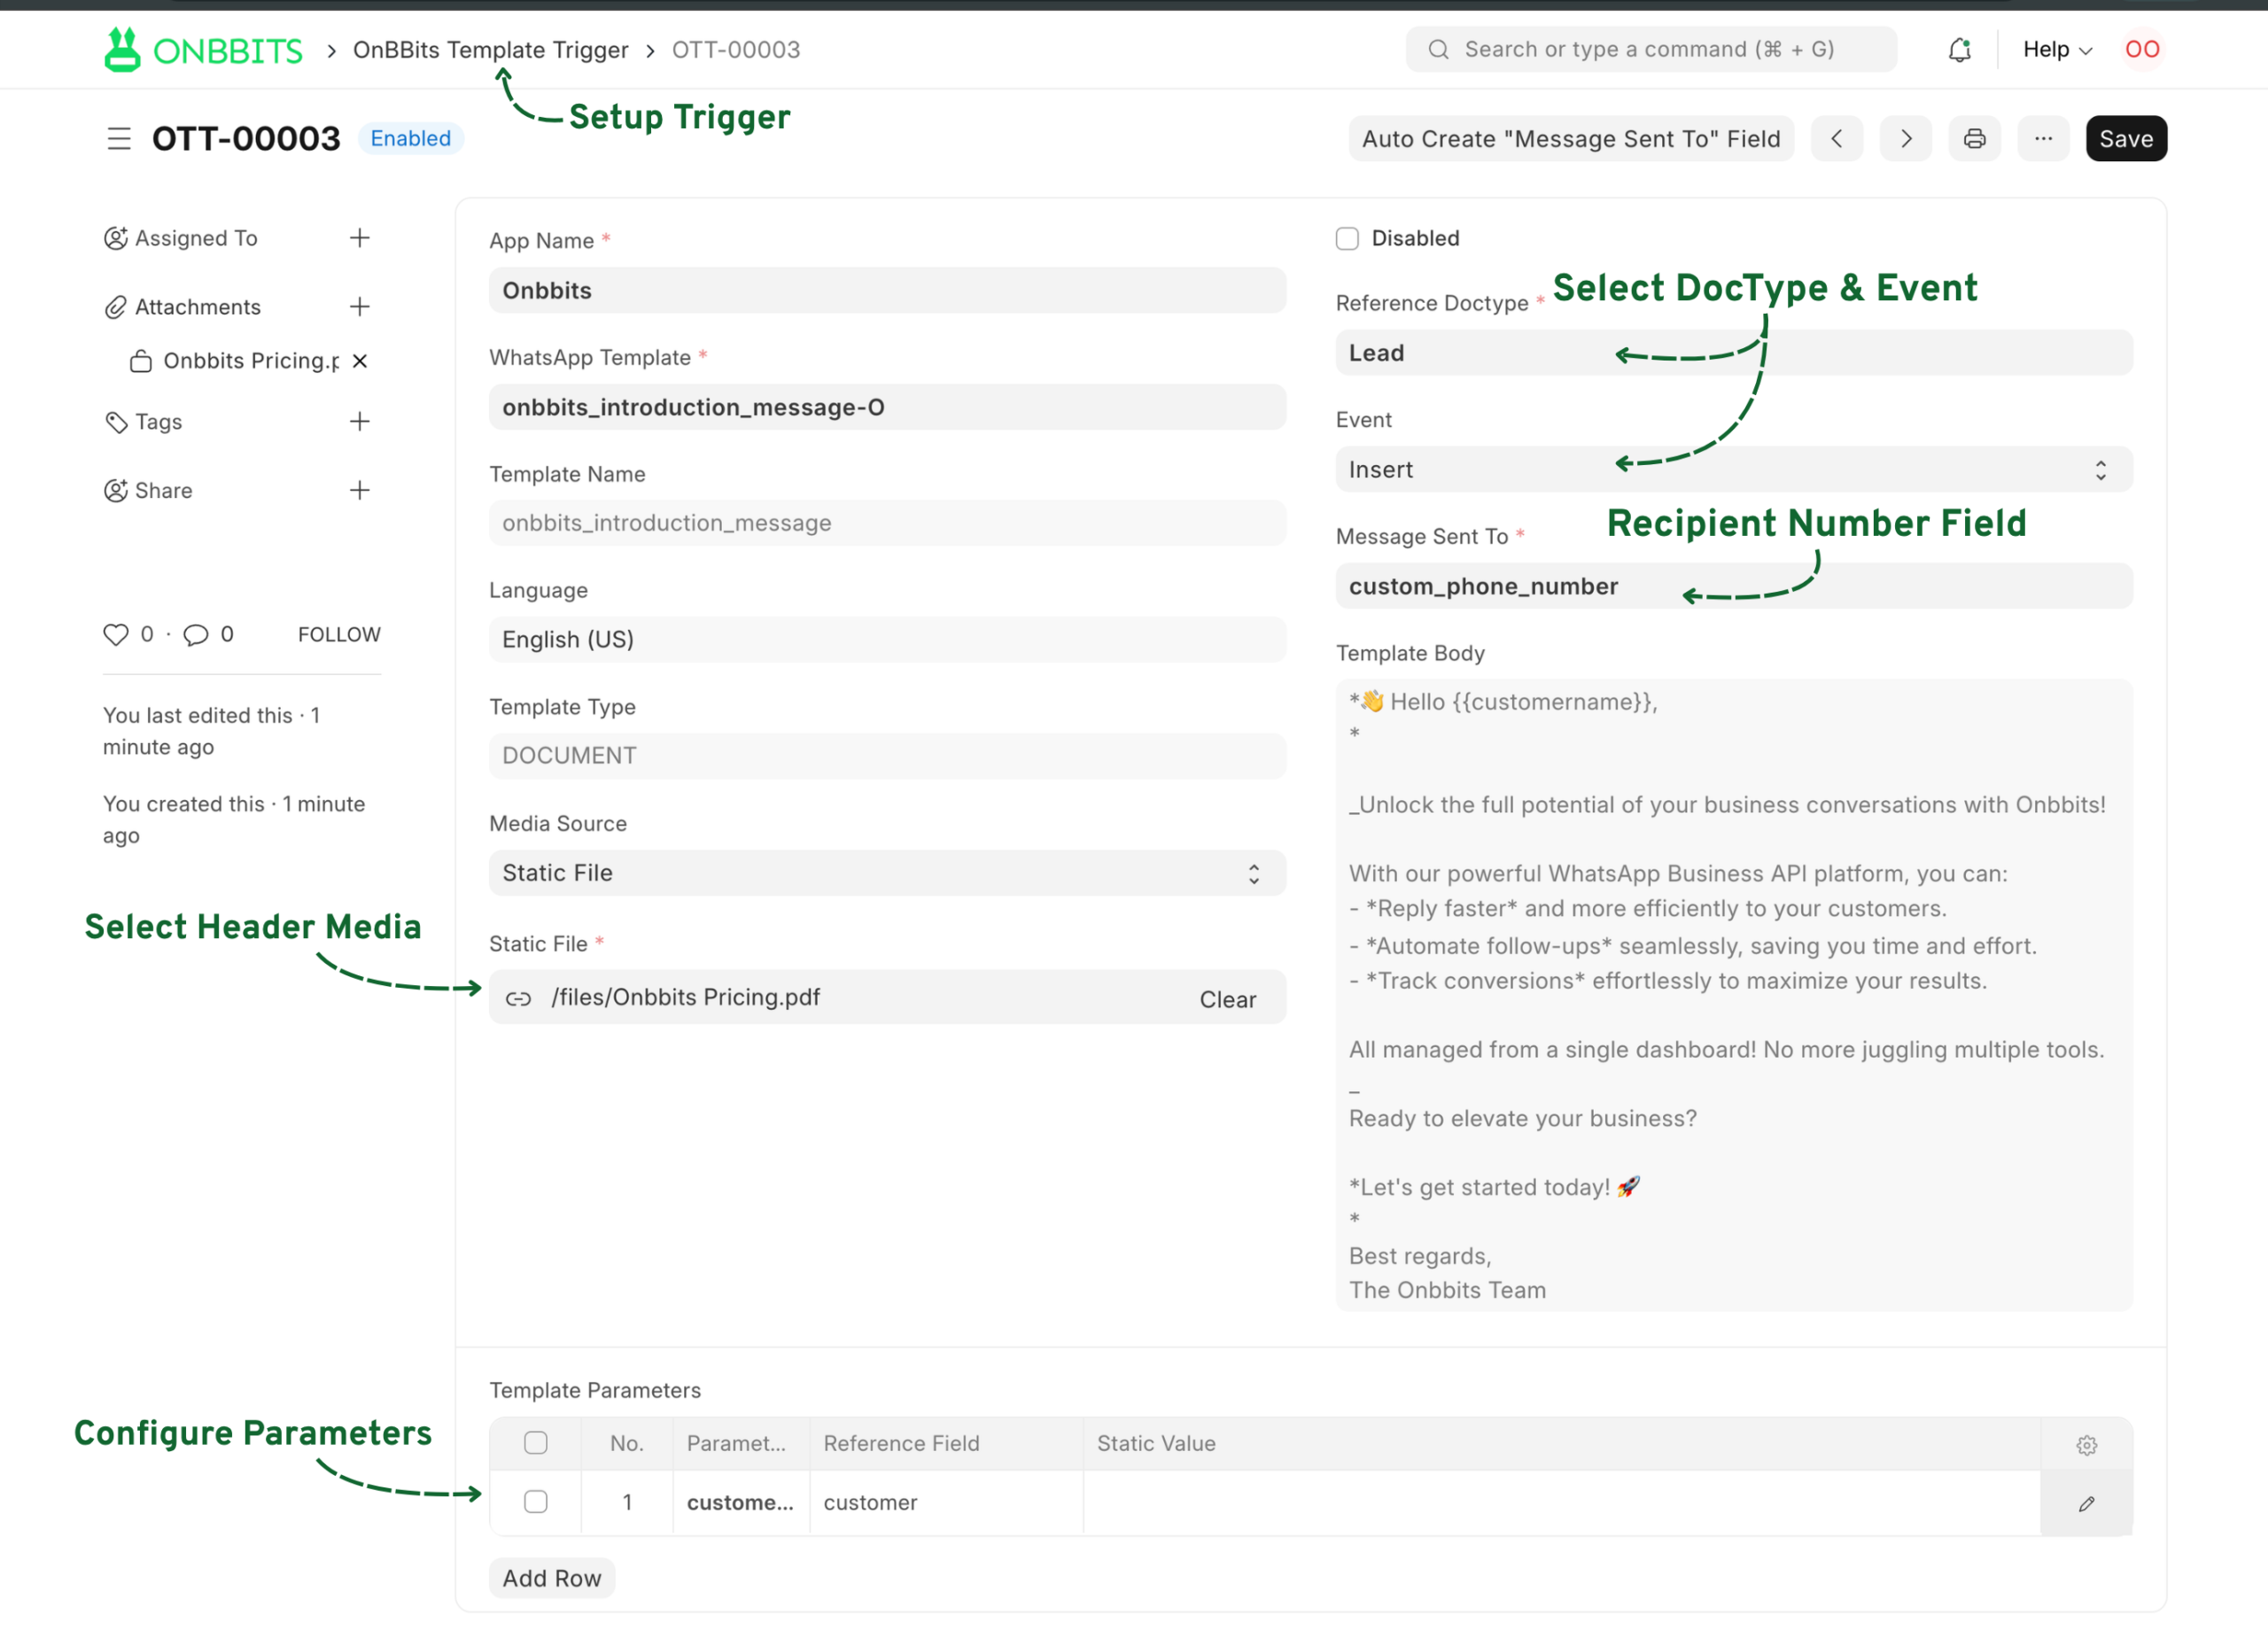
Every trigger also has a Disabled checkbox. Turning this on pauses the trigger without deleting your setup, which is useful if you need to stop messages temporarily while keeping your parameter mapping intact.
Your WhatsApp template may include placeholders like {{1}} or {{2}} in its body. The Template Parameters table is where you decide what fills each one in.
Reference Field: Pulls the value directly from the triggering document and updates automatically each time. For example, customer, opening_date
Static Value: Sends the same fixed text every time, regardless of the document. For example, “Subscription”, “after 2 days”
Our support team is ready to assist you.
© 2026 ONBBITS. All rights reserved.