
OVERVIEW
FEATURES
INTEGRATION
SUPPORT
This guide walks you through creating an API Campaign in Onbbits and getting the request details you need to trigger it from your own system, such as an ERP or another software platform.
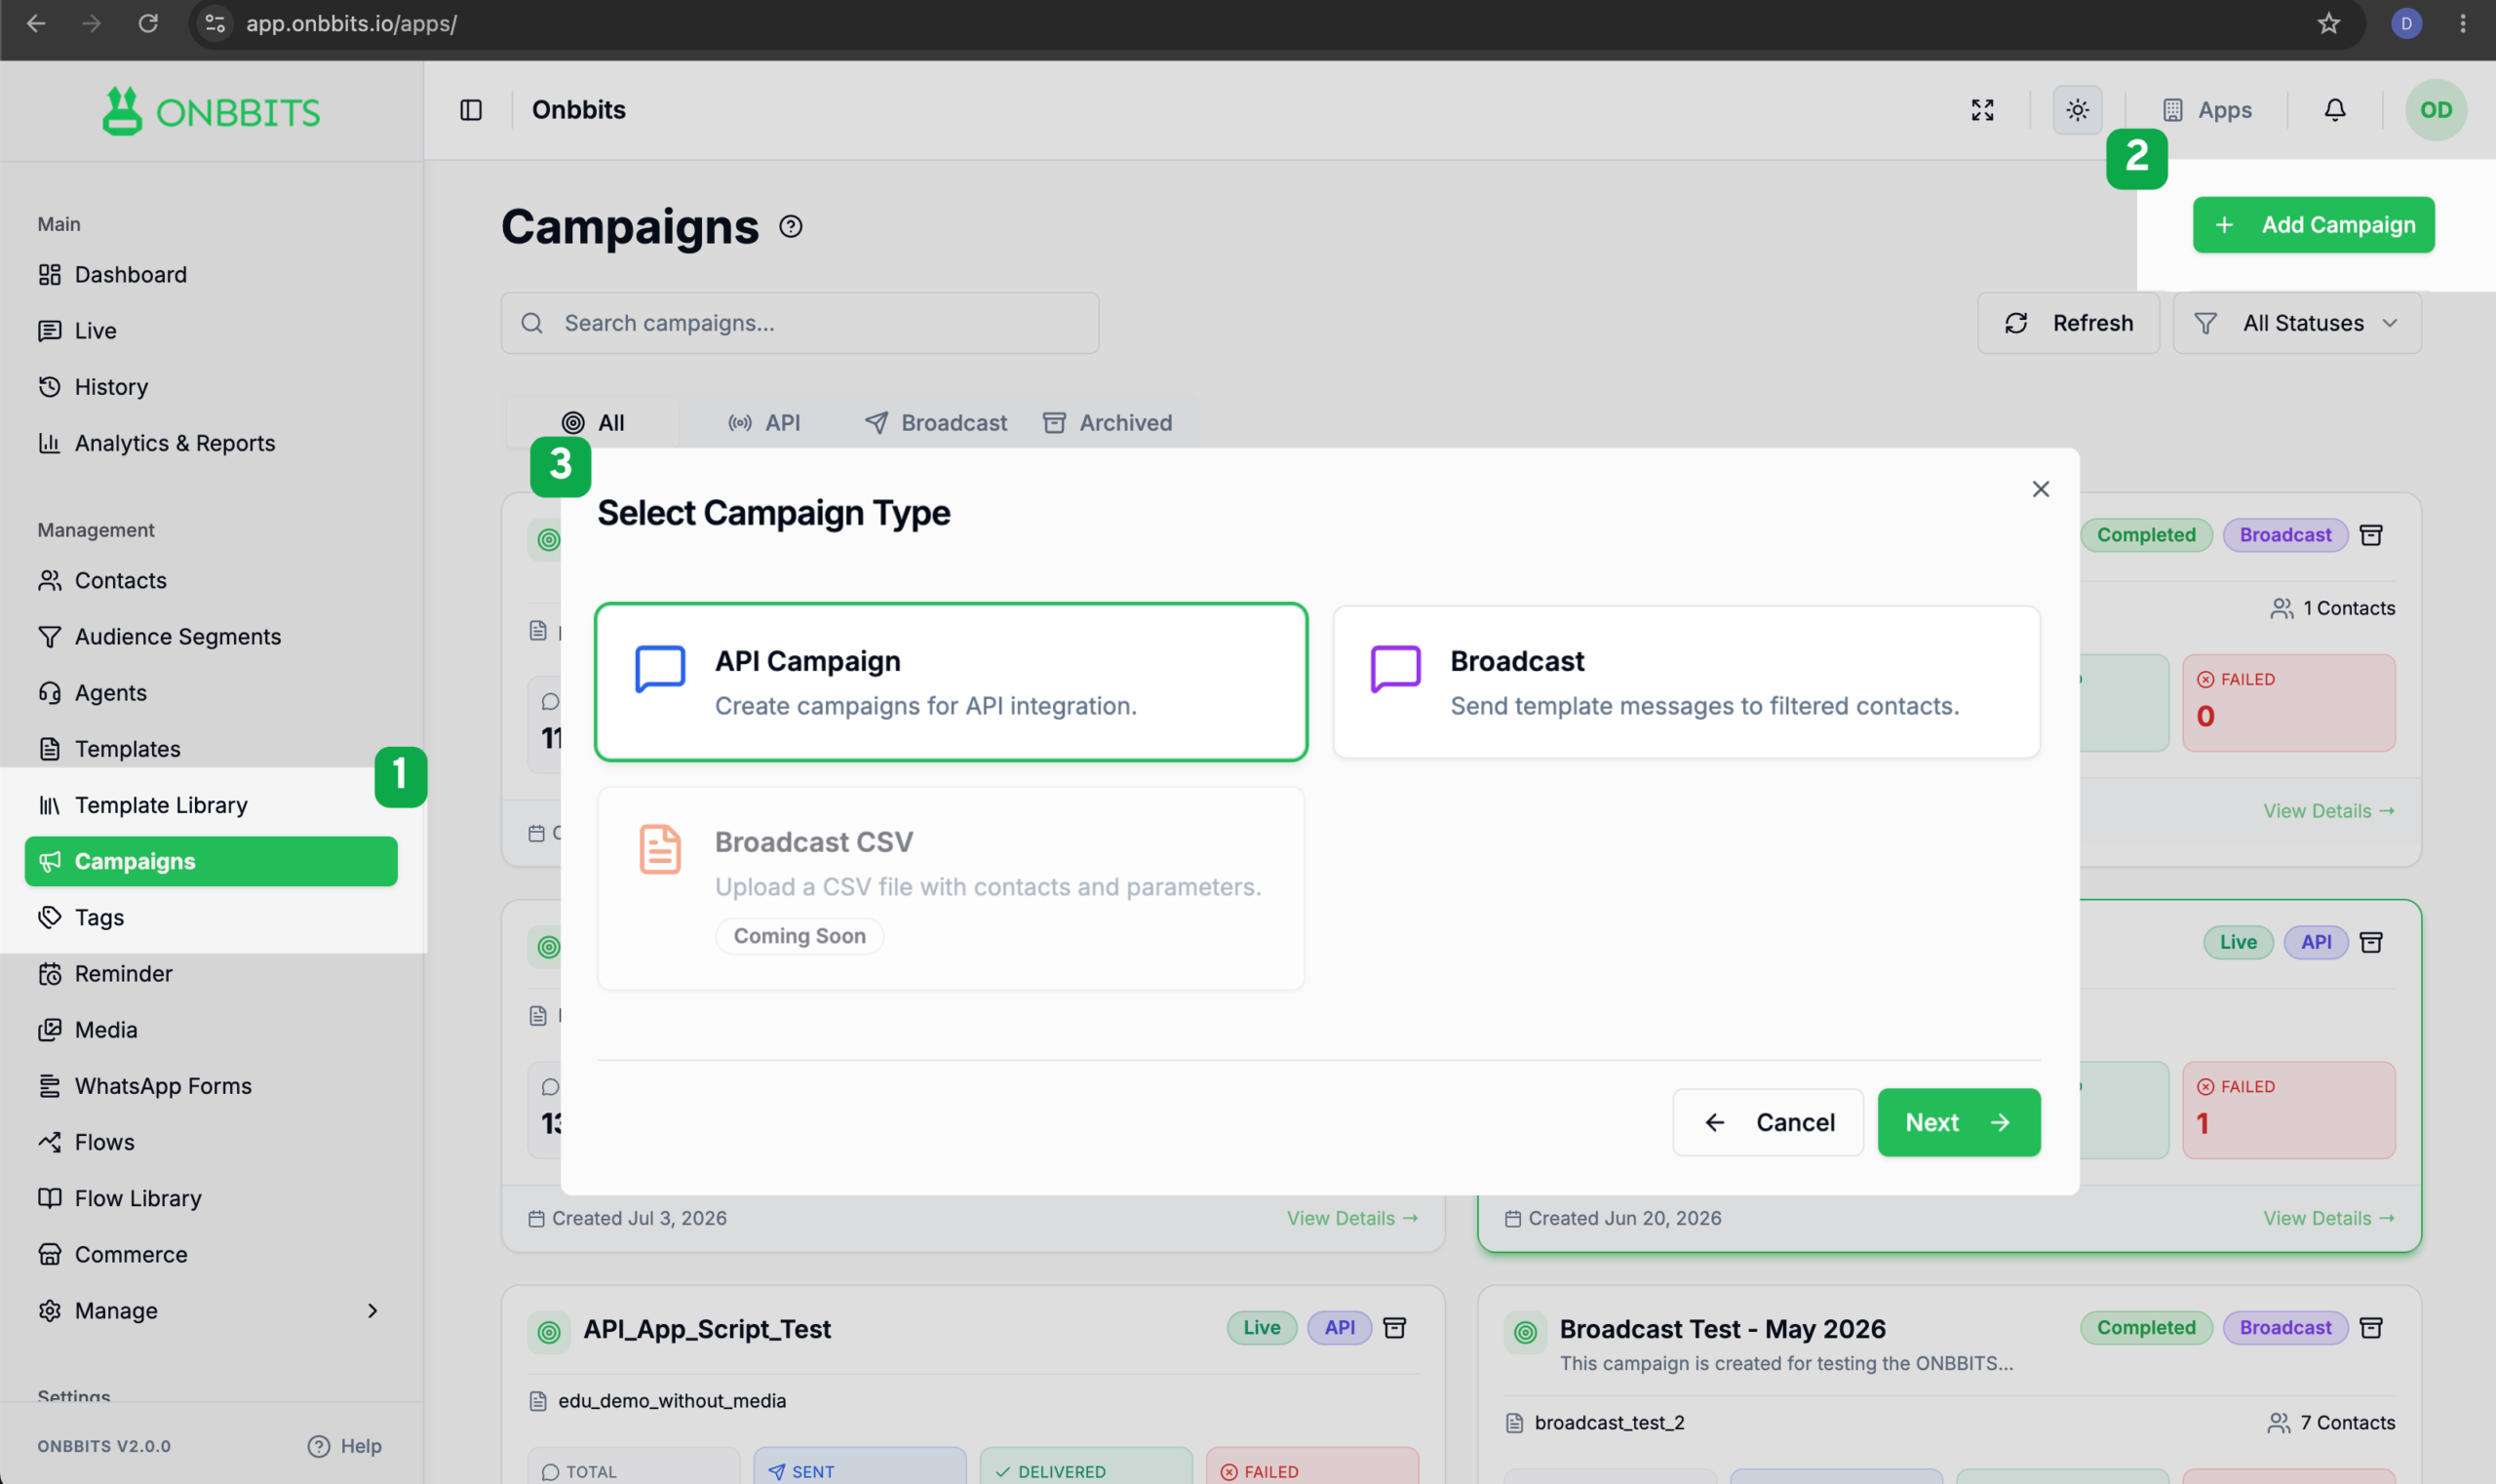
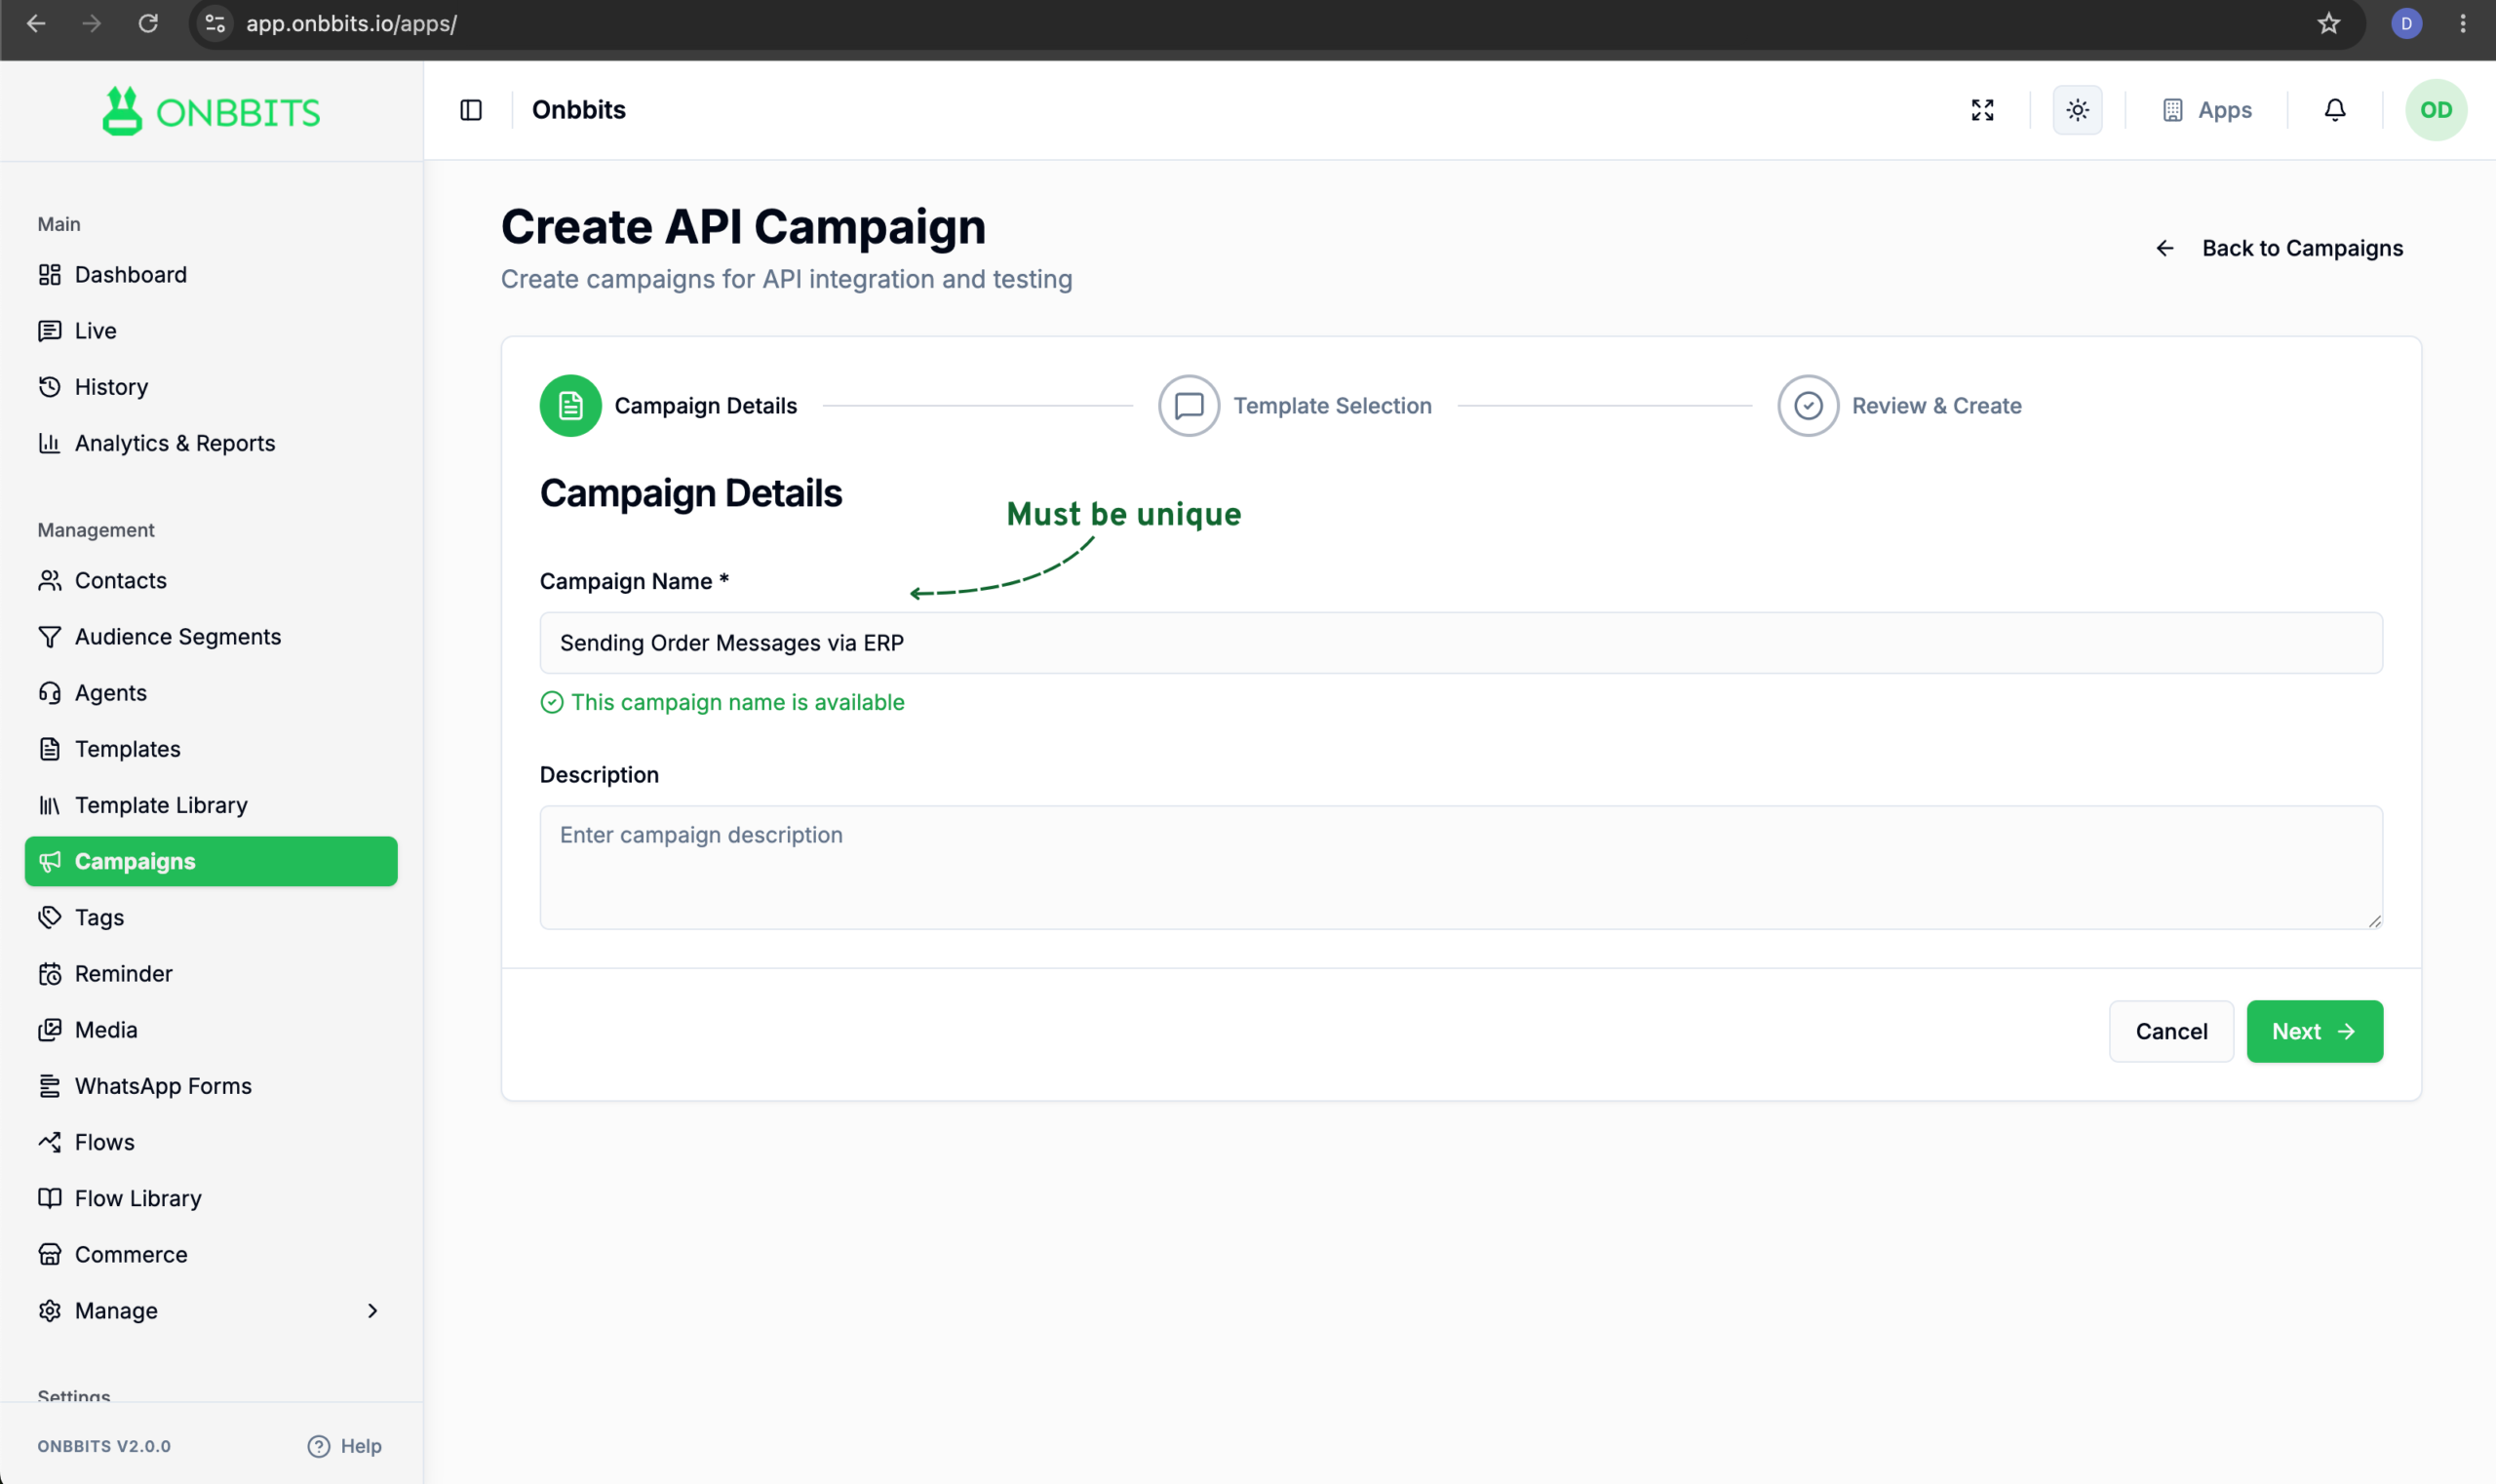
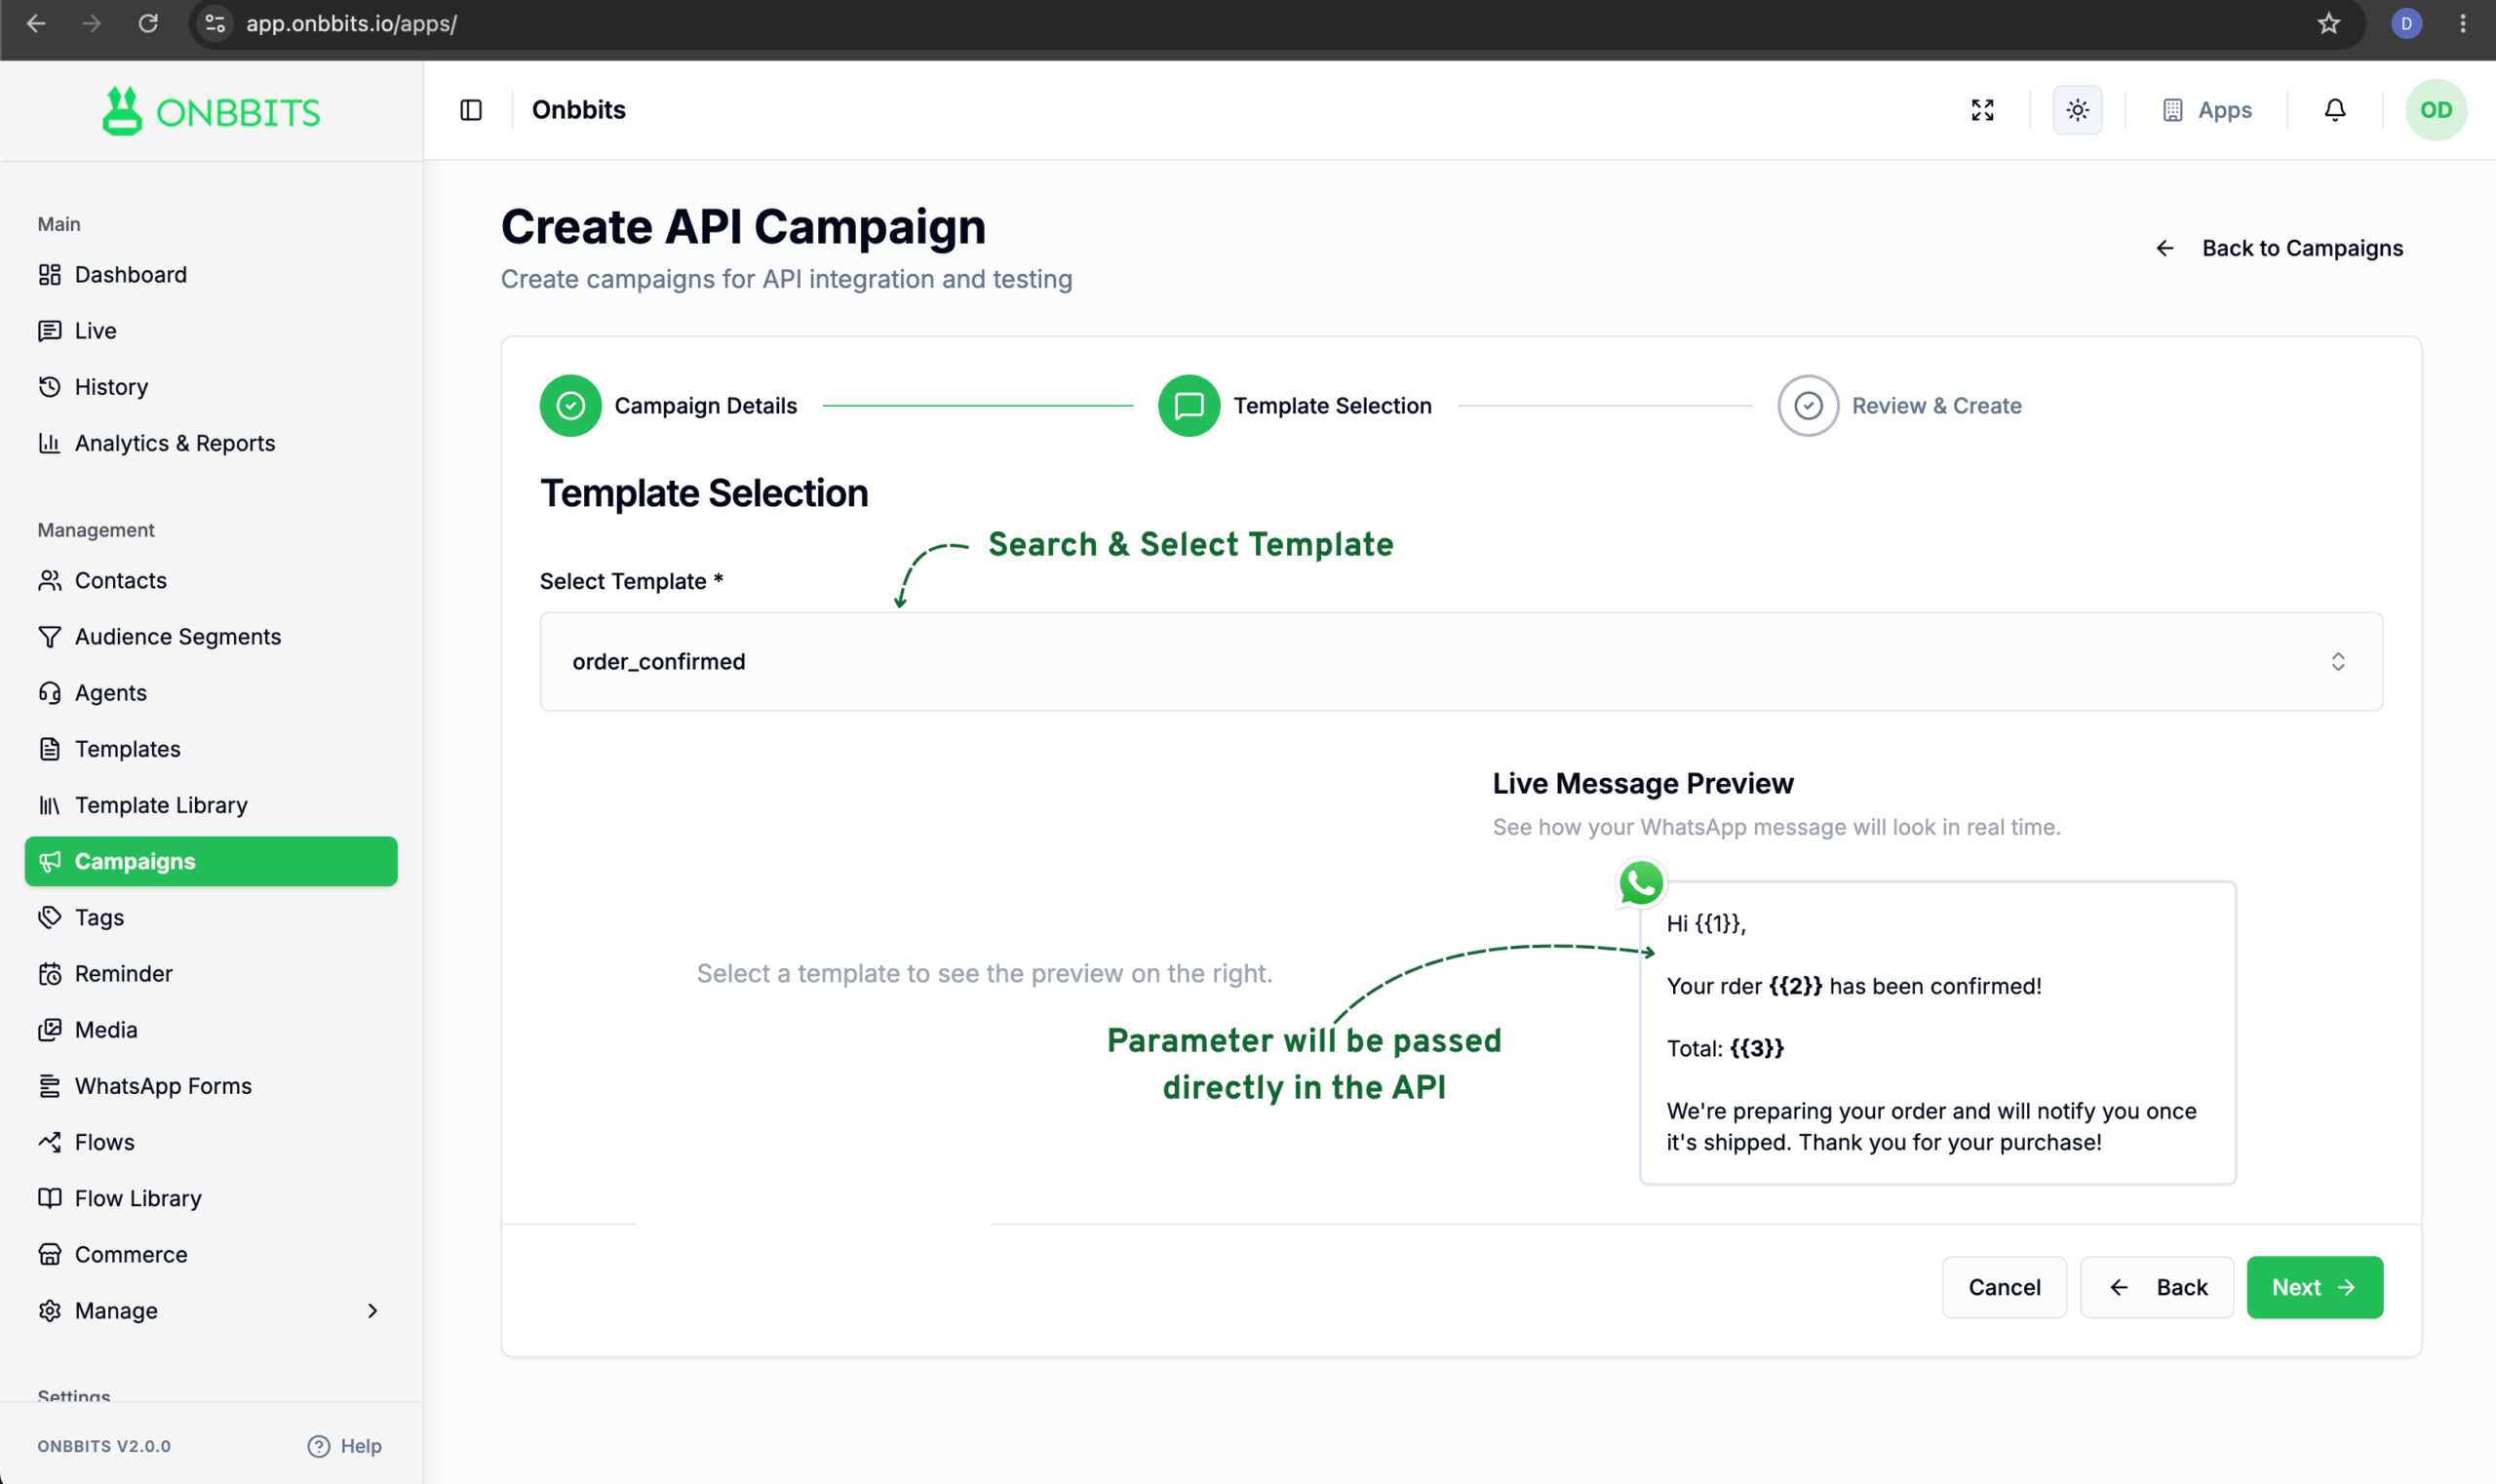
Unlike a Broadcast Campaign, you won’t fill in template parameters here. Those get passed in later, through your own API request. There’s also no audience selection step, since each message is sent to a destination number through your API request rather than a filtered list.
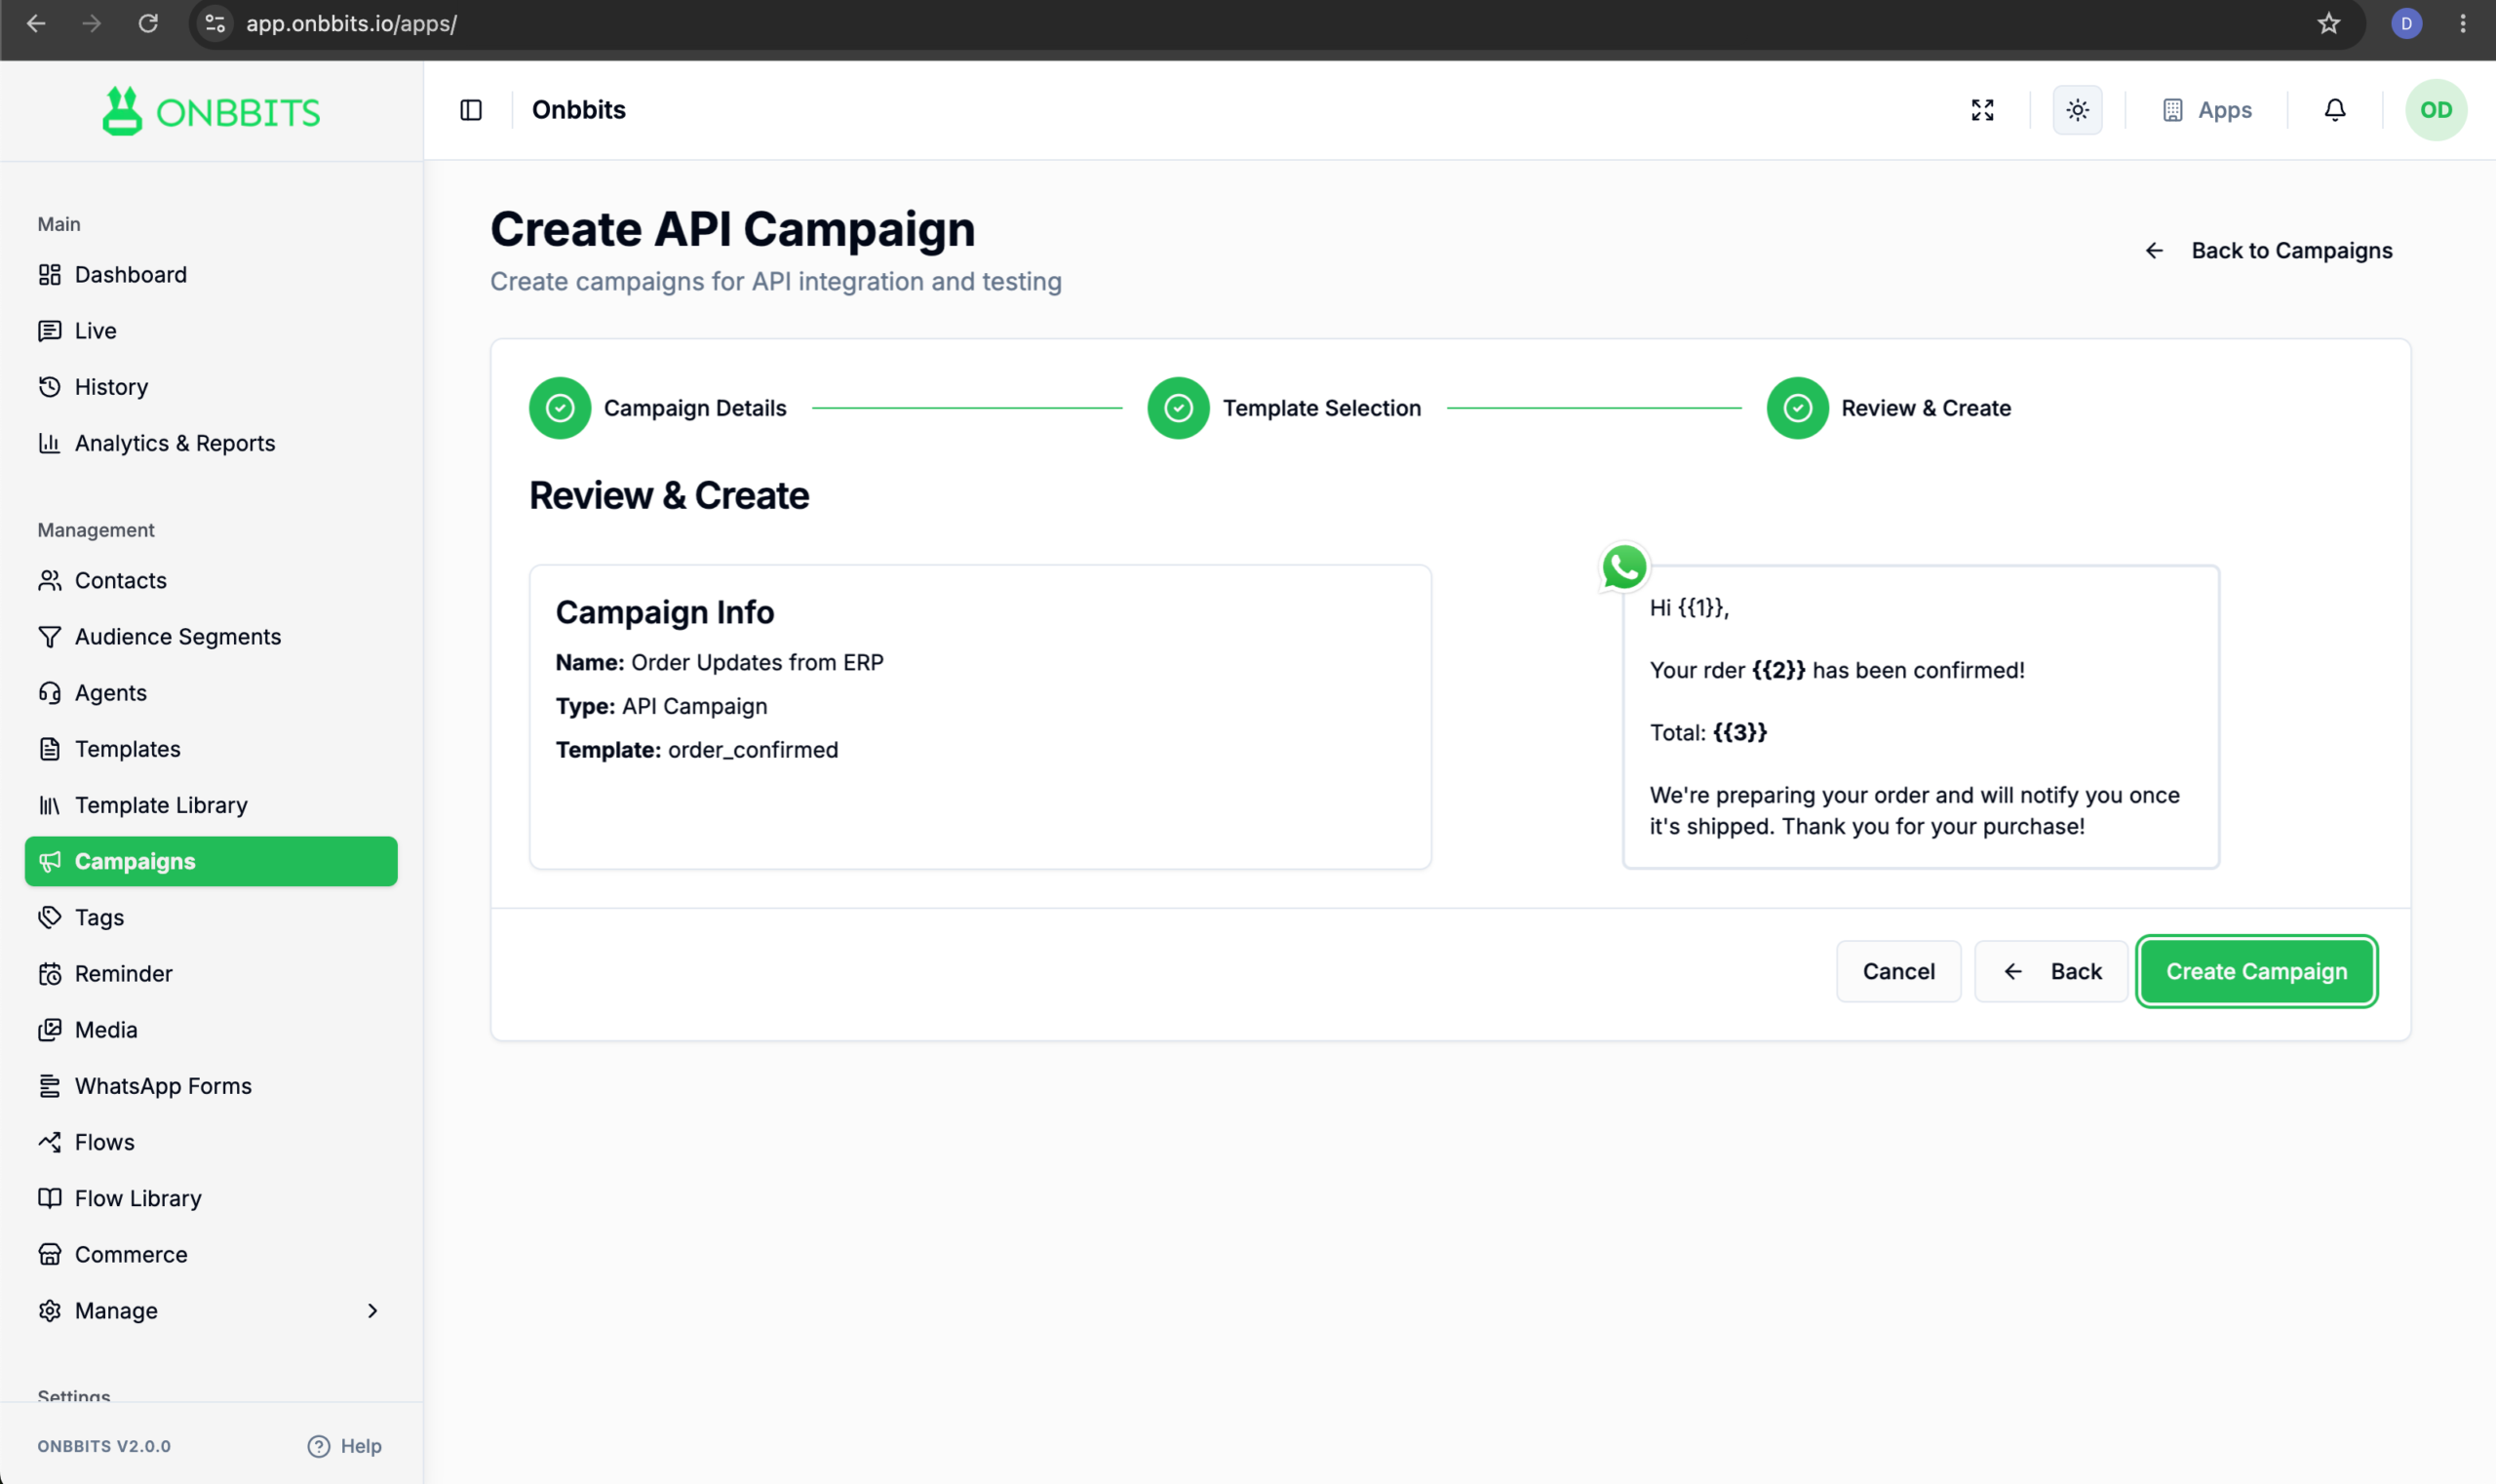
Once your API Campaign is created, you’ll need its request details to connect it to your own system.
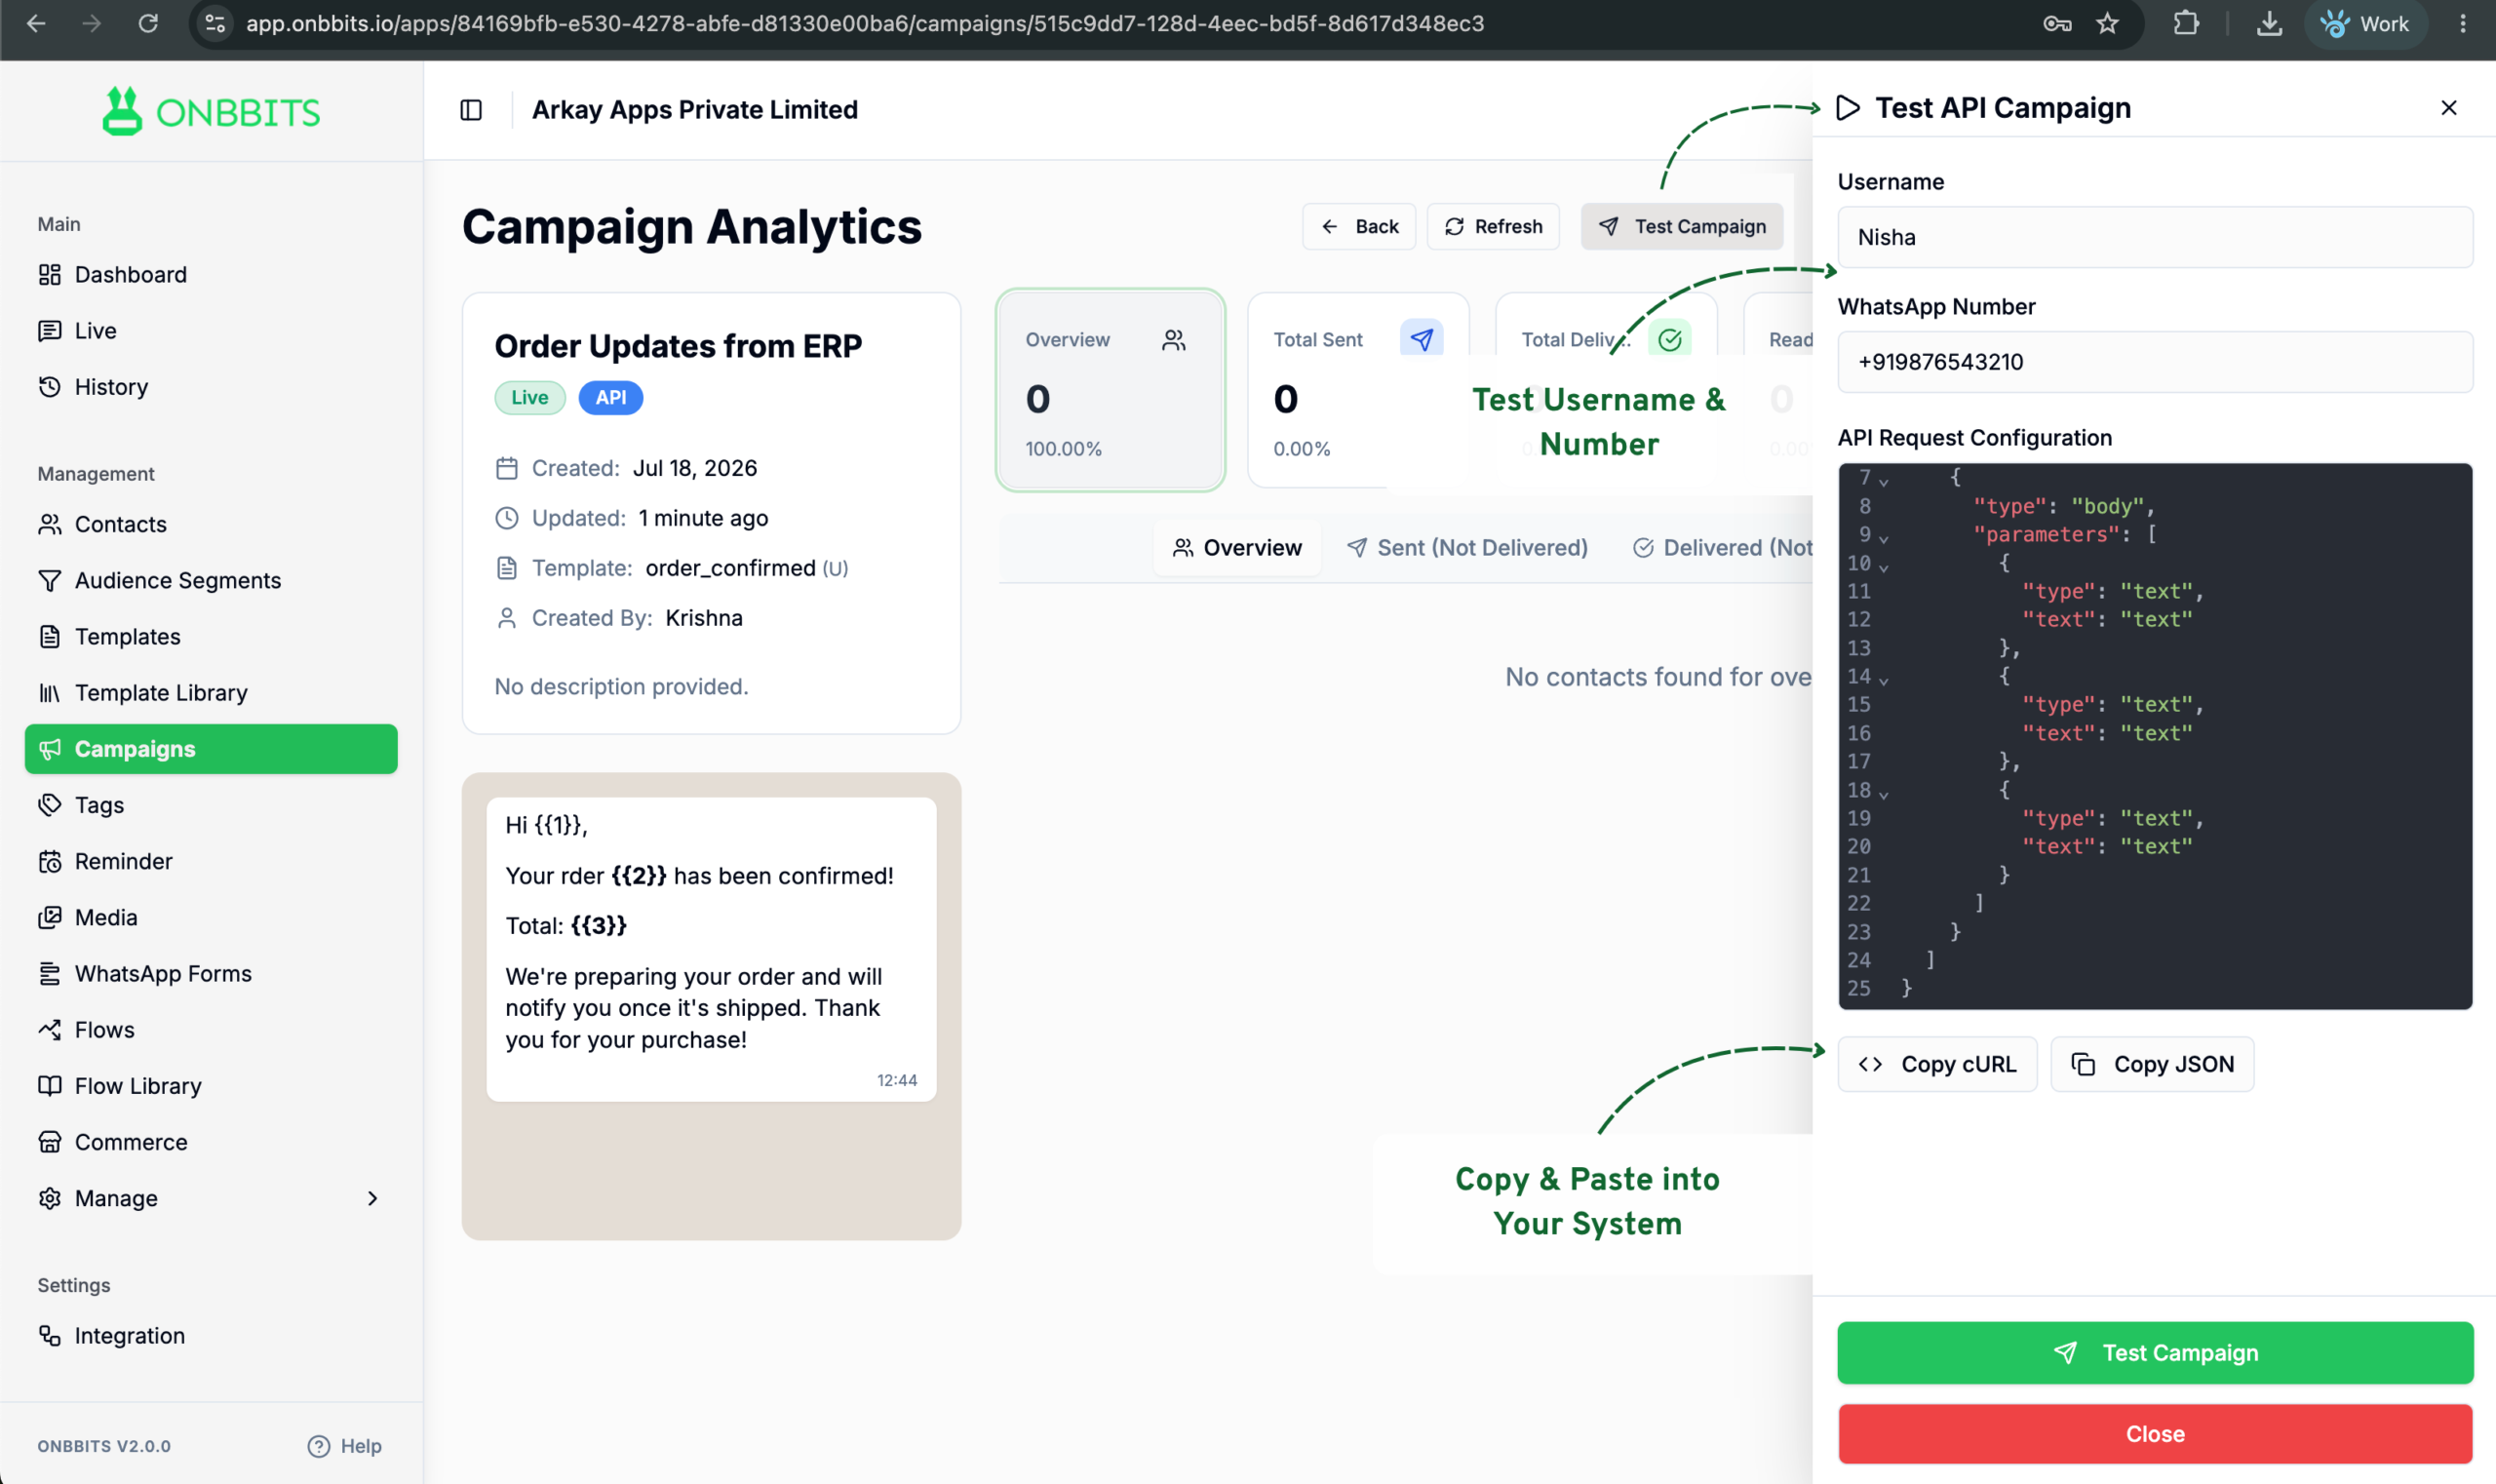
Your API Campaign appears on the Campaigns dashboard right away, ready for you to test and connect using the API Request Configuration.
					{
  "token": "YOUR_API_TOKEN", // Your OnBBits API Token
  "campaignName": "Lead Notification", // API Campaign Name
  "destination": "+919727077732", // Recipient's WhatsApp number
  "userName": "Onbbits Sales", // Contact Name
  "components": [
    {
      "type": "body",
      "parameters": [
        {
          "type": "text",
          "text": "John Doe" // Value for Variable {{1}}
        },
        {
          "type": "text",
          "text": "ABC Corporation" // Value for Variable {{2}}
        },
        {
          "type": "text",
          "text": "john@example.com" // Value for Variable {{3}}
        },
        {
          "type": "text",
          "text": "+919876543210" // Value for Variable {{4}}
        },
        {
          "type": "text",
          "text": "Product Inquiry" // Value for Variable {{5}}
        },
        {
          "type": "text",
          "text": "High Priority" // Value for Variable {{6}}
        }
      ]
    }
  ]
}
Your App Token is automatically included when you copy the cURL request. You only need to update it if you regenerate your API token.
Still Have Questions? Visit Our FAQ Page
Our support team is ready to assist you.
© 2026 ONBBITS. All rights reserved.