
How to Manage Opt-In and Opt-Out Settings

Onbbits comes with default keywords that opt contacts in and out, but you can change these to fit your business.

Managing Opt-In Keywords

By default, Onbbits opts someone in when they message Start or Opt In. To add your own keywords:

  1. Go to the sidebar, then Manage, then Opt-in Settings to find these settings.
  2. Type a new keyword into the Opt-in Keywords section and click Add.
  3. To remove a keyword, click the trash icon next to it.

Managing Opt-Out Keywords

By default, Onbbits opts someone out when they message STOP, Opt Out, or OUT. To add your own:
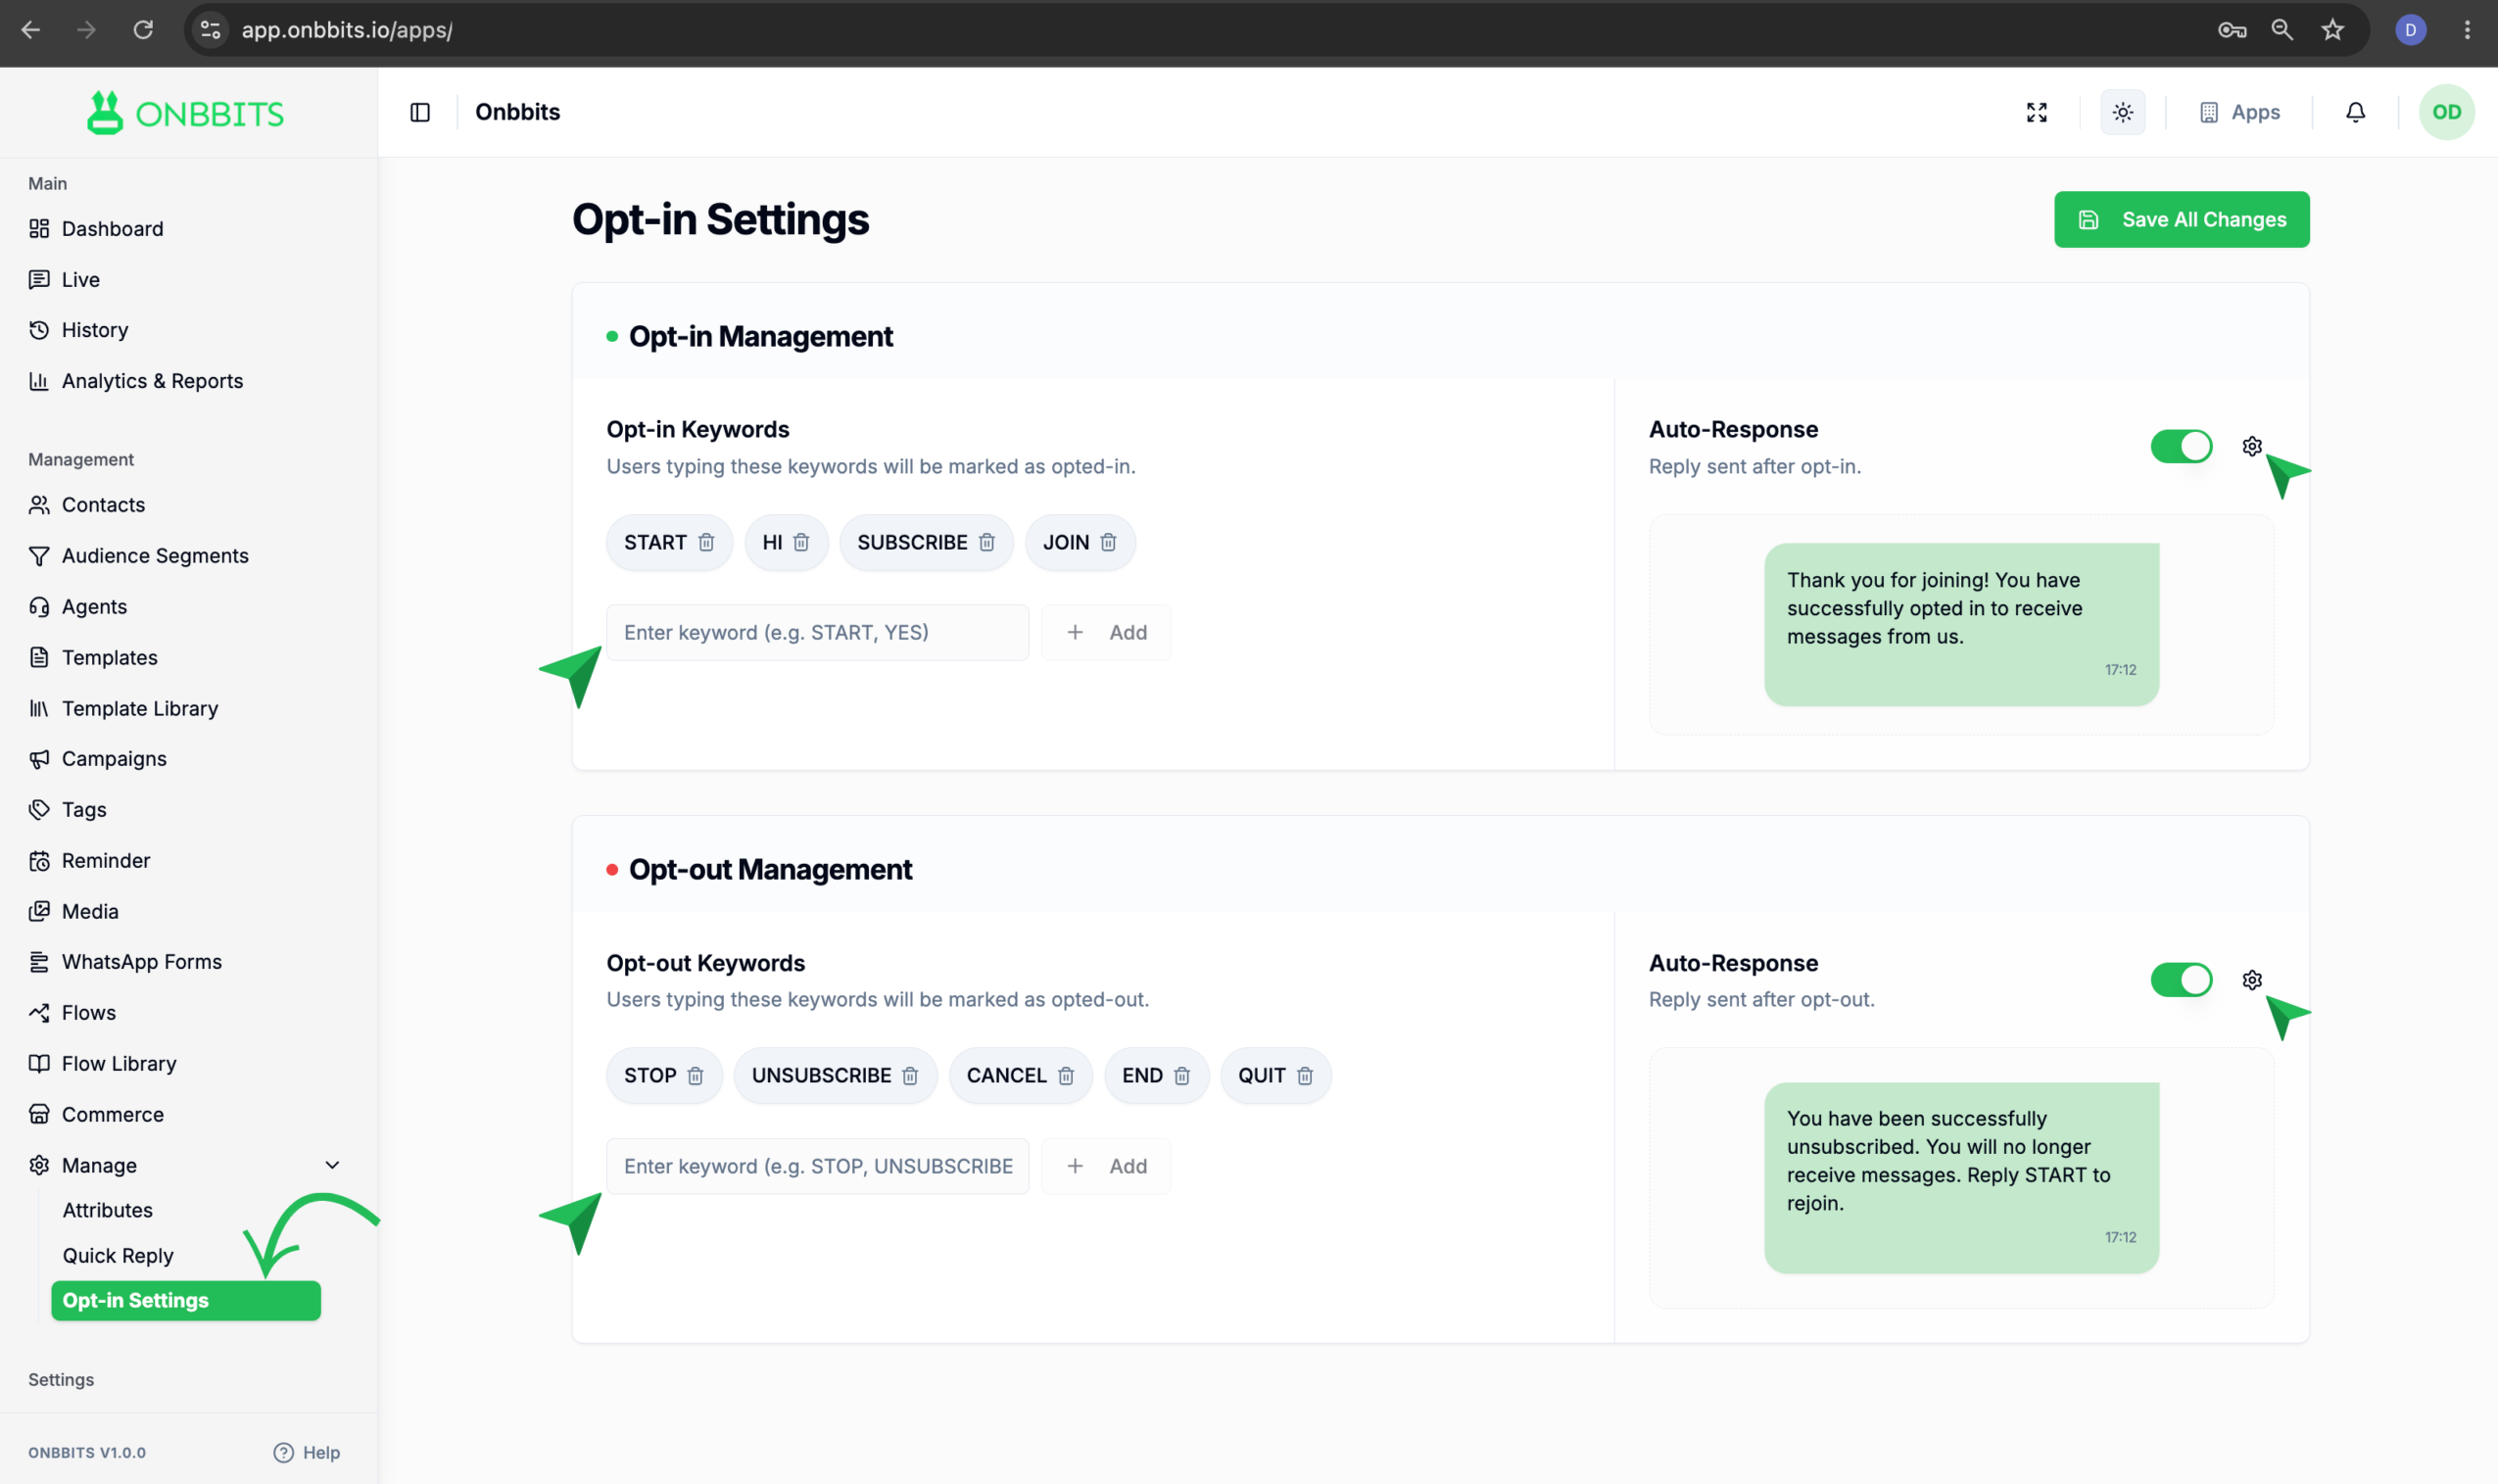
  1. Under Opt-out Management, find the Opt-out Keywords section.
  2. Type a new keyword into the field and click Add.
  3. To remove a keyword, click the trash icon next to it.

Setting Up Auto-Responses

Onbbits can automatically send a message back to the customer when they opt in or out, so they know it worked. 

  1. Turn on the Auto-Response toggle for opt-in, opt-out, or both.
  2. Click the gear icon next to the toggle to customise the message.
Click Save All Changes in the top right after making any updates. Changes won’t apply until you save.

Opting a Contact In or Out Manually

Sometimes you’ll want to change a contact’s opt-in status yourself, without waiting for them to message a keyword. You can do this right from the Contact Info panel, whether you’re in a live chat or looking at chat history.
  1. Open the contact’s Contact Info panel from chat or chat history.
  2. Find the status badge under their name — it shows Opted In or Opted Out.
  3. Click the badge to switch their status.
Related Articles

How to Add and Update a Contact

How to Import and Export Contacts

How to Search and Filter Contacts

What Is a Contact in OnBBits?

Understanding Contact Opt-In and Opt-Out Rules

Still need help?

Our support team is ready to assist you.

© 2026 ONBBITS. All rights reserved.