How to Import and Export Contacts

If your contacts are stored elsewhere, you can easily bring them into Onbbits. This article covers importing contacts in bulk and exporting your contact list when you need a copy outside Onbbits.
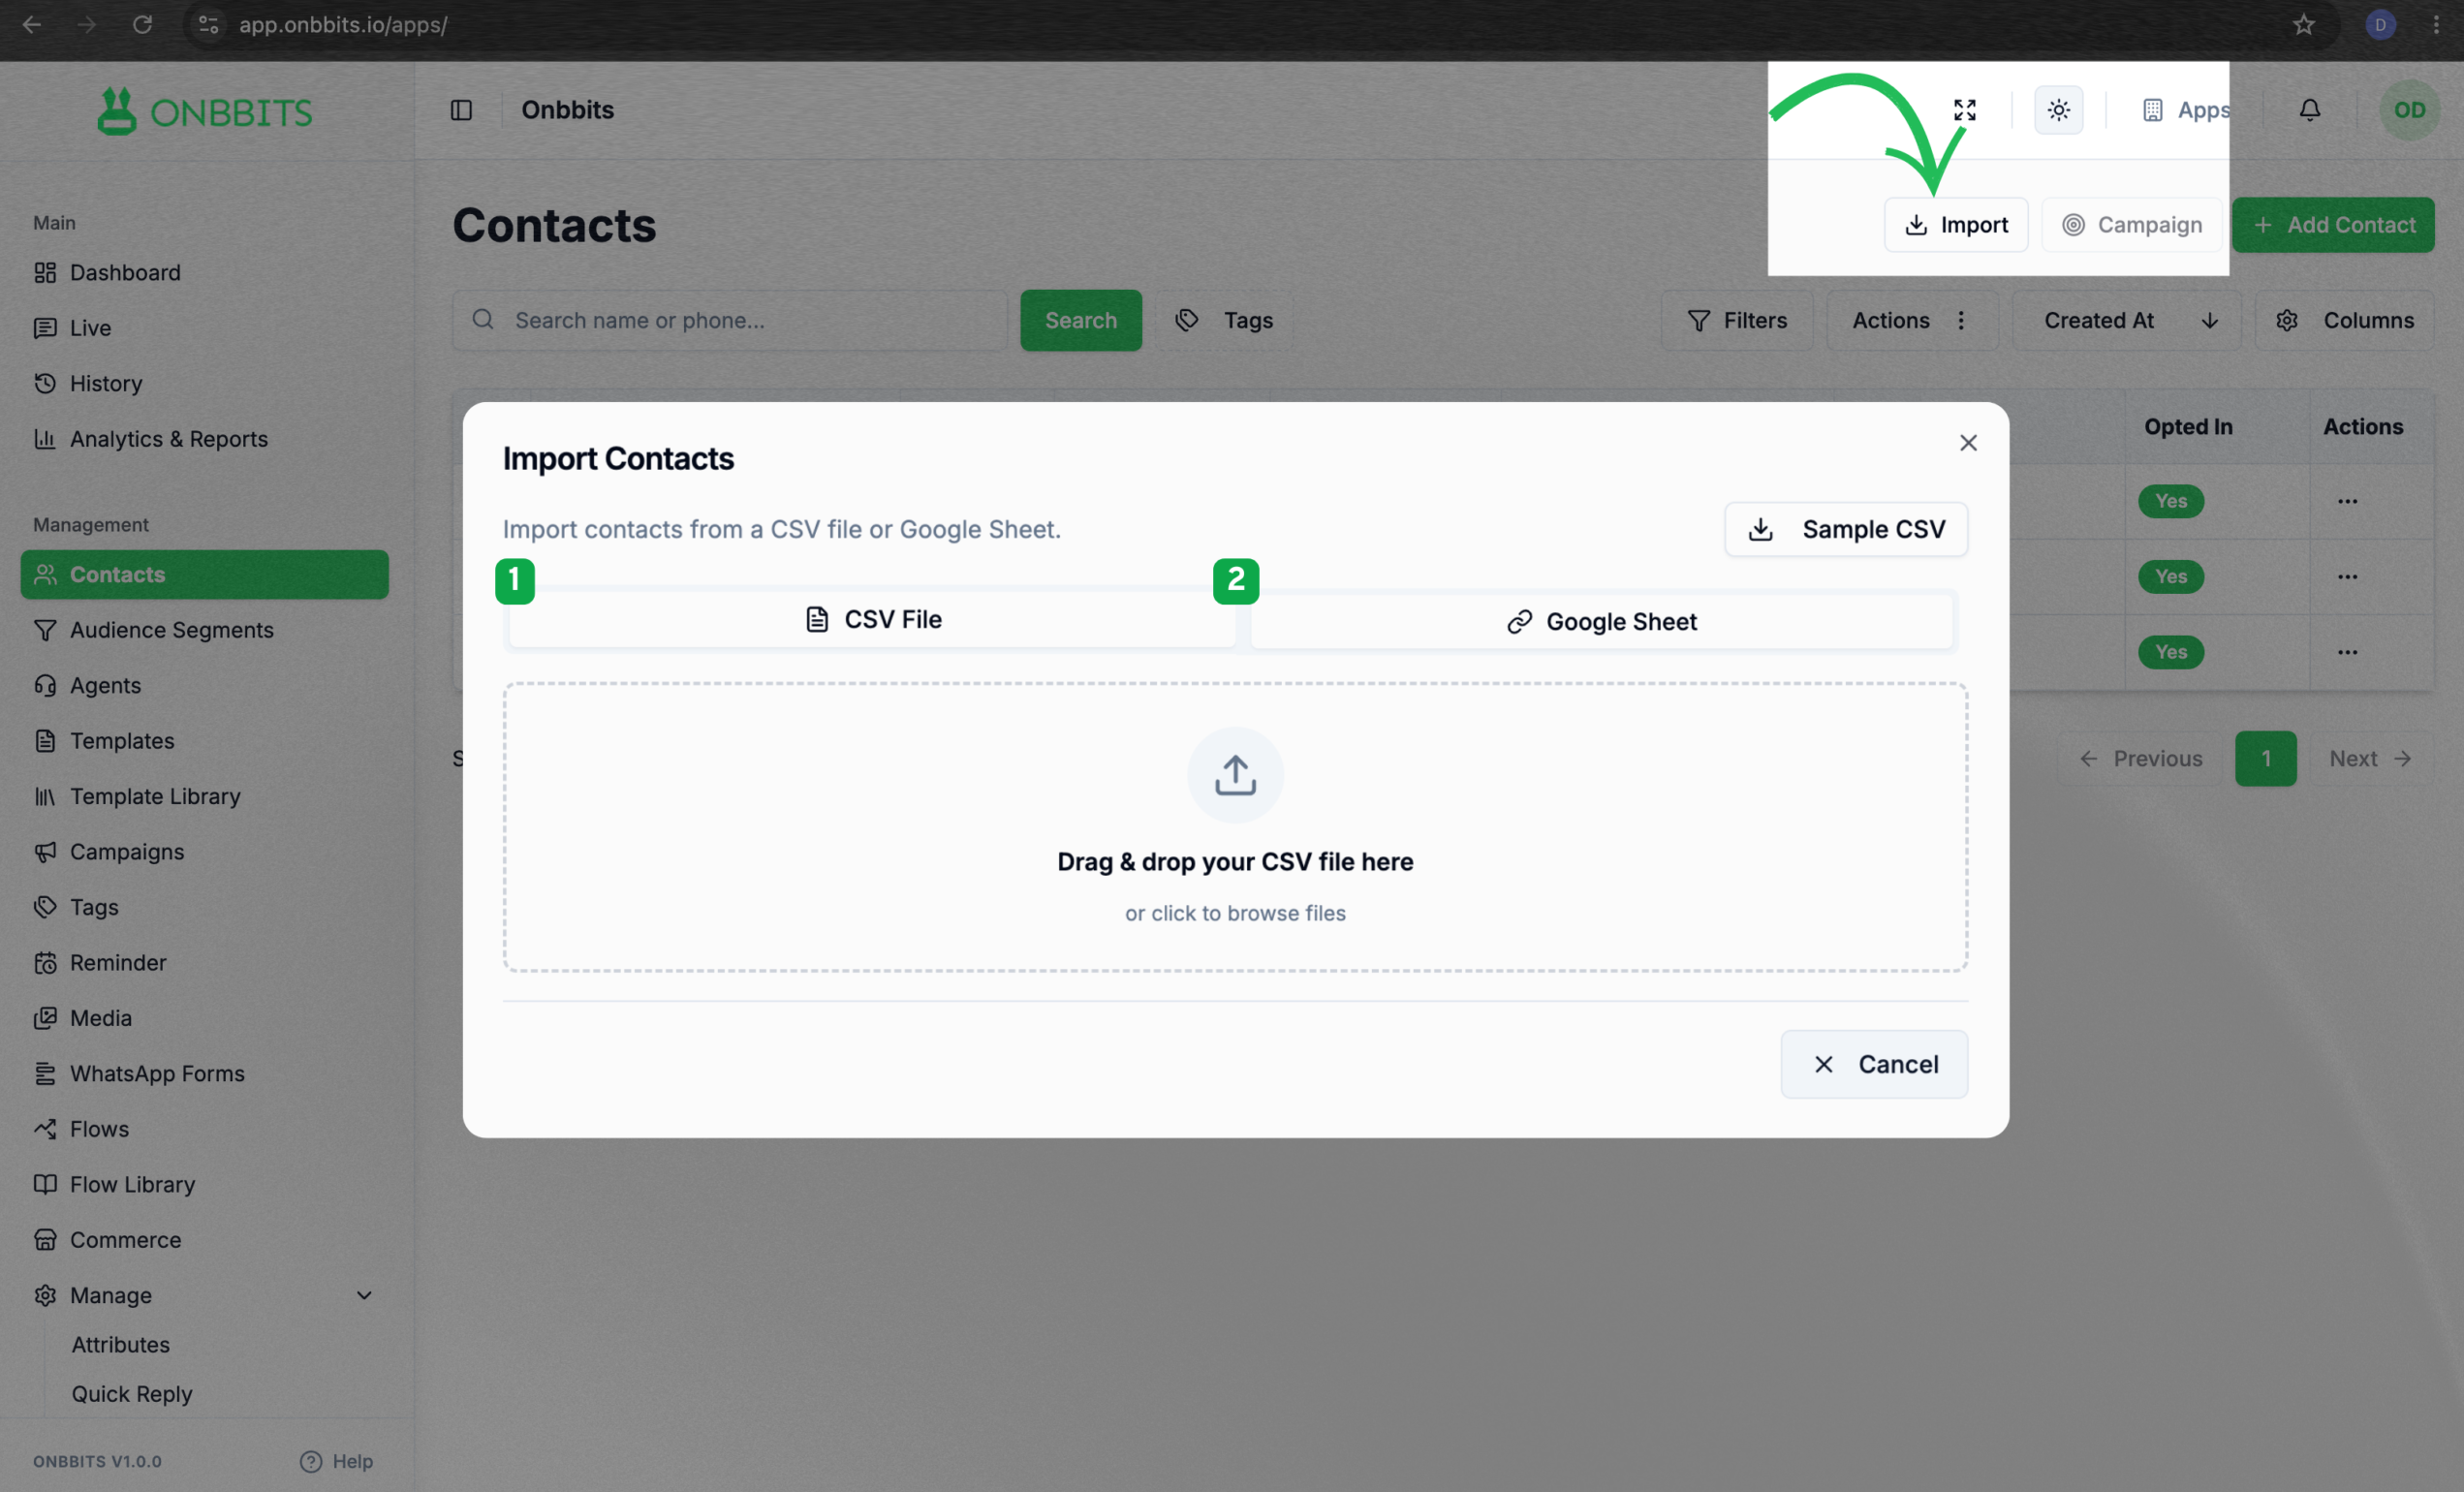
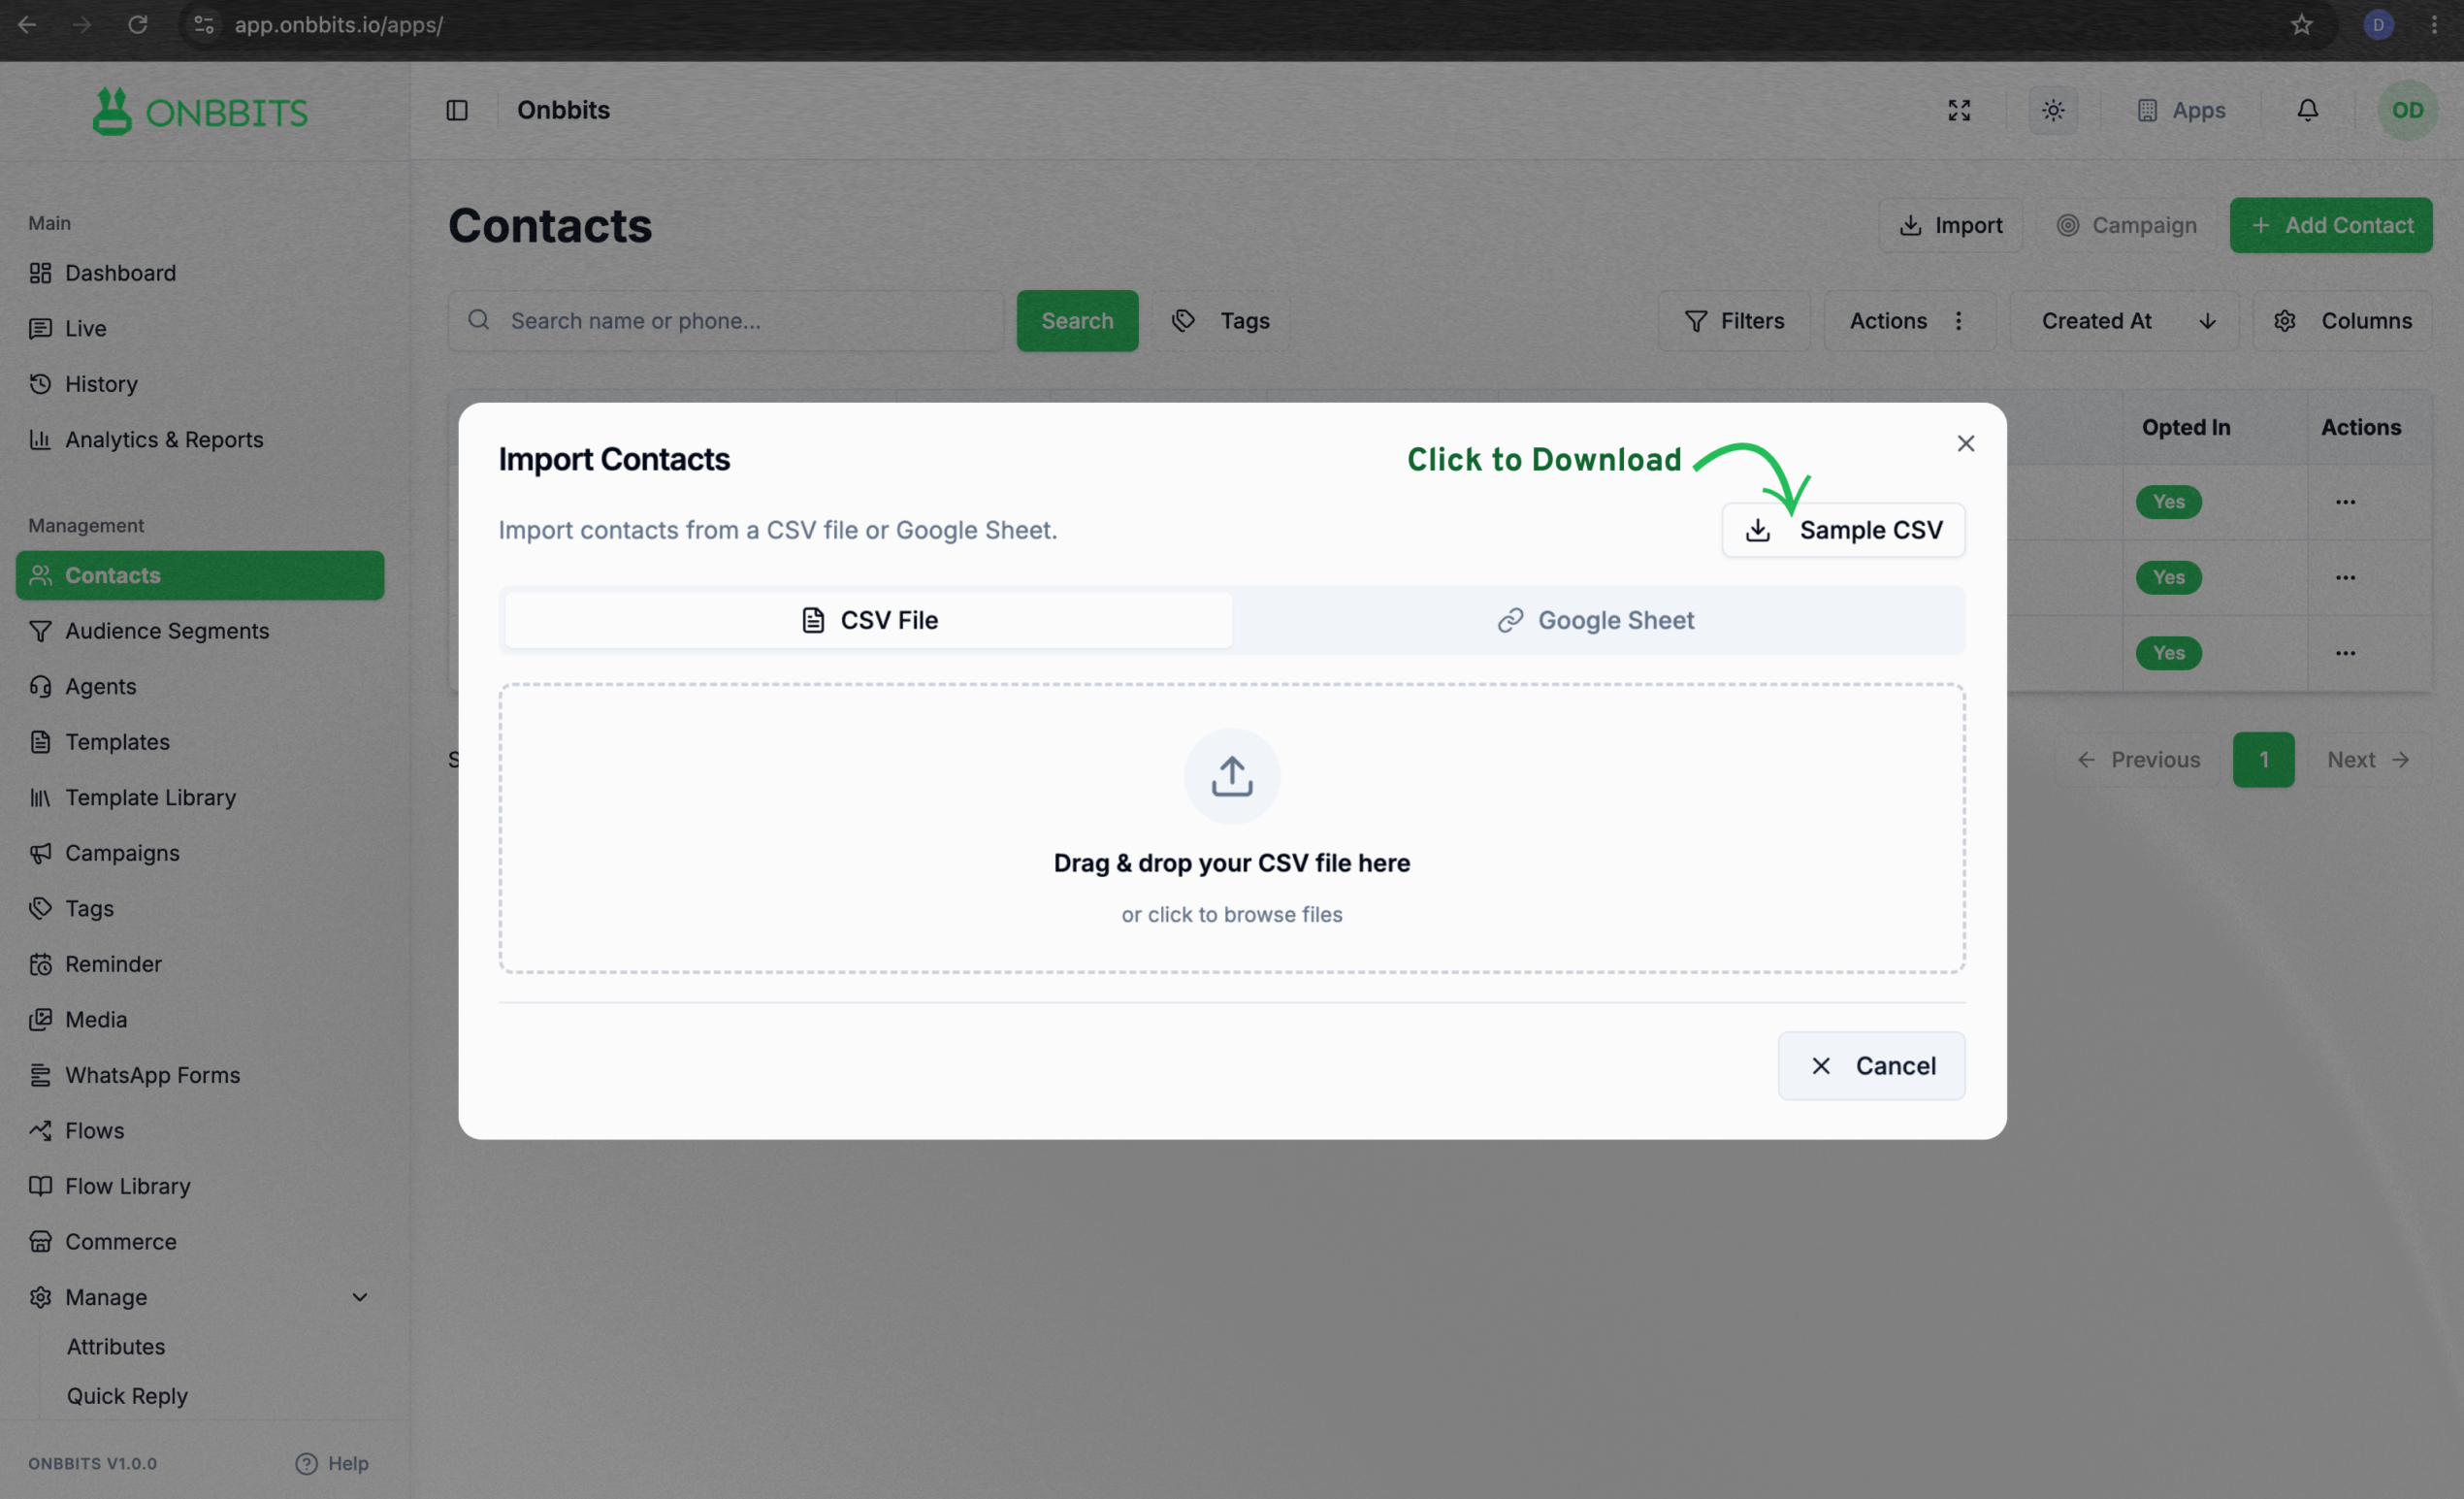
Importing Contacts

  1. Go to Contacts and click Import.
  2. Choose how you want to import: CSV or Google Sheets.

Importing via CSV

  1. Download the sample CSV file provided, and match your file’s format to it.
  2. Upload your CSV file.
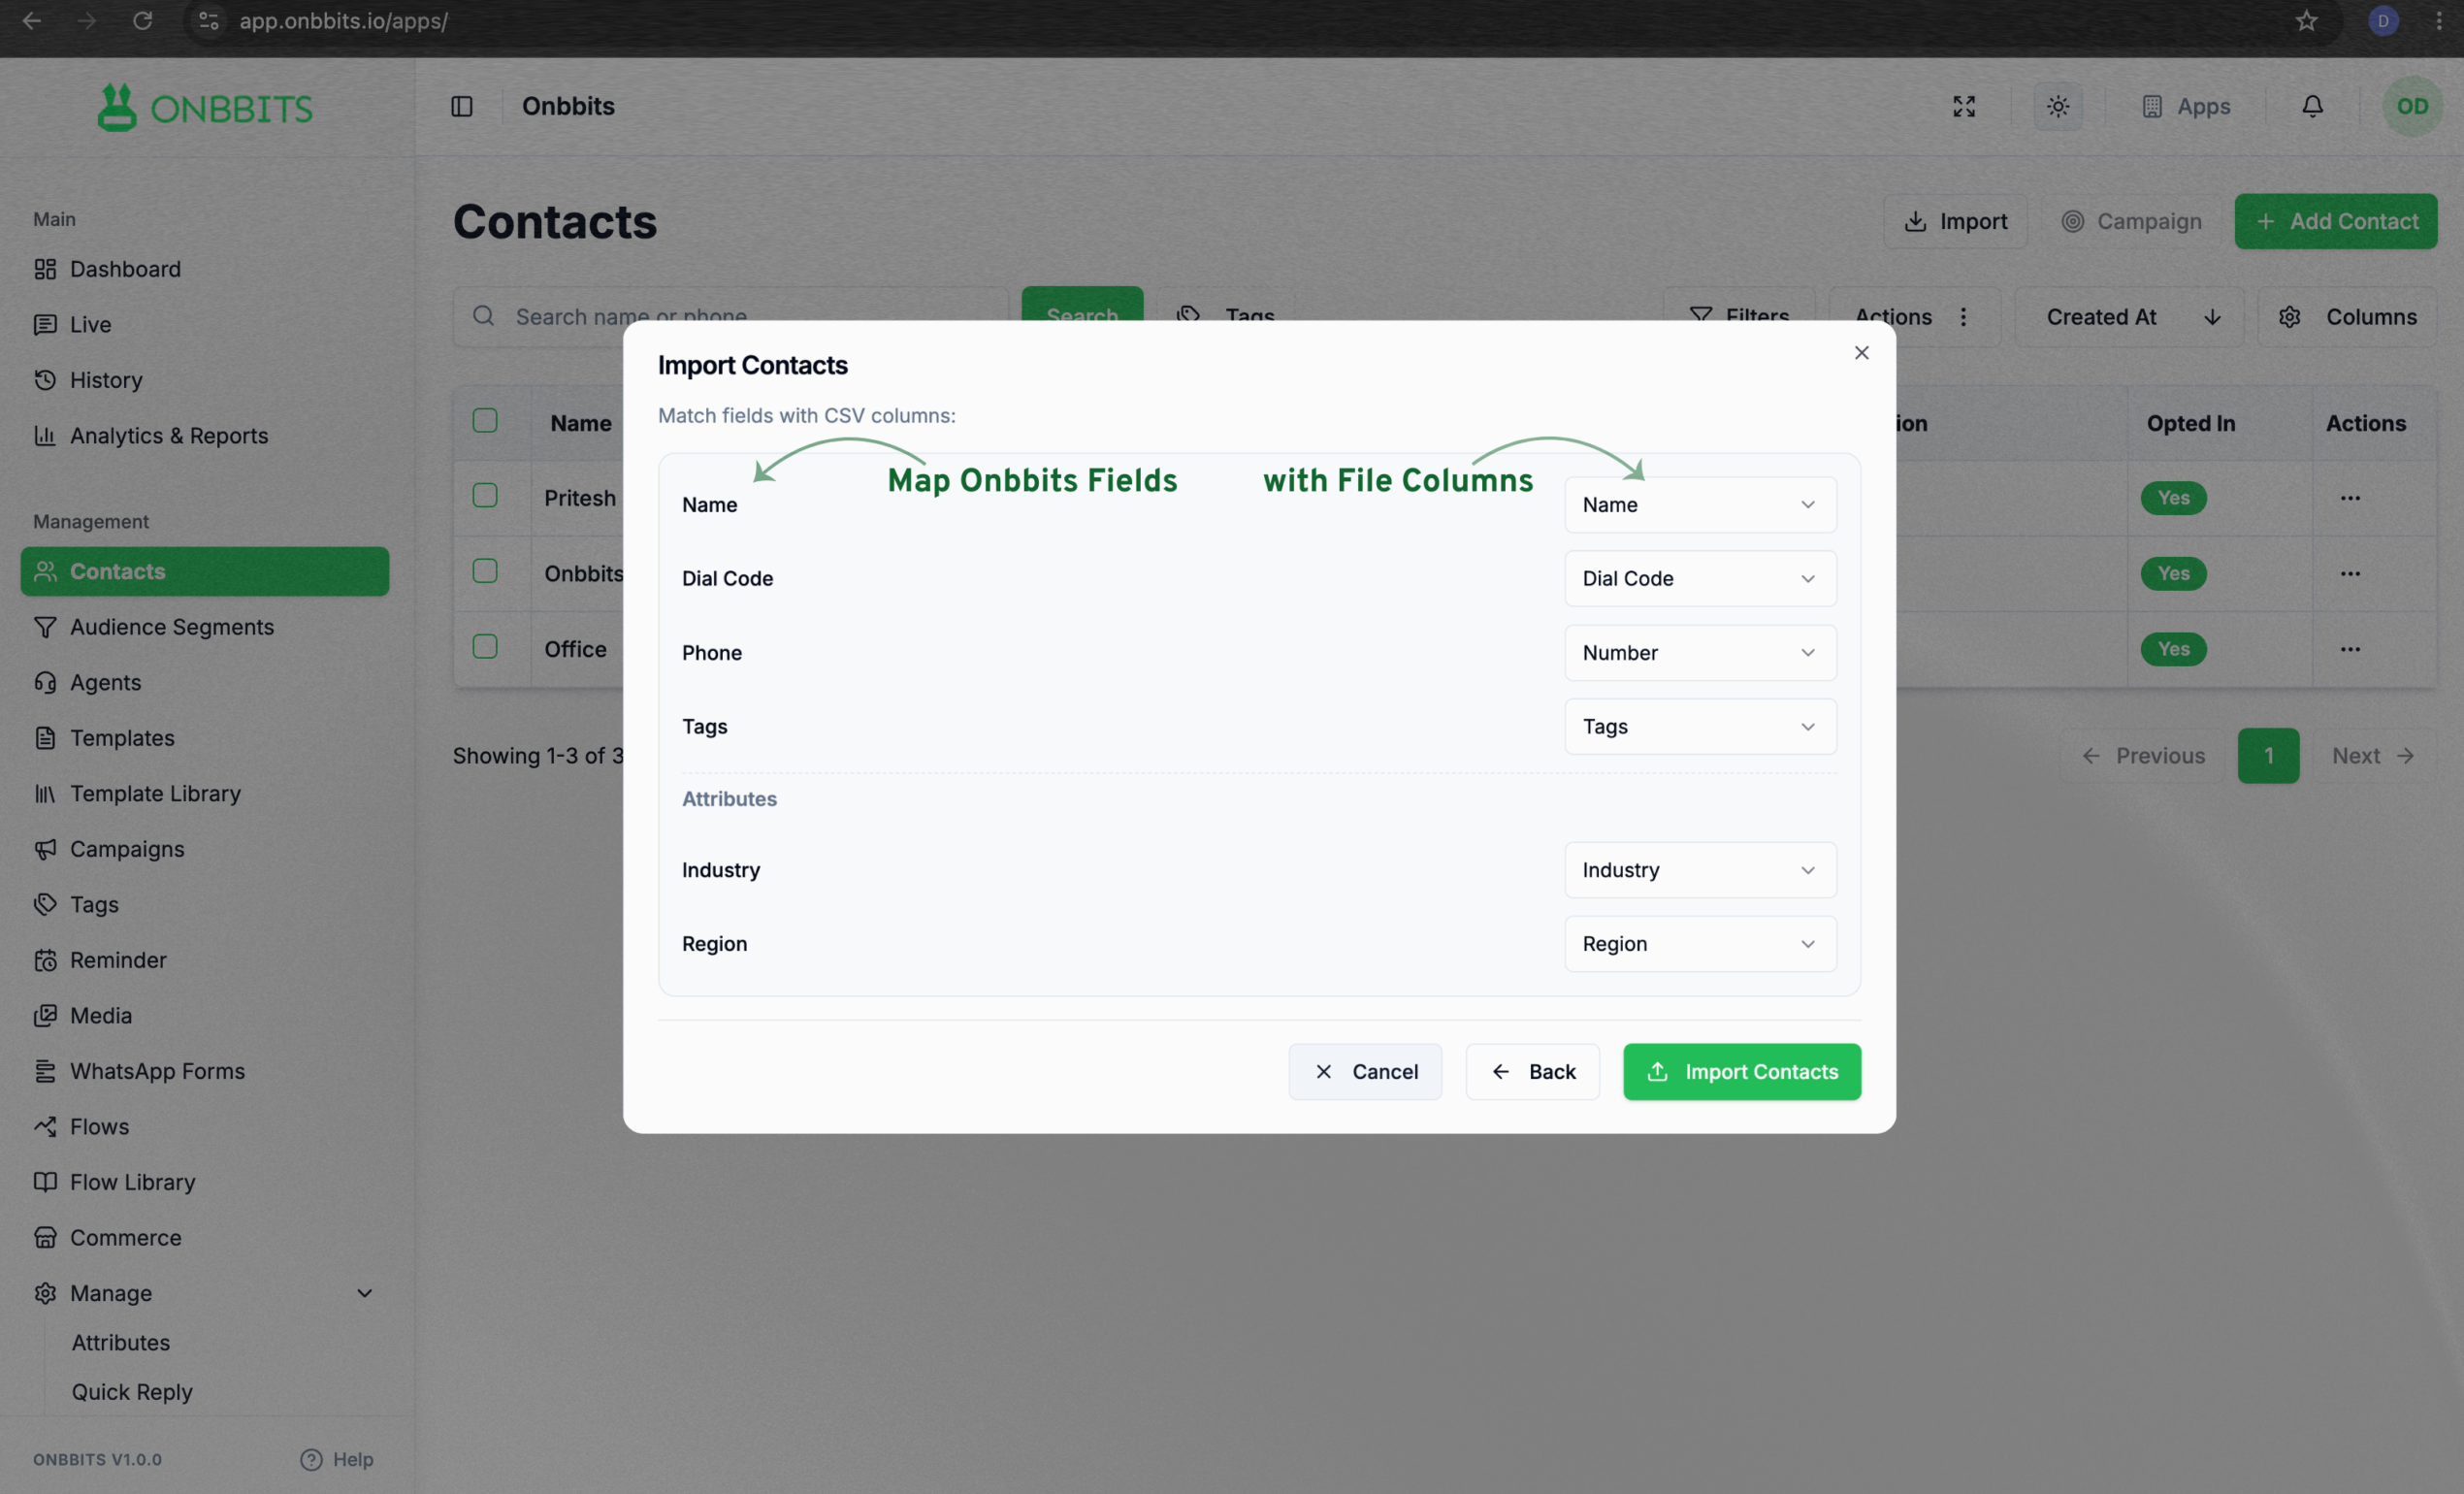
  1. Map your file’s columns to the right fields — Name, Phone Number and Dialcode are required, while Tags and Attributes are optional.
  2. Confirm the import.

Importing via Google Sheets

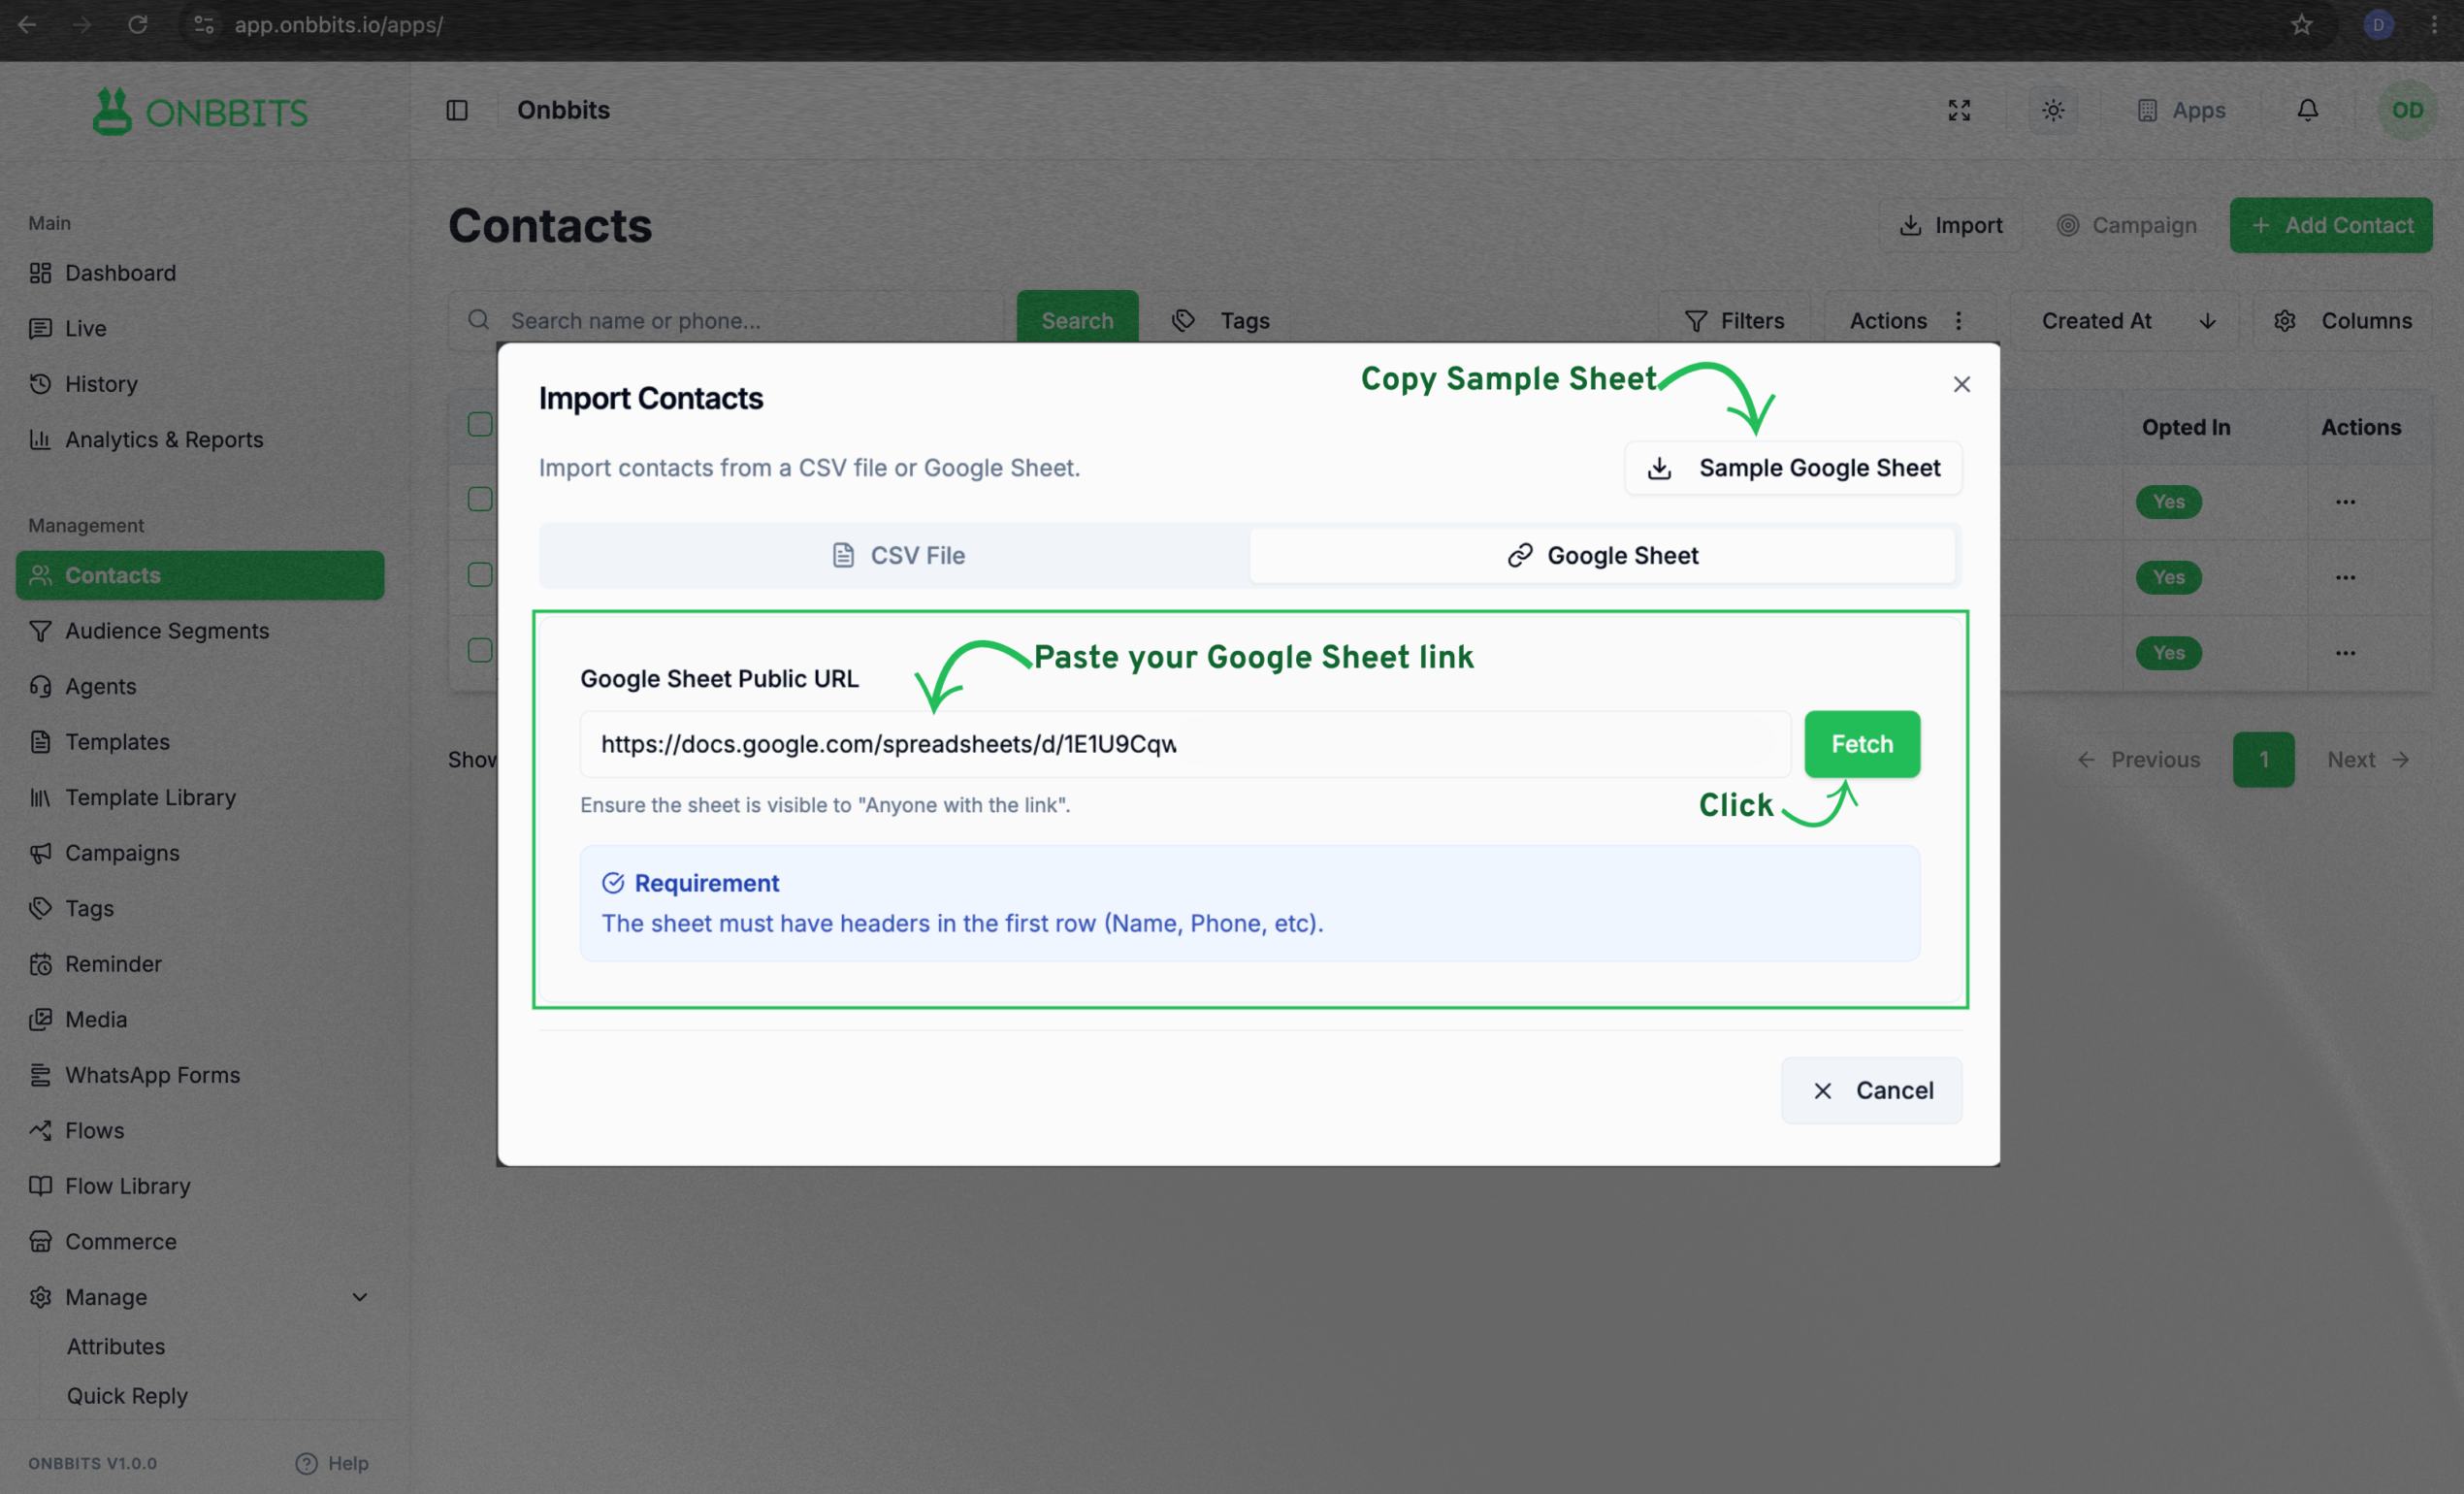
  1. Click the sample Google Sheet button and copy the sample sheet to your own account.
  2. Add your contacts to the copied sheet.
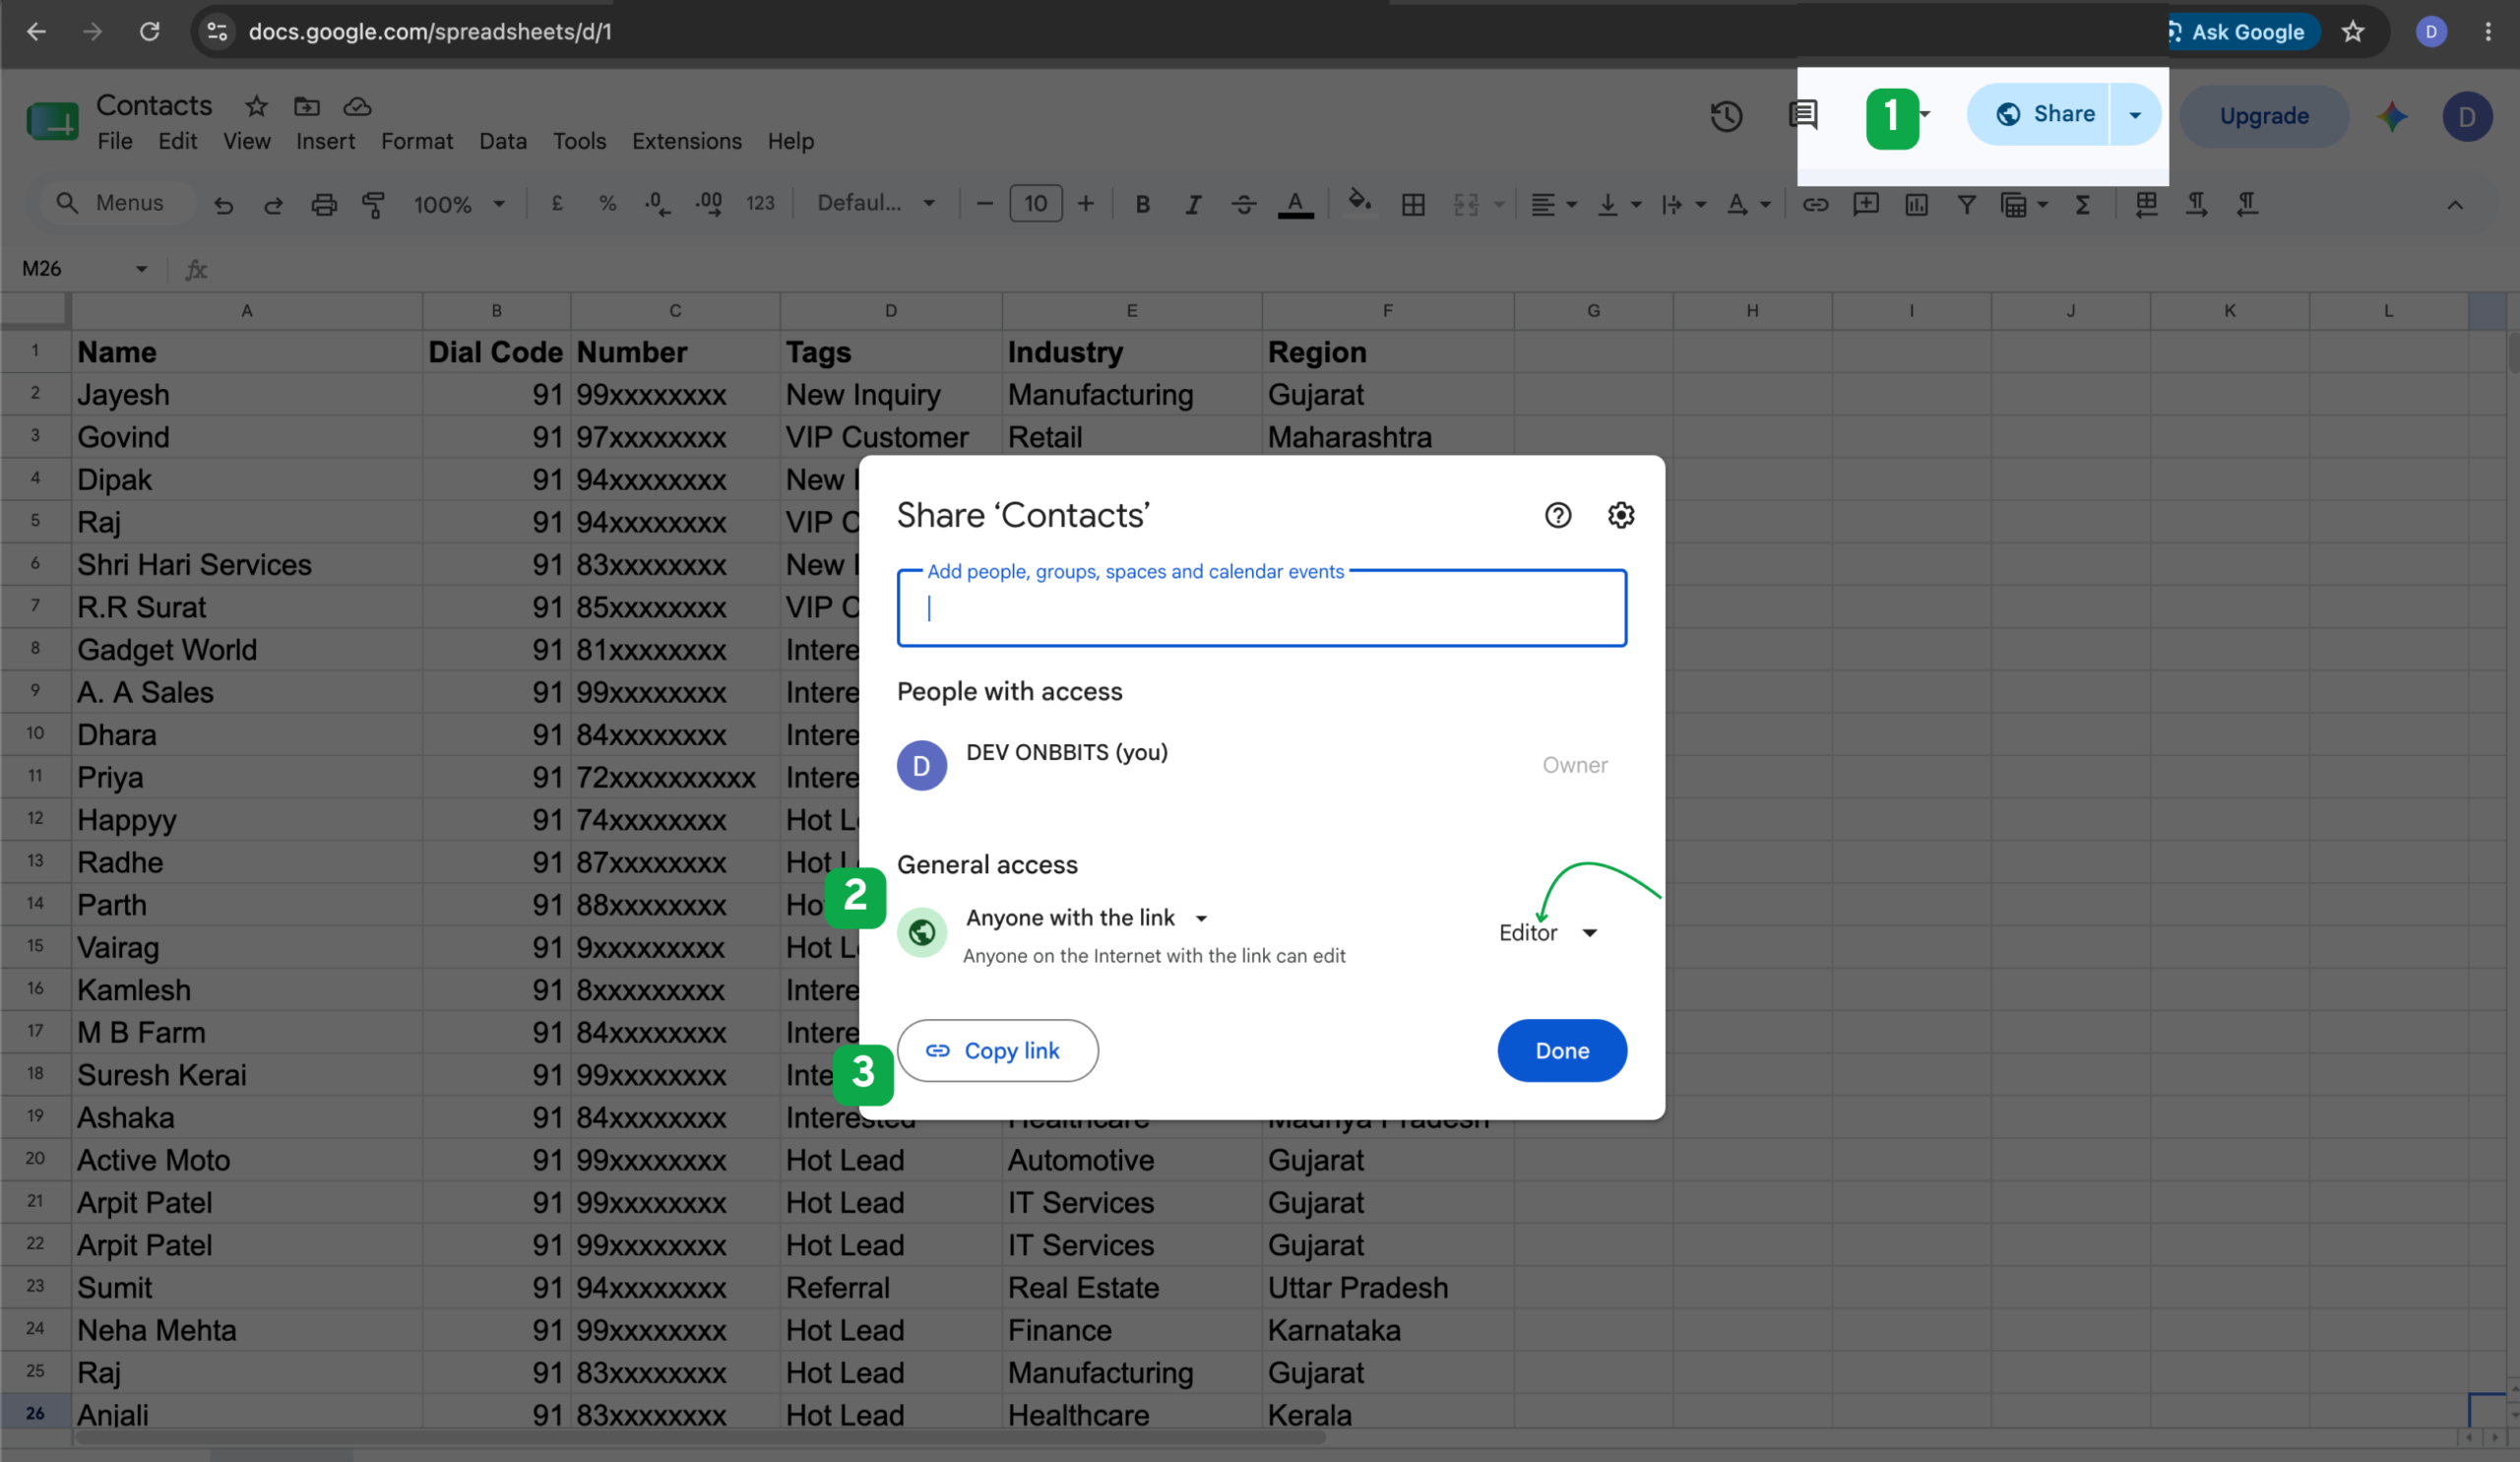
  3. Make sure the sheet’s sharing setting is set to Anyone with the link – Editor, so Onbbits can read it.
  1. Paste the sheet link into Onbbits and click Fetch.
  2. Map the columns the same way you would for CSV.
  3. Confirm the import.
Important

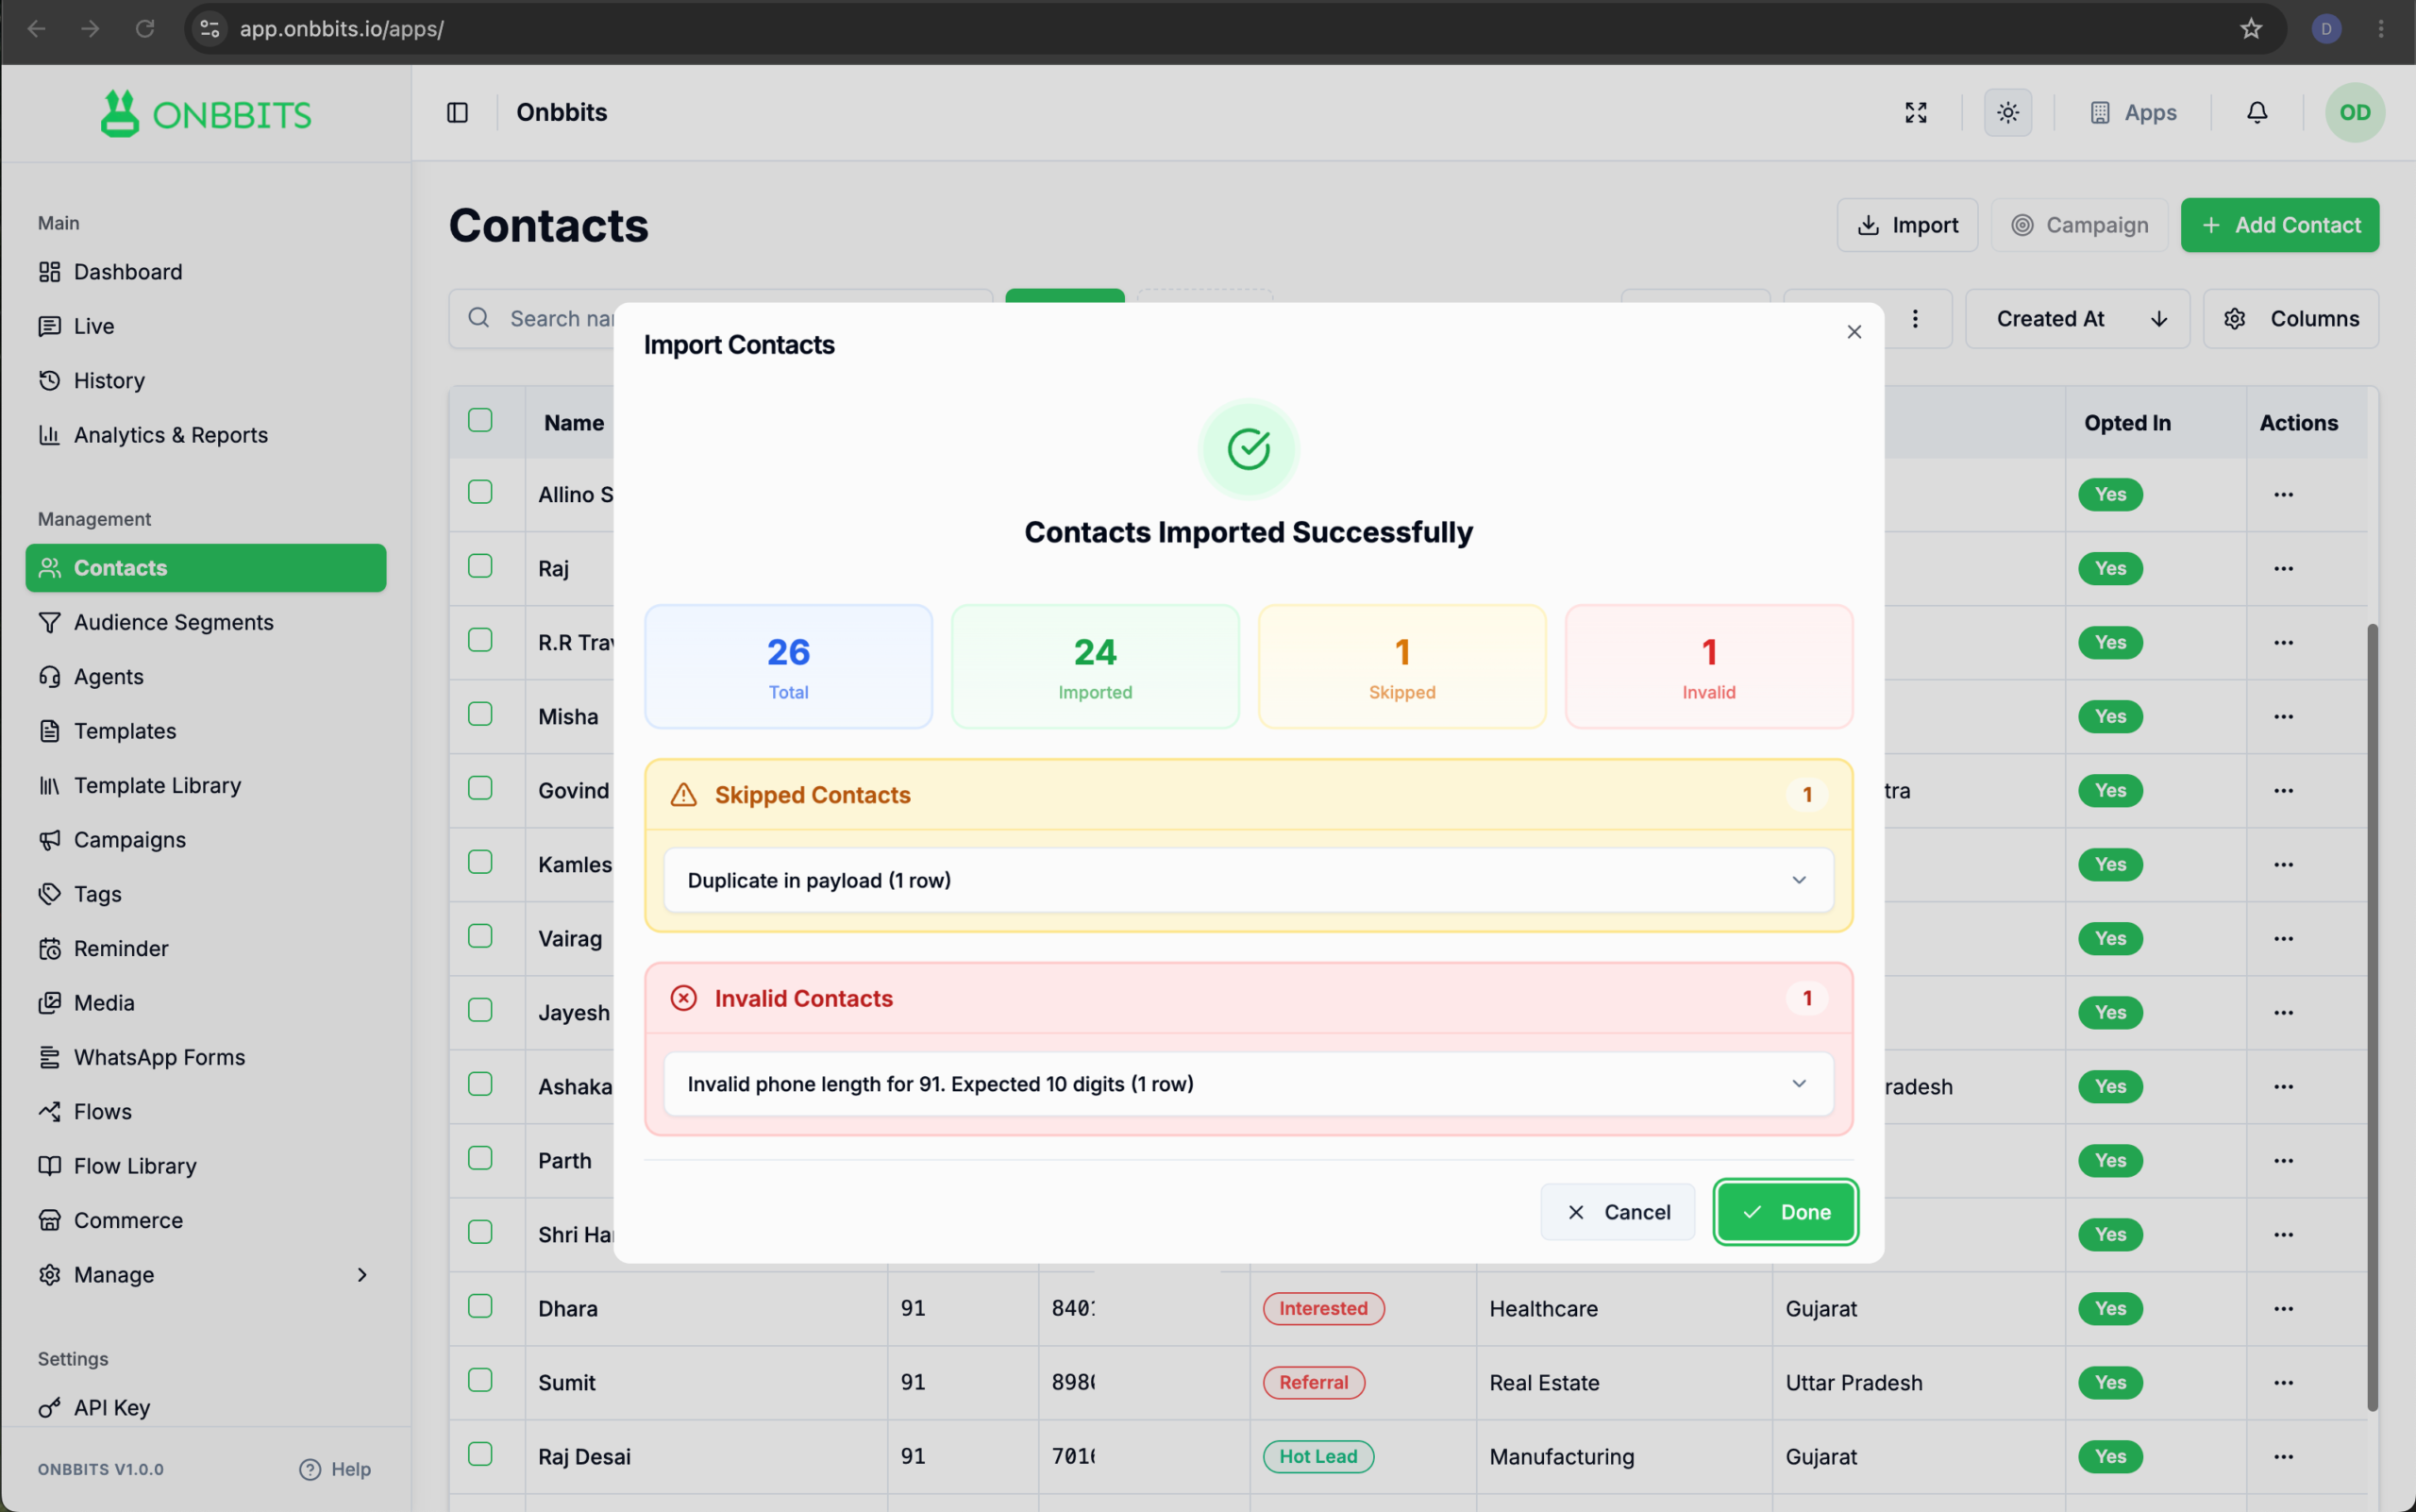
Reading the Import Result

Once the import finishes, you’ll see a summary showing:

Exporting Contacts

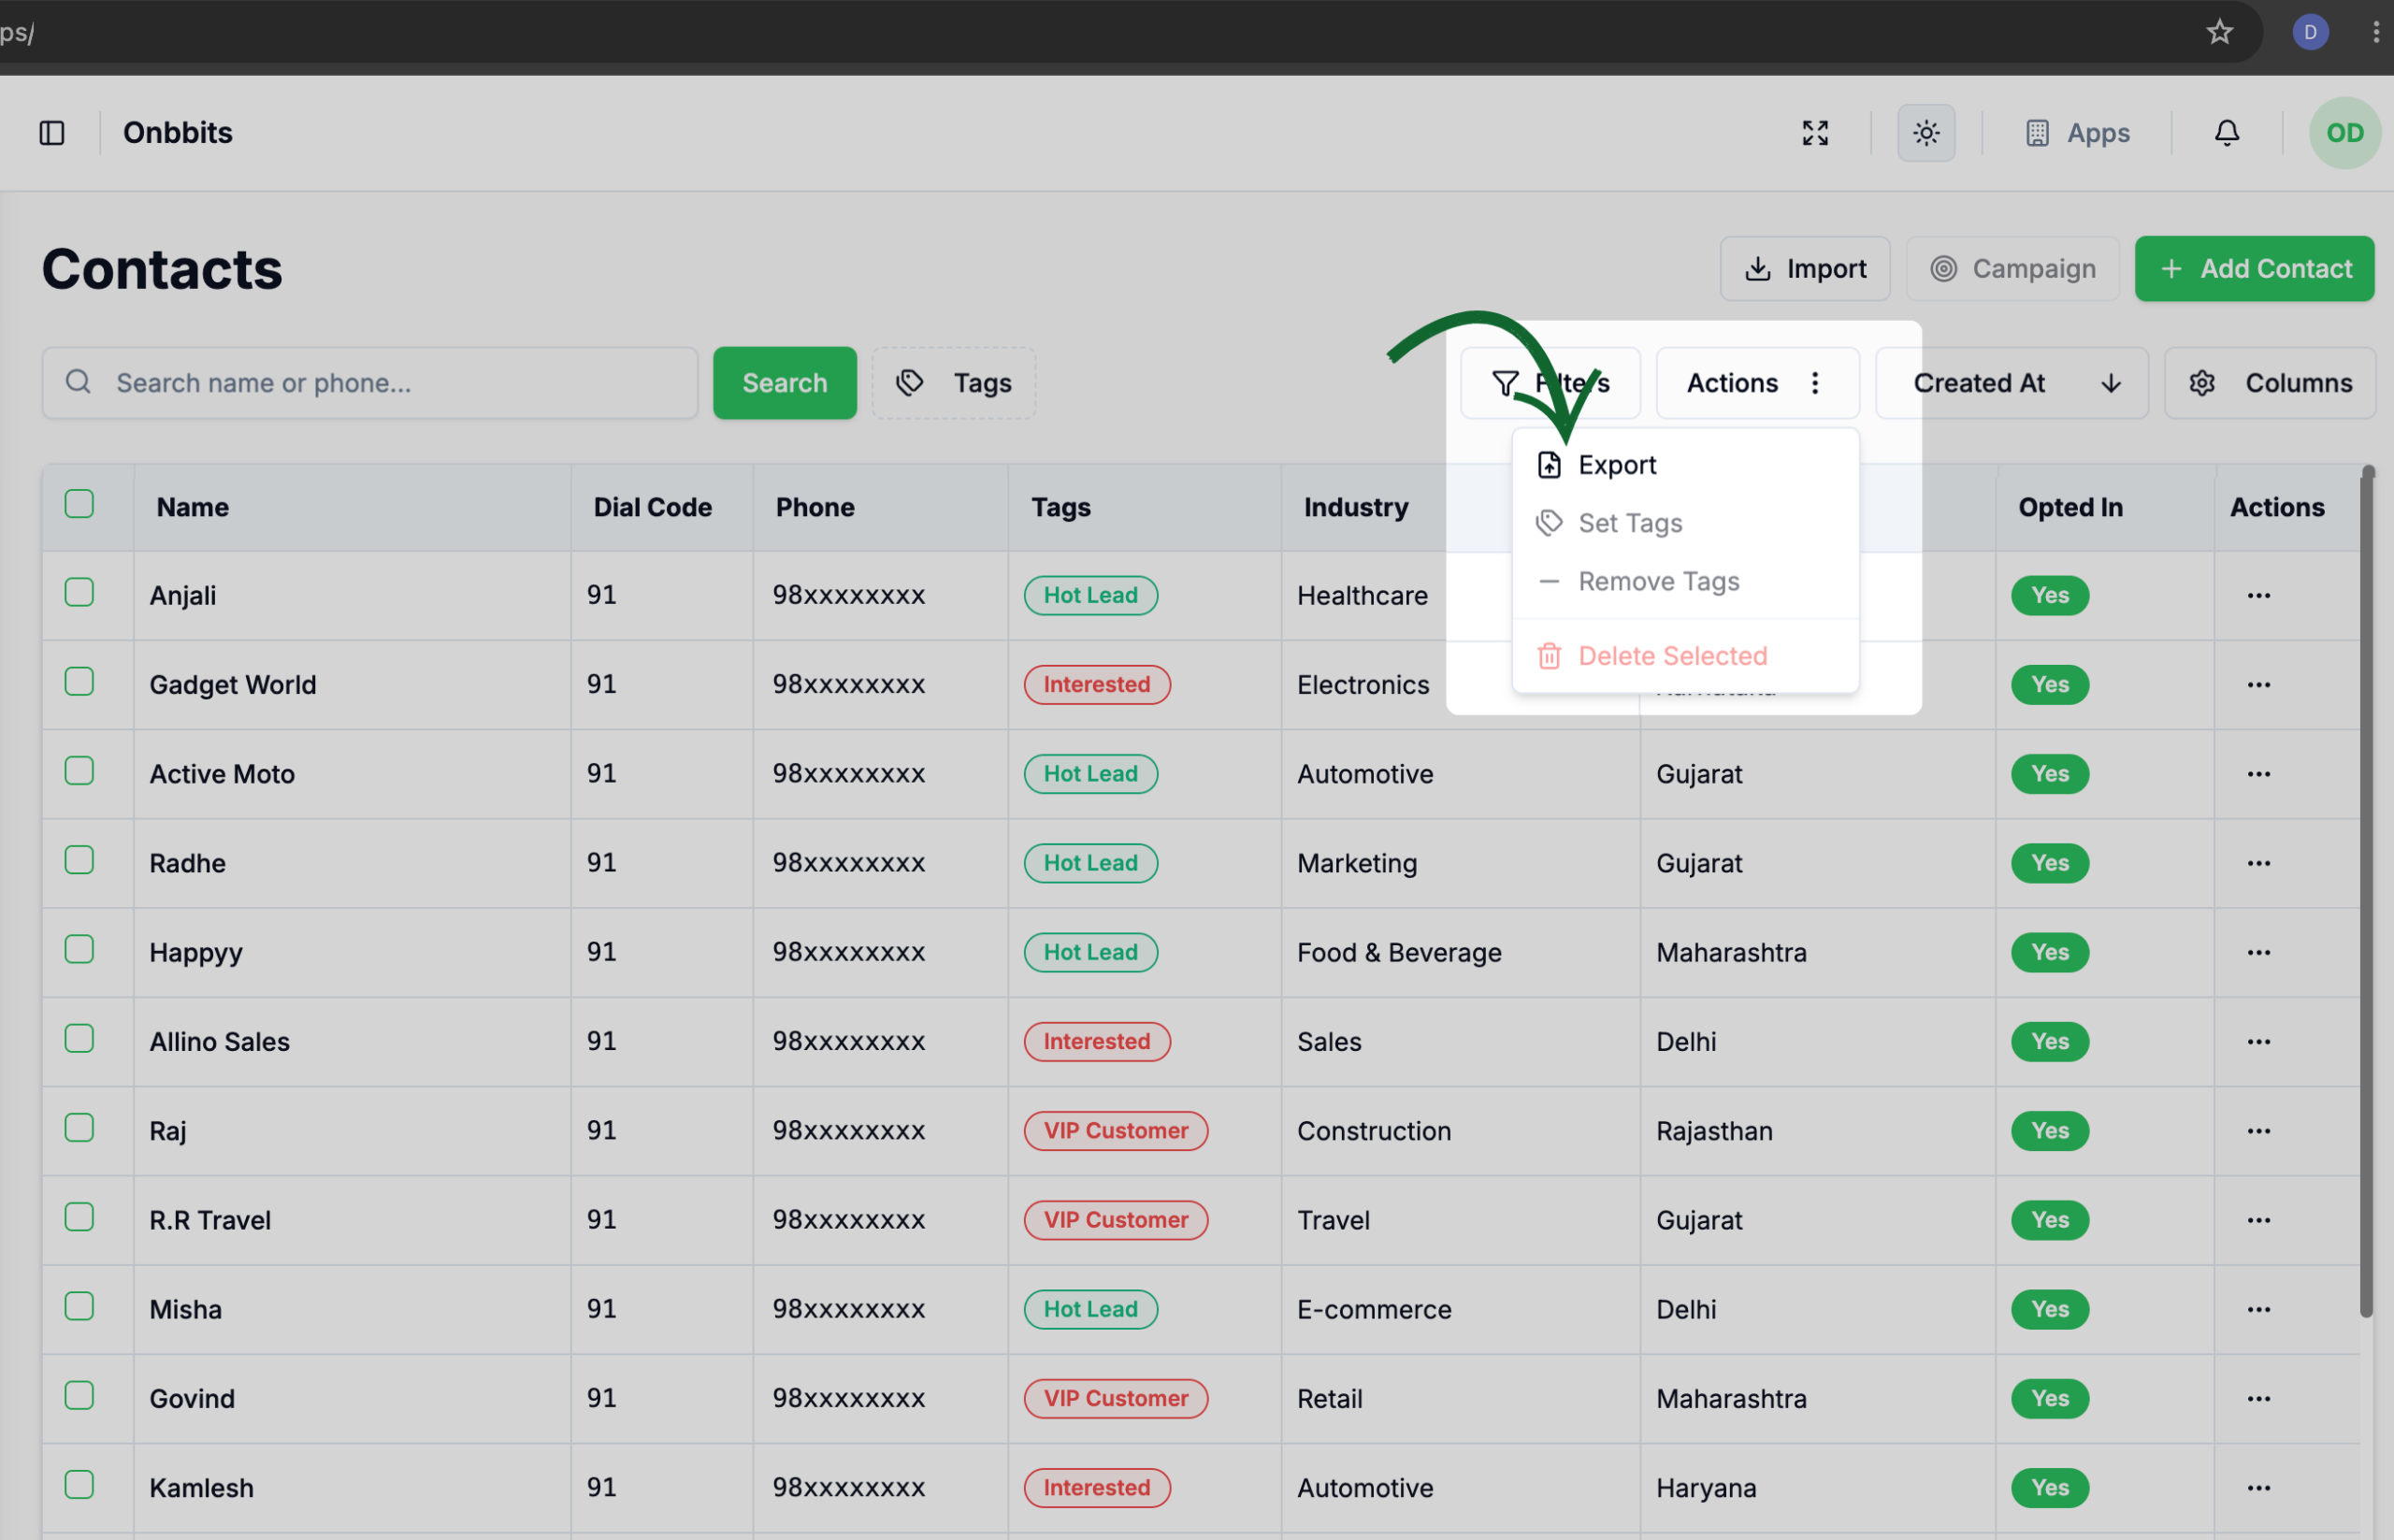
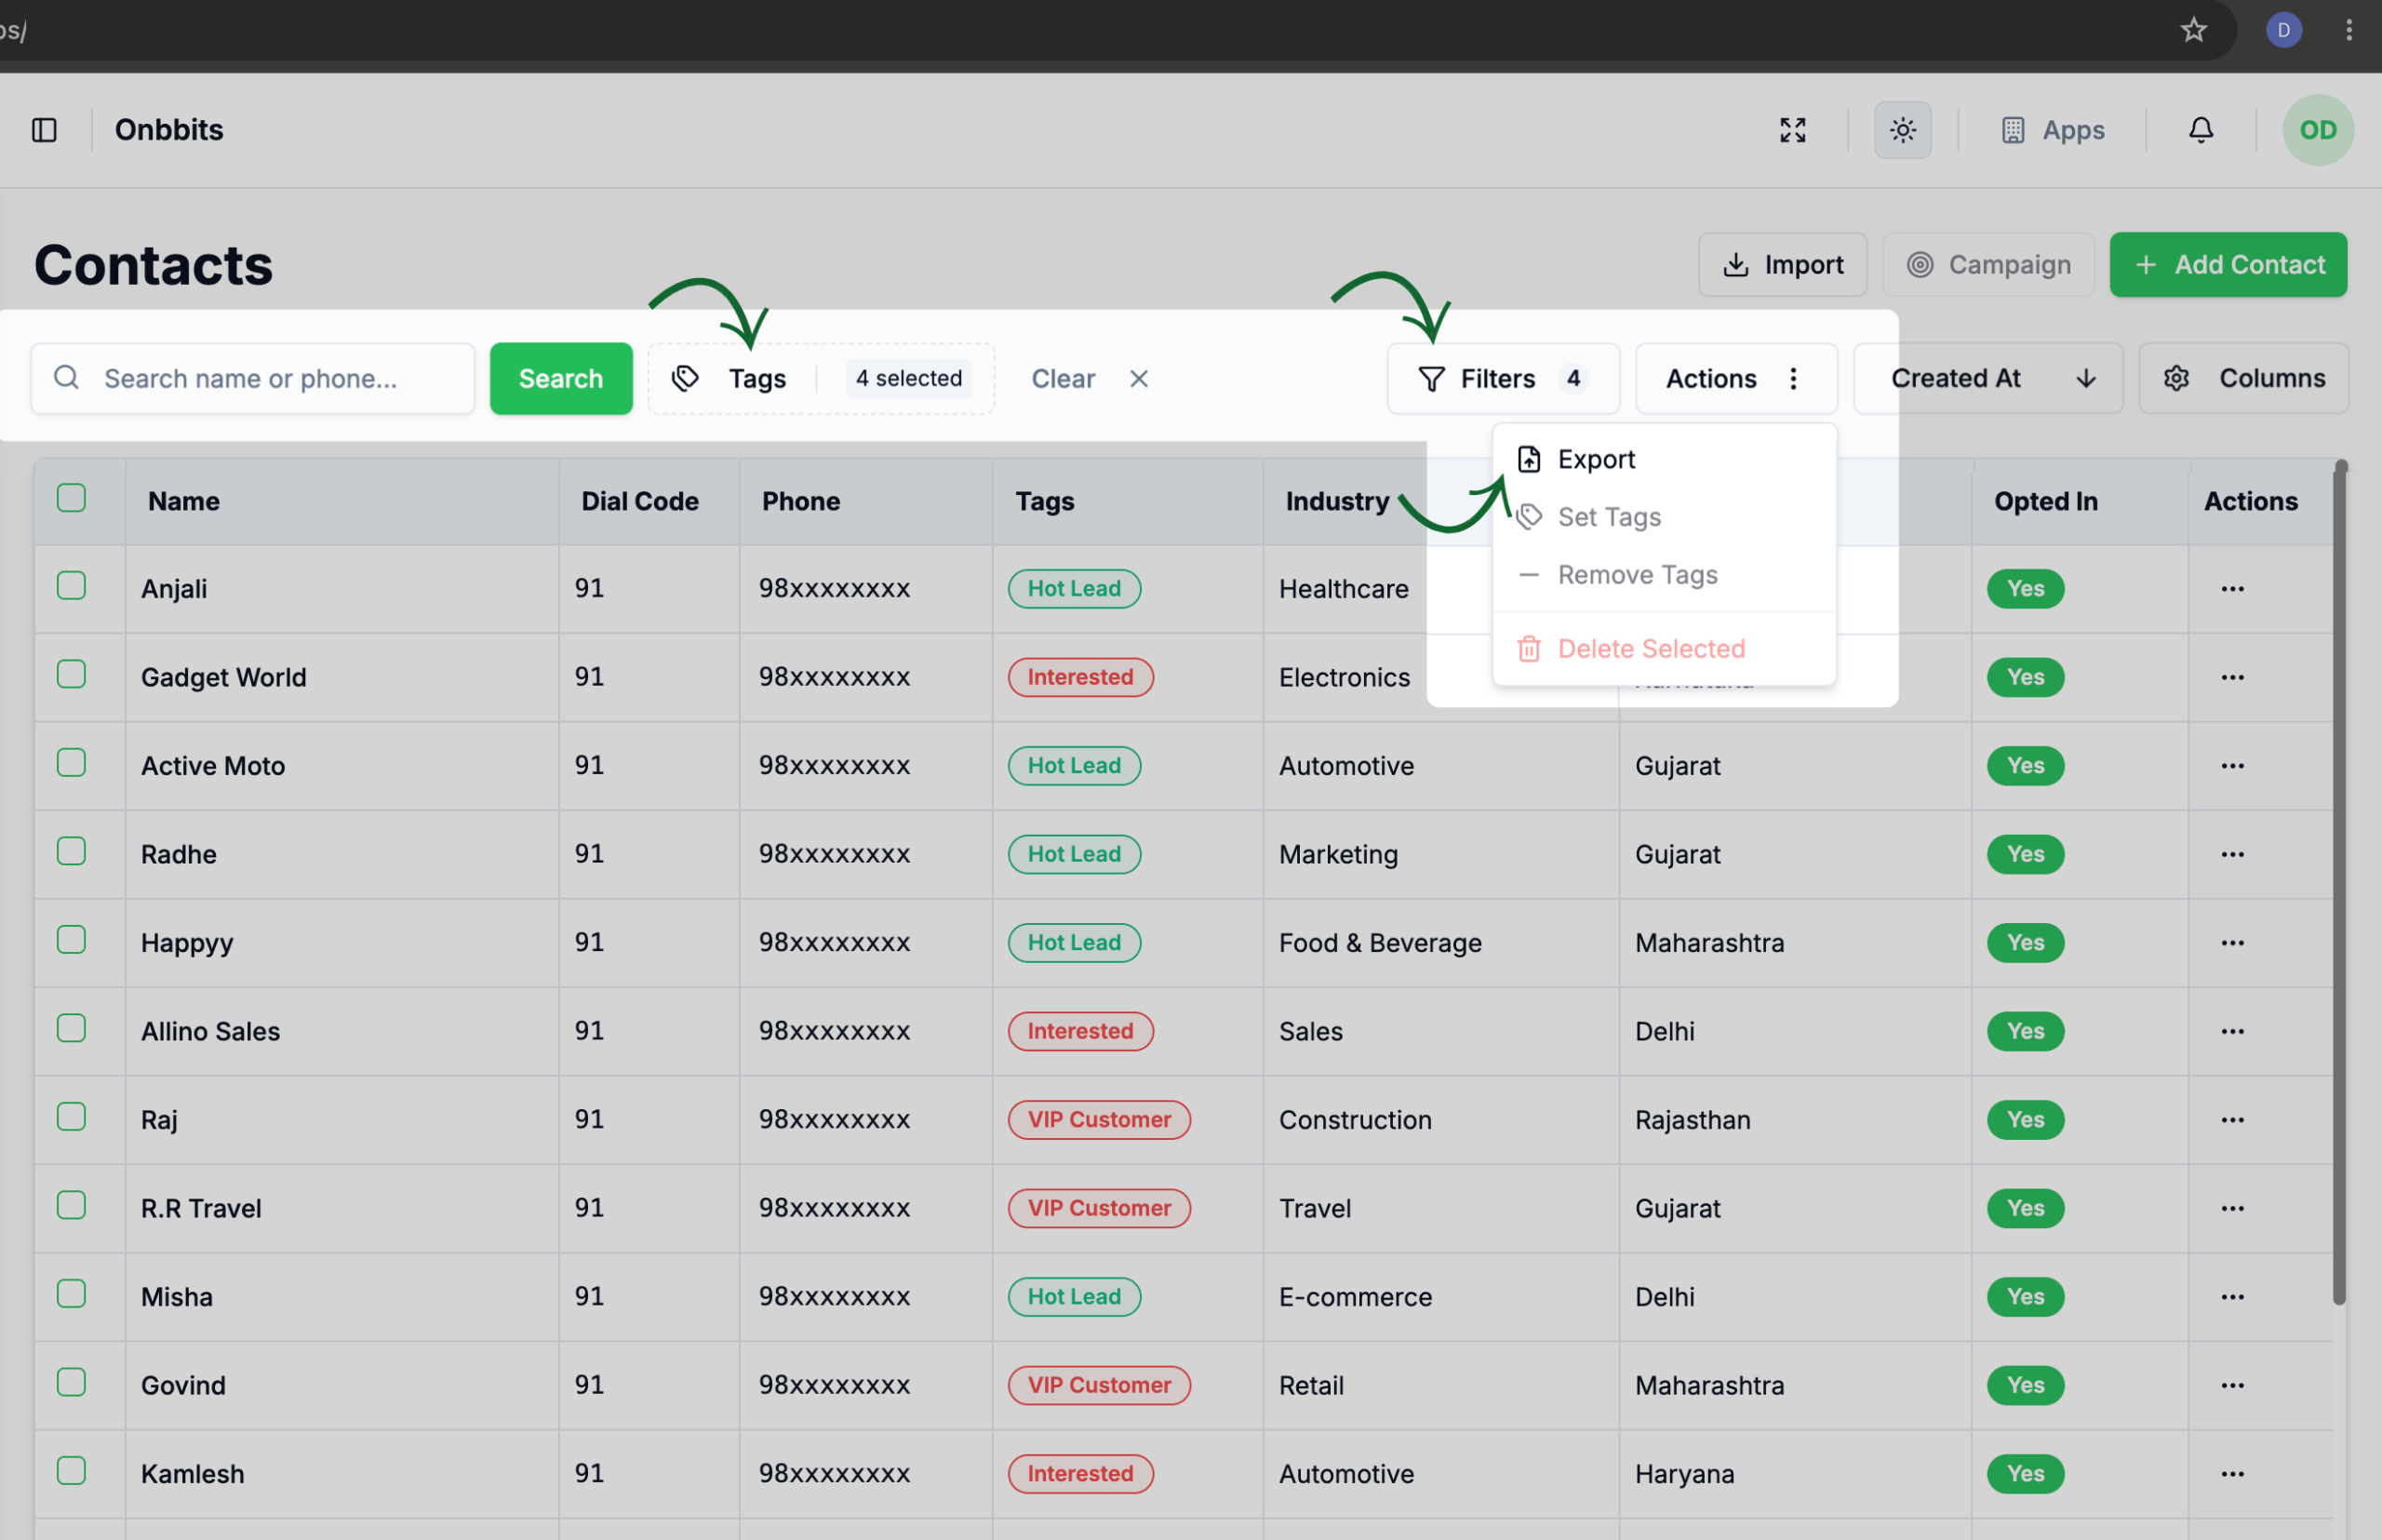
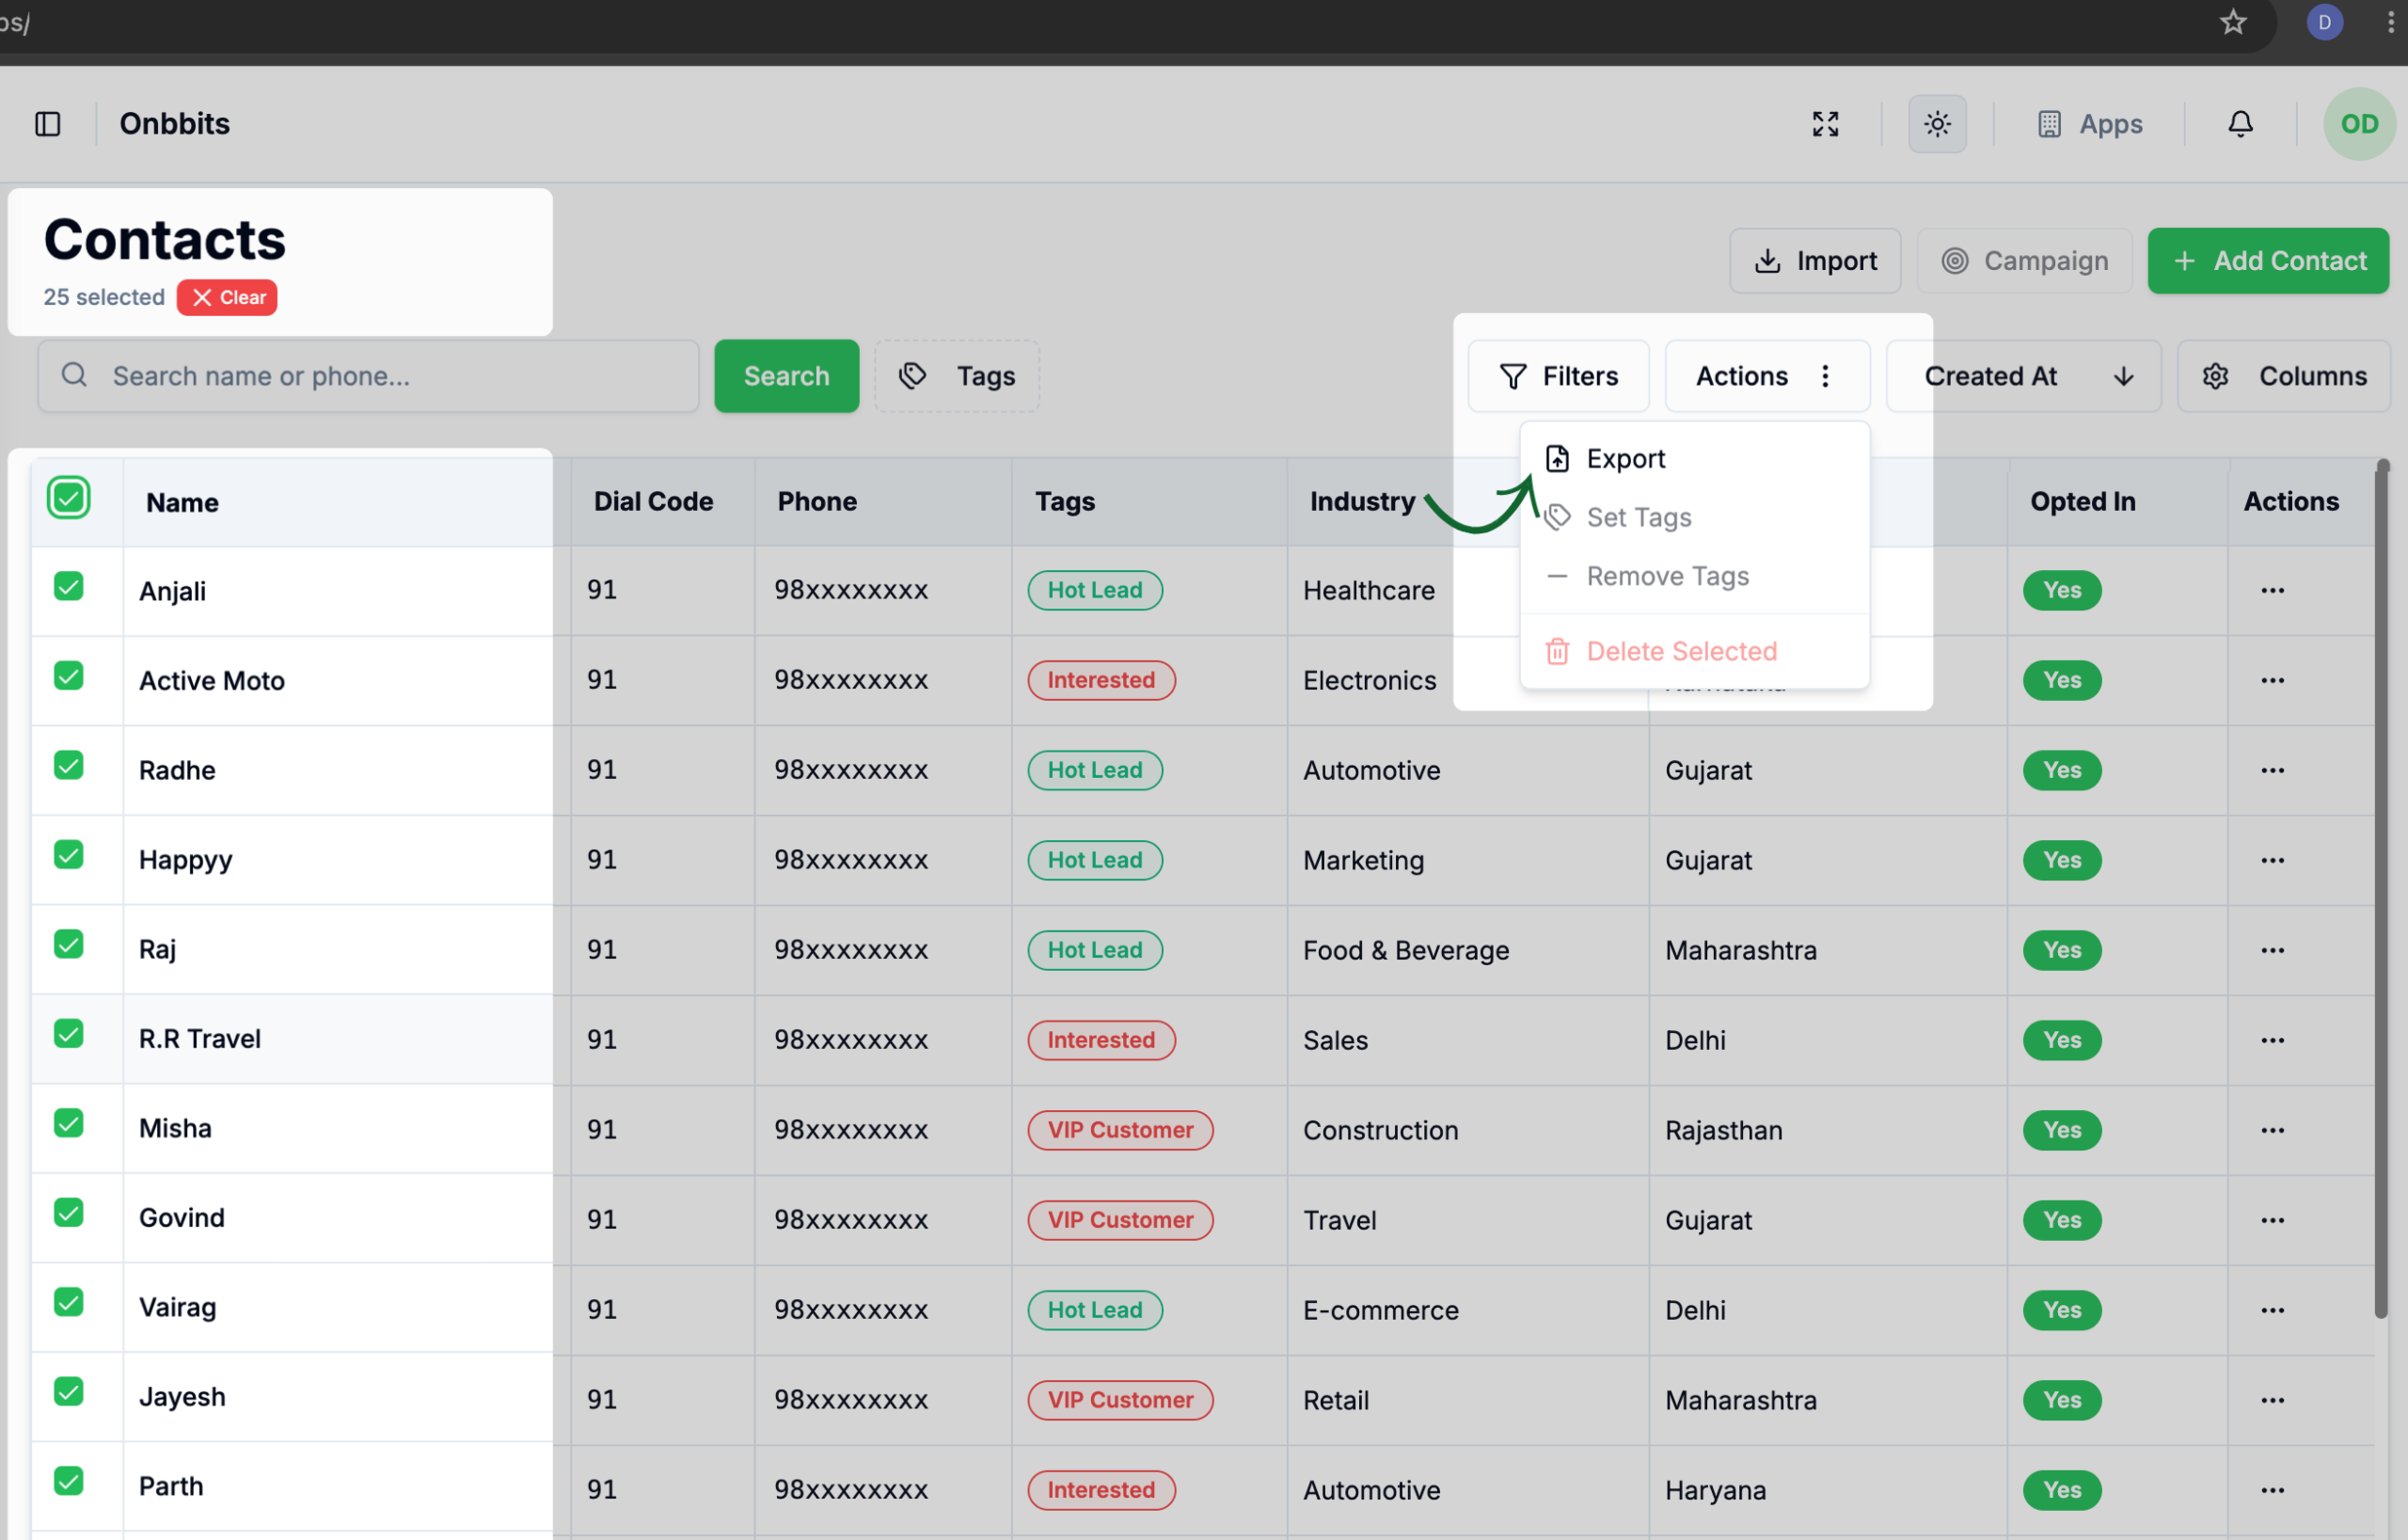
You can export all your contacts, just the ones matching a filter, or only the ones you pick yourself. Each works a little differently.

Exporting All Contacts

  1. Go to Contacts.
  2. Click Actions, then Export.

Exporting Filtered Contacts

  1. Apply the filters you want.
  2. Click Actions, then Export.

Exporting Selected Contacts

  1. Select the contacts you want using the checkboxes.
  2. Click Actions, then Export.

Note: Only Owners can export contacts. If you’re an Agent and don’t see the export option, that’s expected — it’s not available for your role.

Related Articles

How to Add and Update a Contact

How to Search and Filter Contacts

How to Manage Contact Opt-In/Opt-Out Settings

What Is a Contact in OnBBits?

Understanding Contact Opt-In and Opt-Out Rules

Still need help?

Our support team is ready to assist you.

© 2026 ONBBITS. All rights reserved.