
OVERVIEW
FEATURES
INTEGRATION
SUPPORT
This is a complete reference for every node available in the Flow builder, grouped the way they appear in the node panel: Start, Message, Input, Logic, and Action, plus the End nodes that close out a conversation. Let’s look at them.
Every Flow begins with a Start node, where you set what triggers it. A Start node can use either or both of the following:
Keyword Trigger: Set keywords which will trigger the flow.
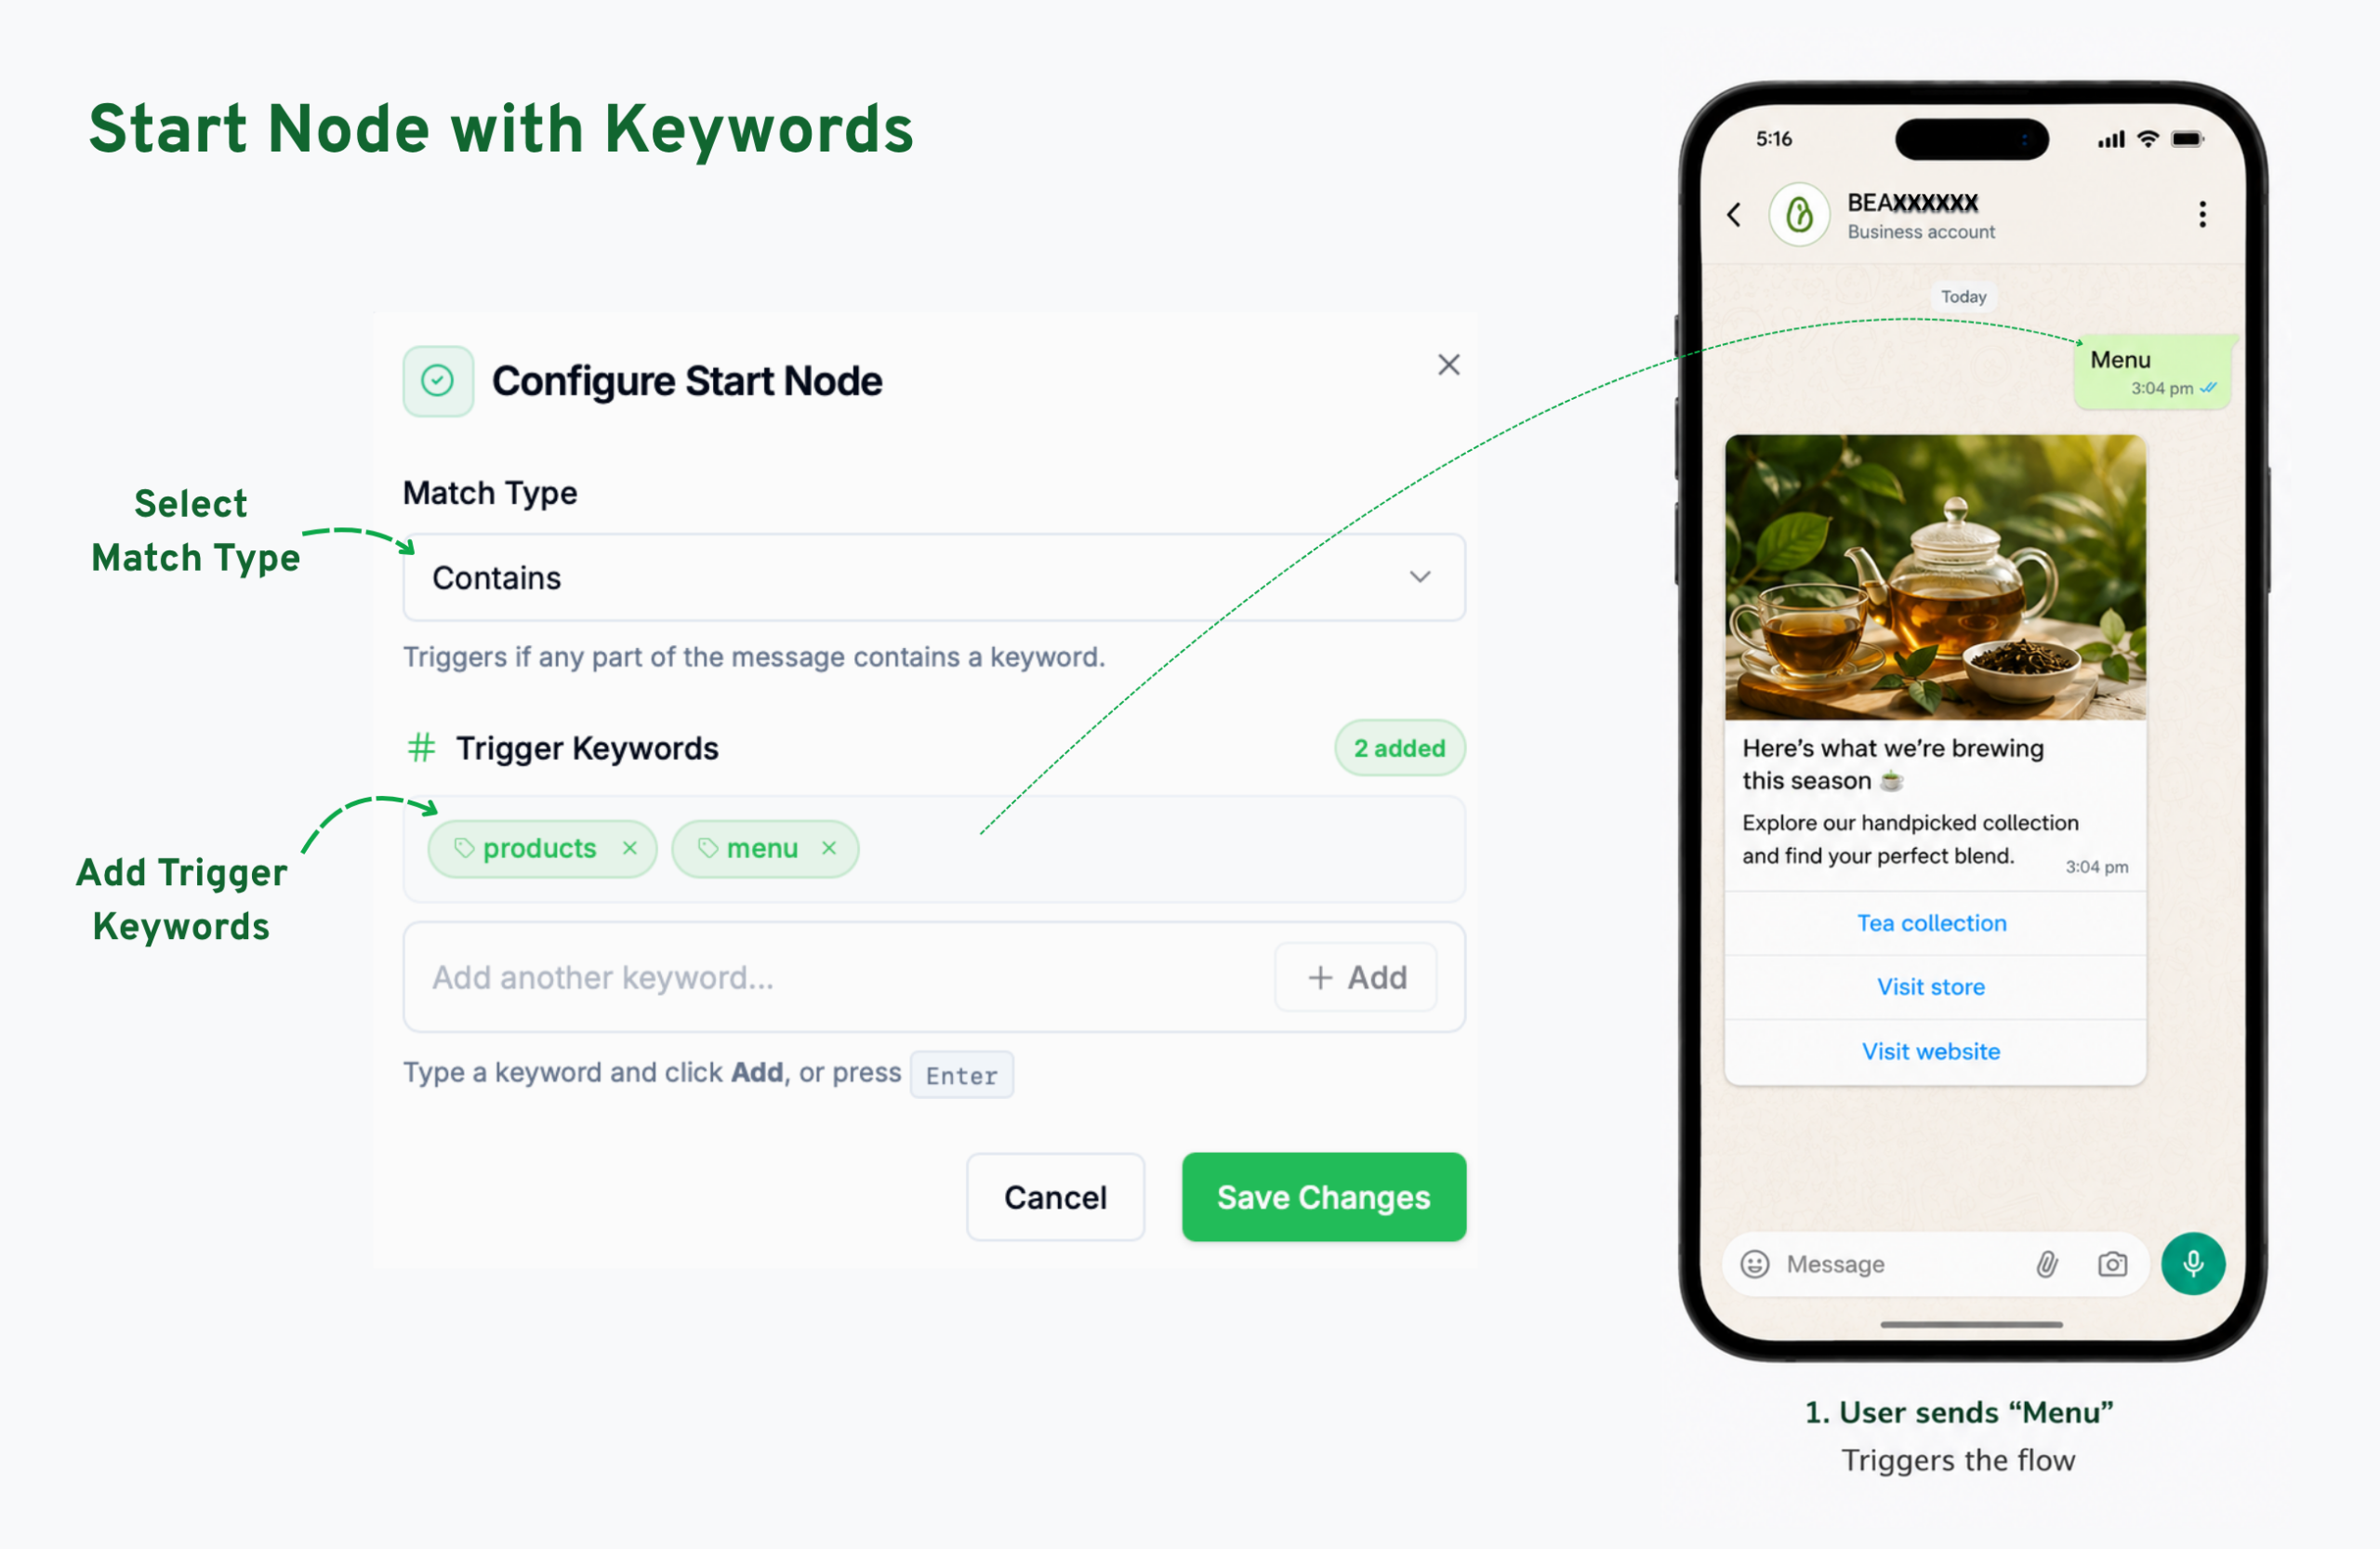
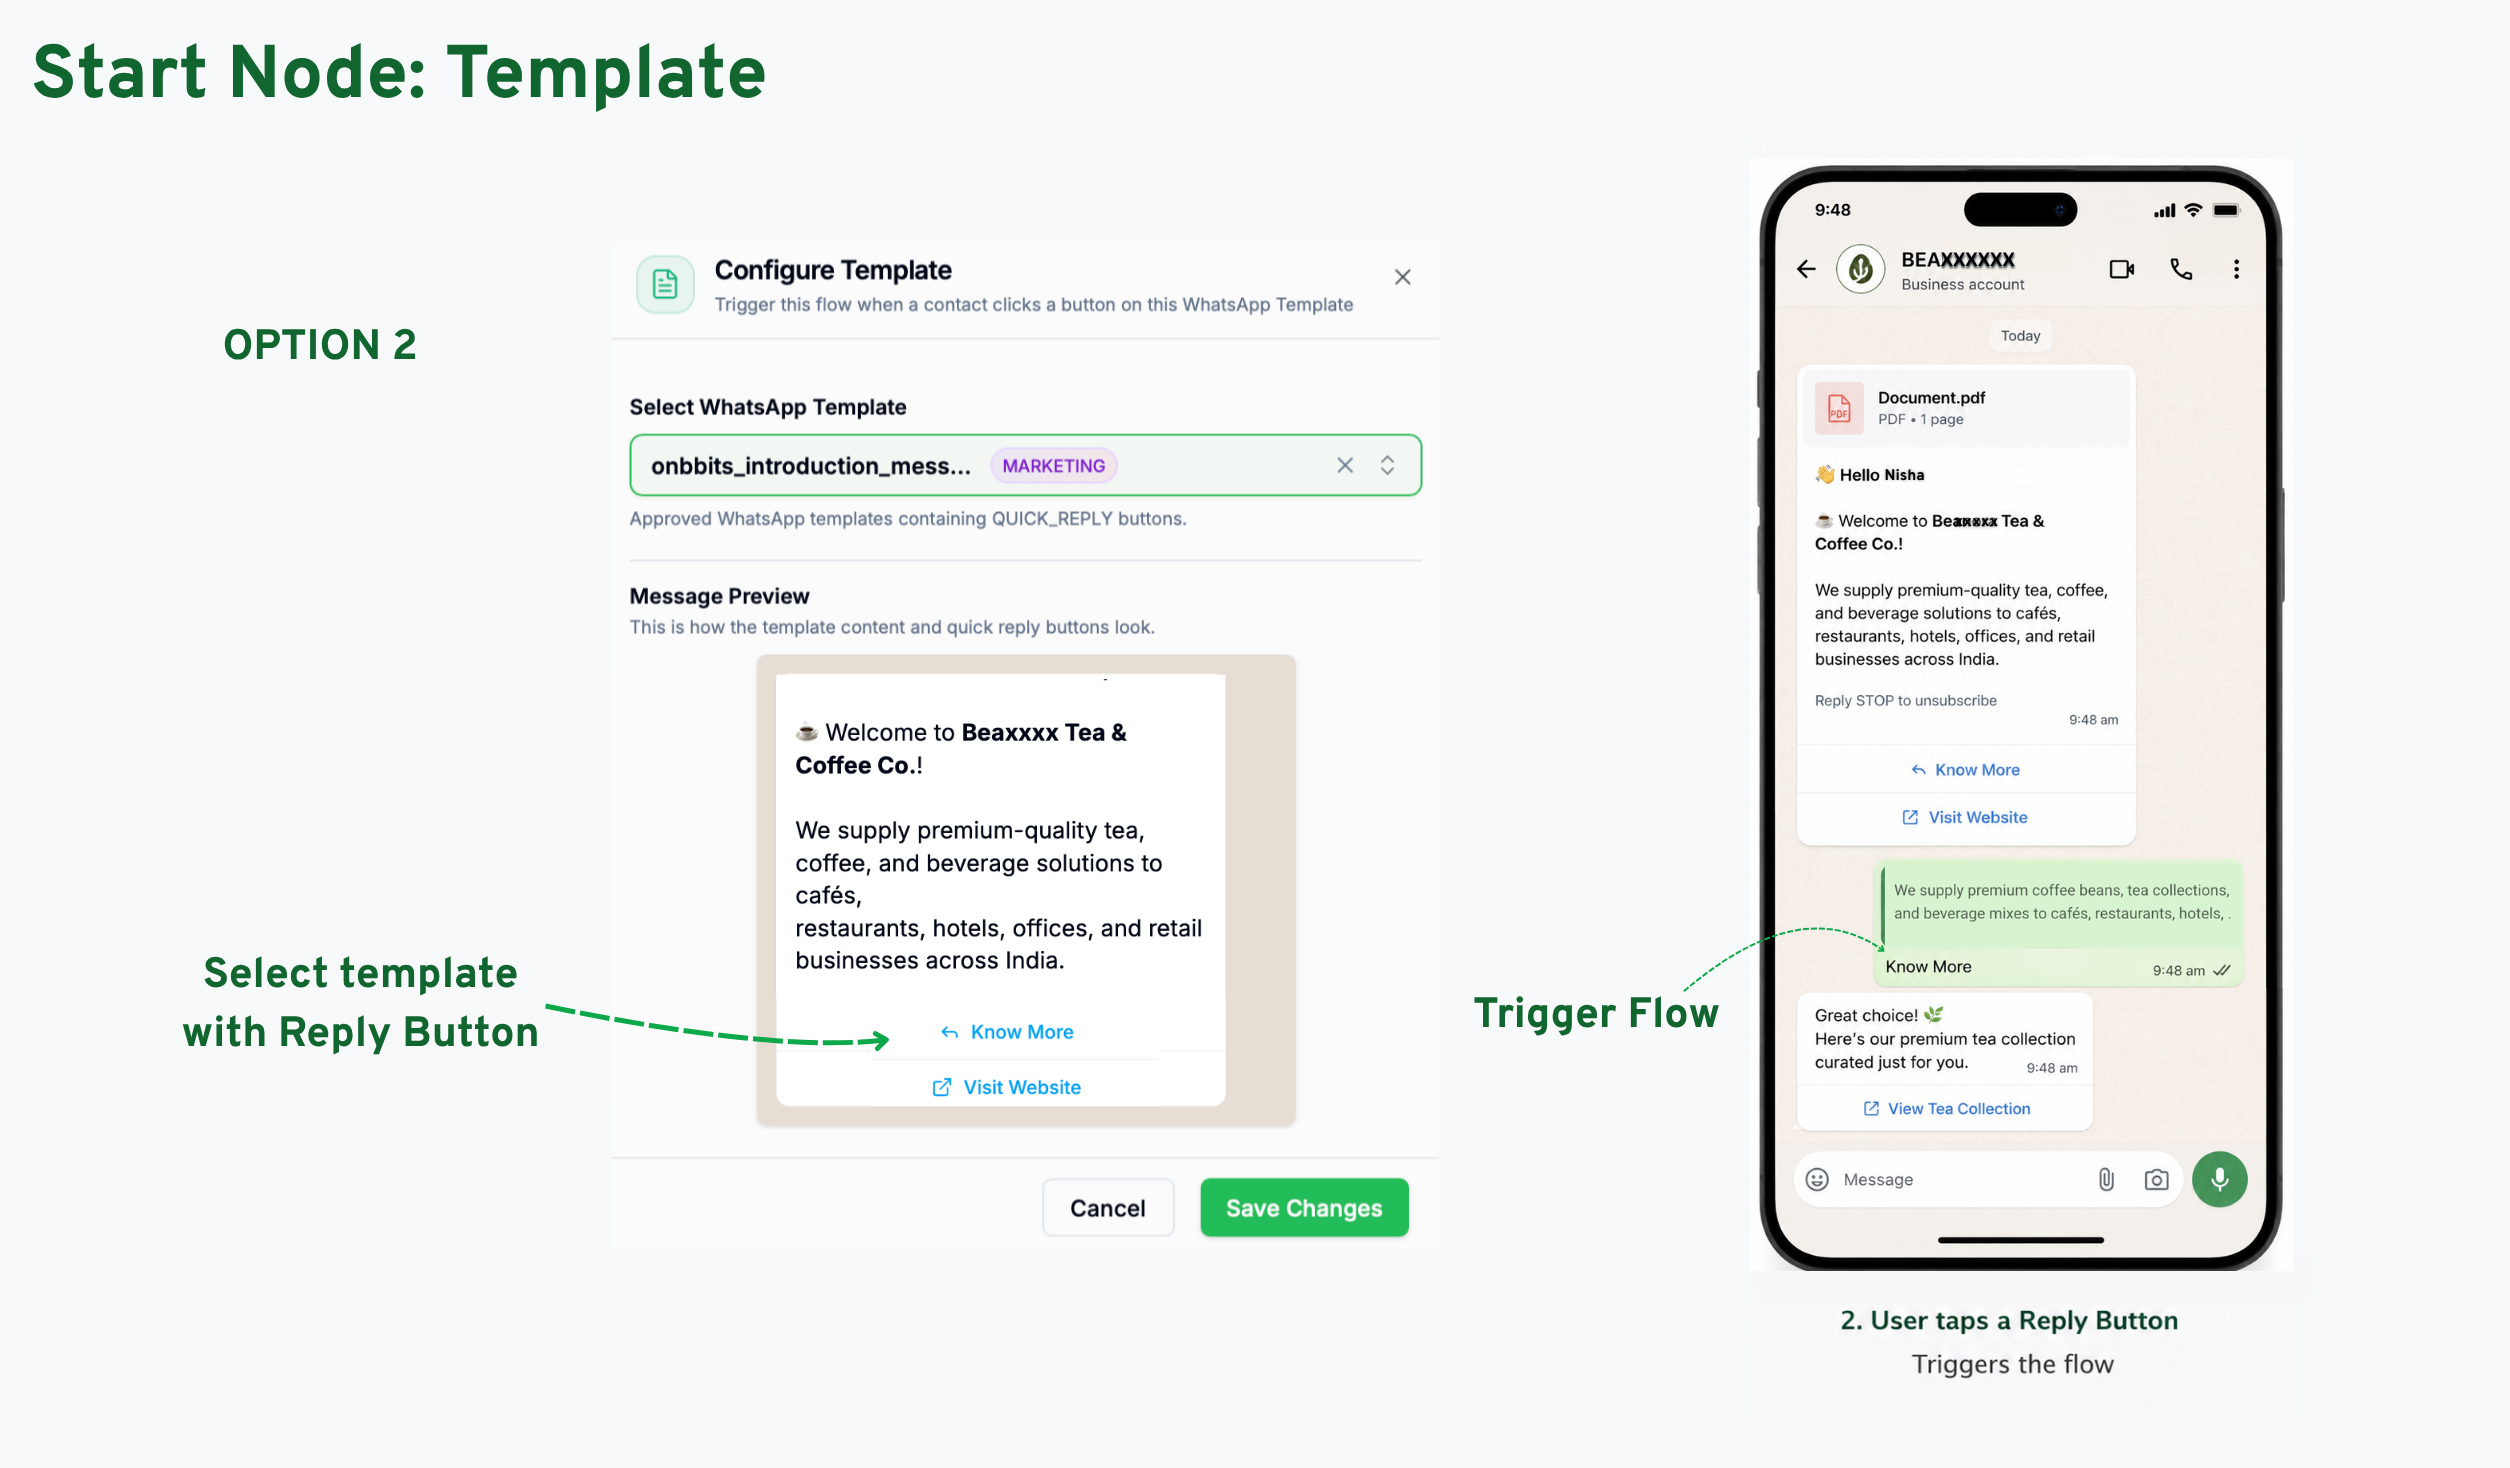
Template Trigger: Starts the Flow when a contact taps a Quick Reply button on a specific WhatsApp Template.
Text Message sends a plain text message. Supports WhatsApp formatting — bold, italic, strikethrough, and monospace — and you can insert variables captured earlier in the Flow, such as a customer’s reply to a Question node (like {{business_name}}).
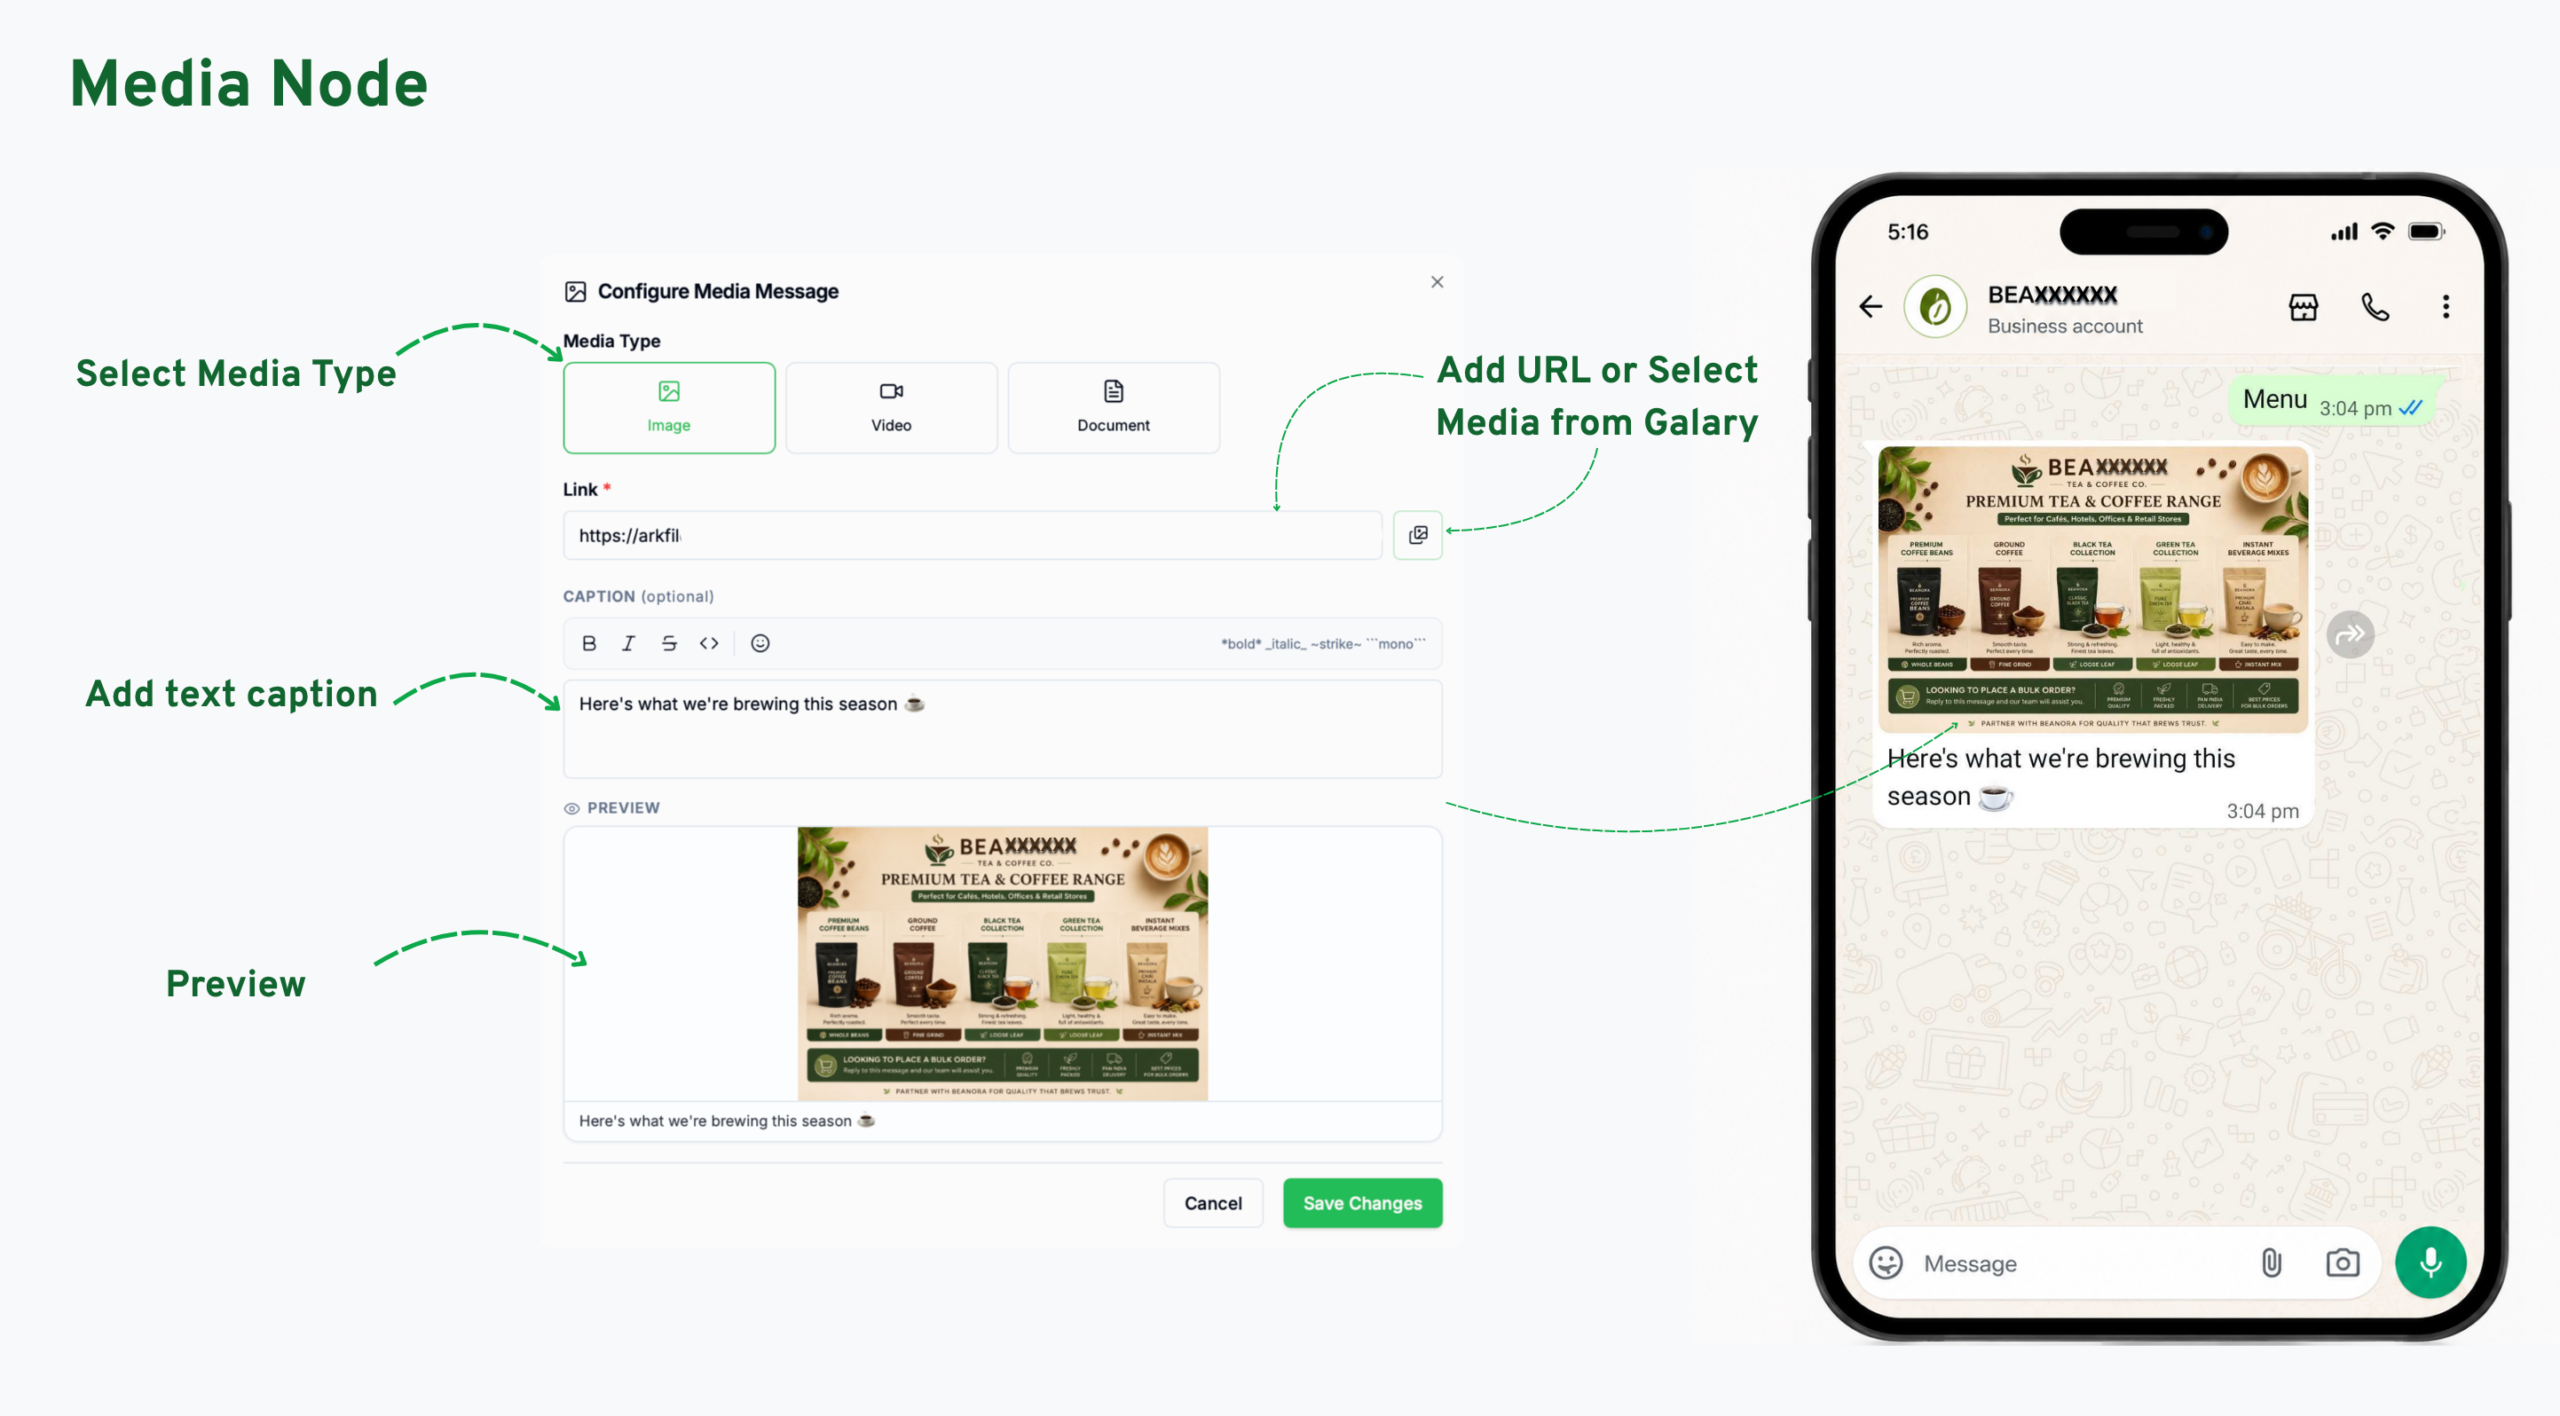
Media sends an image, video, or document to the customer. You can also add an optional Caption — with the same formatting options as Text Message — and an optional Filename.
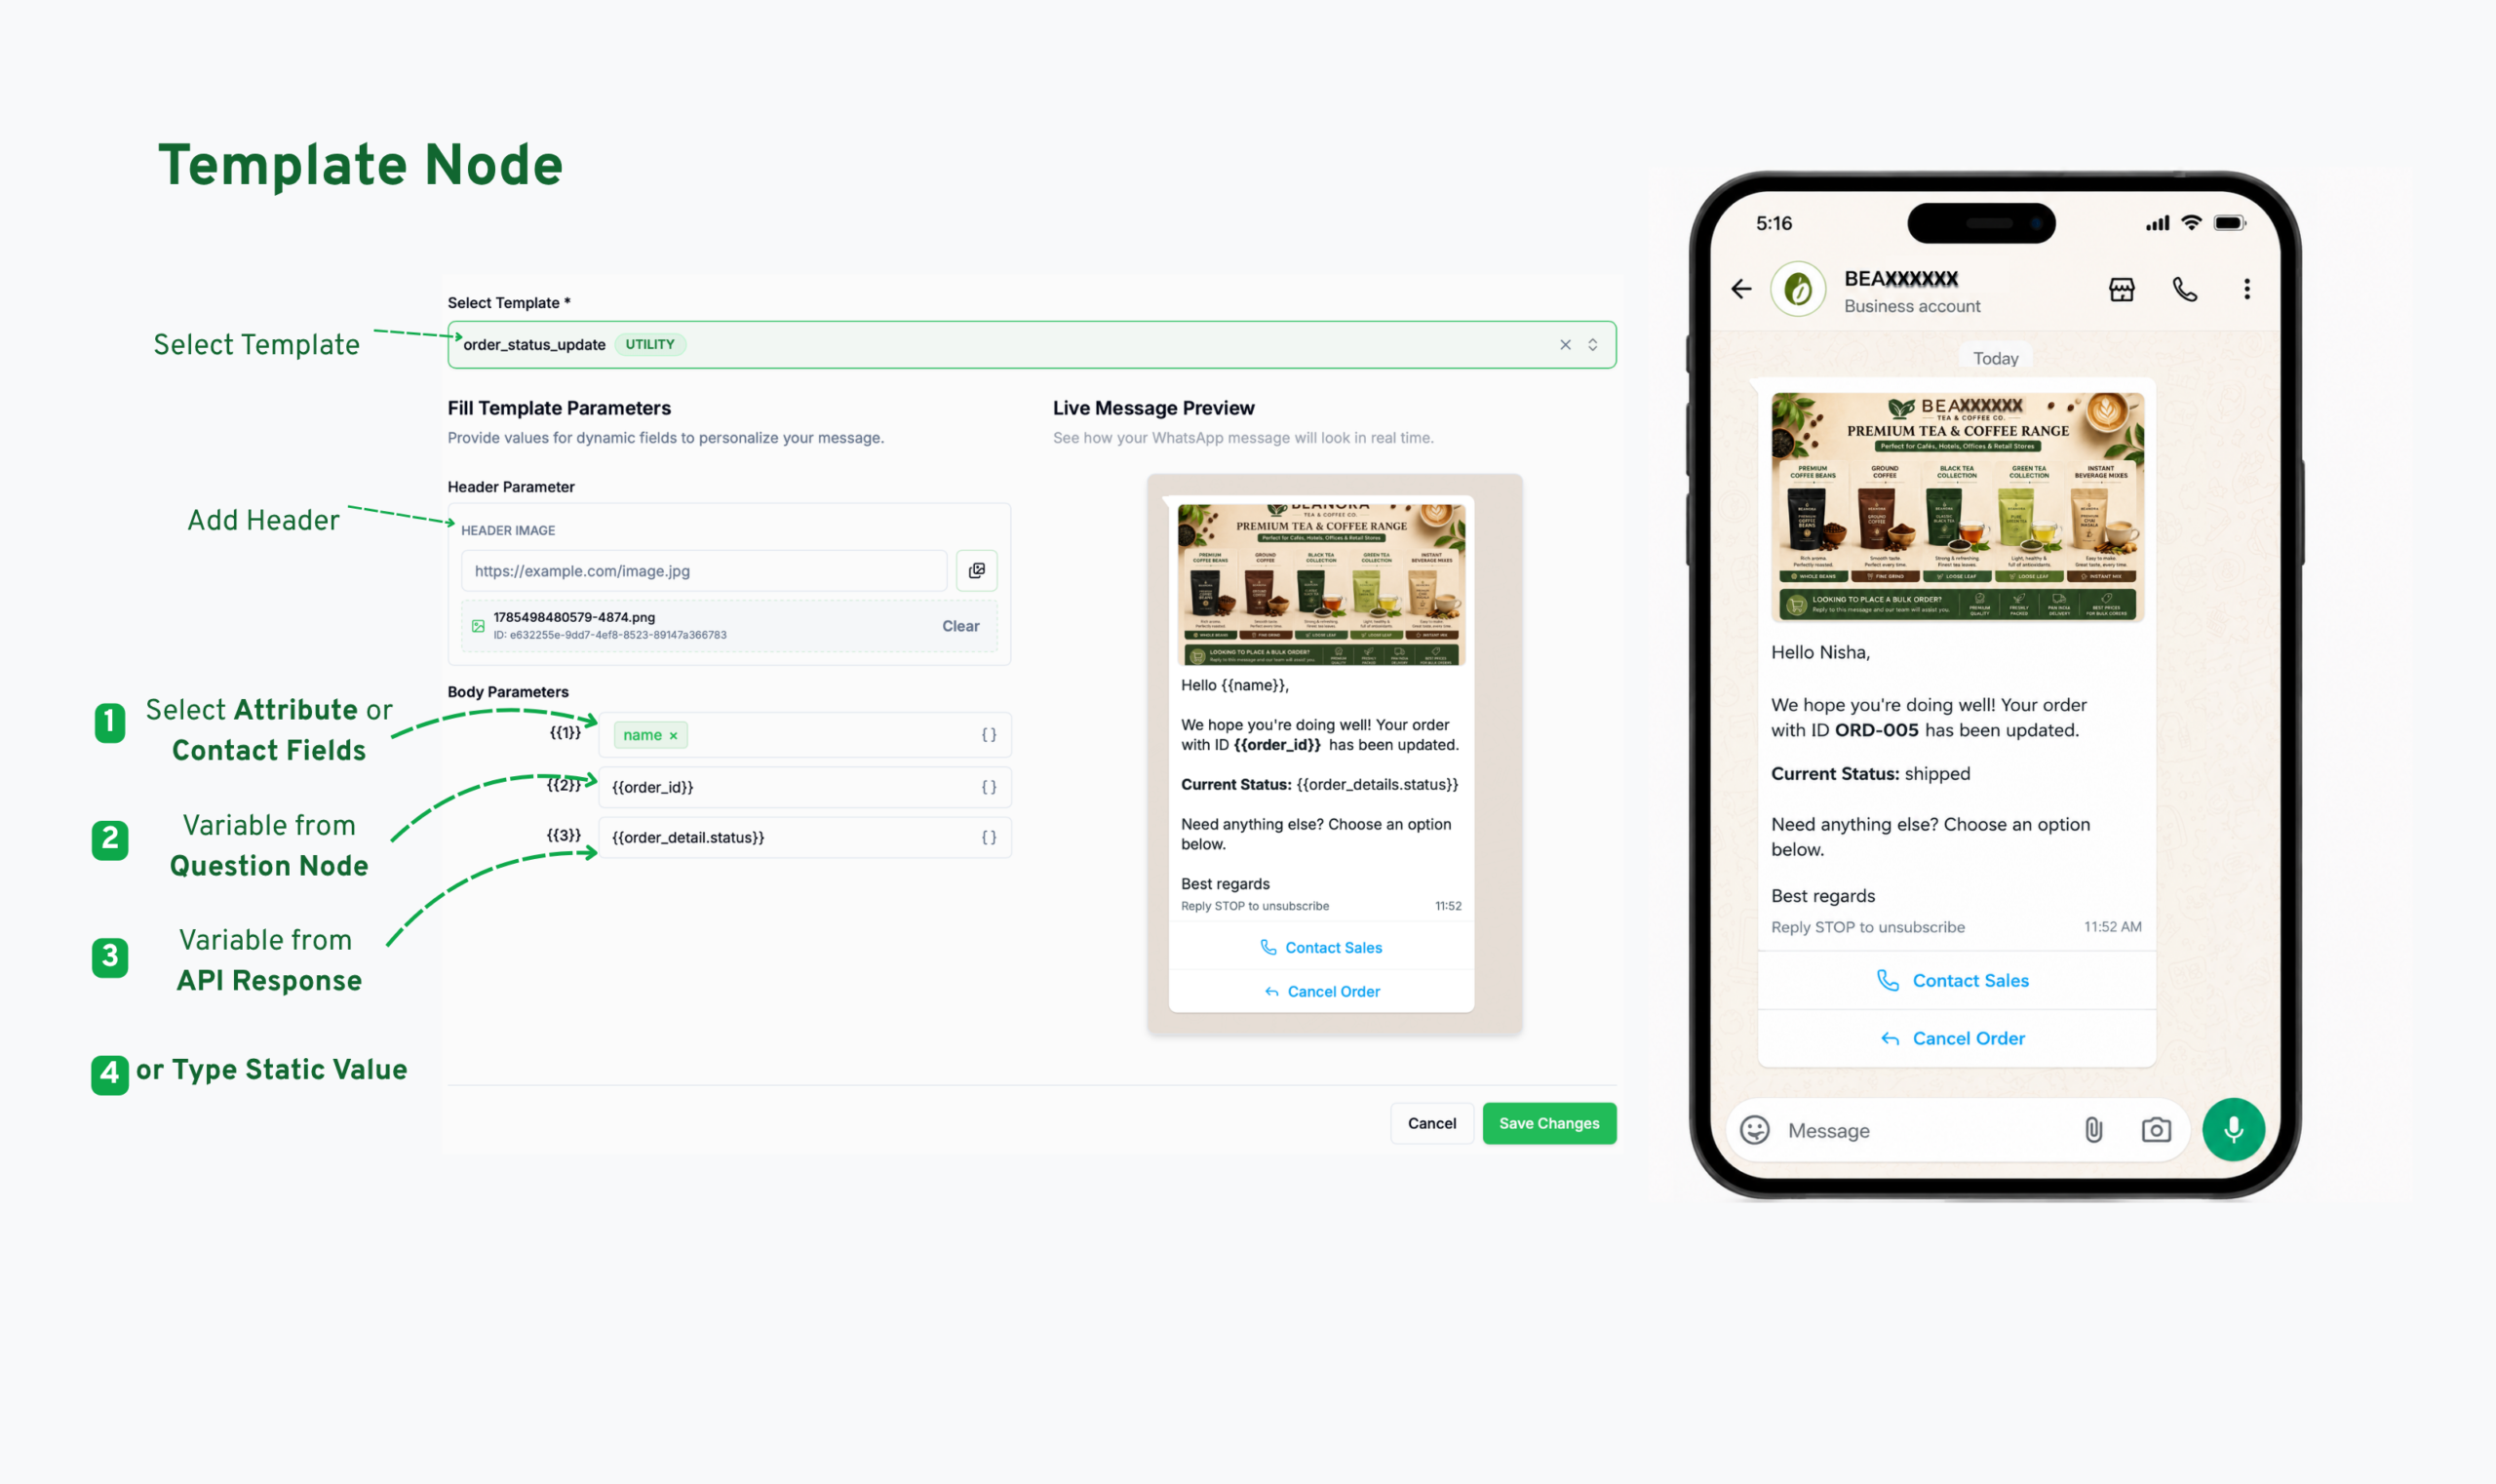
Template sends an approved WhatsApp Template
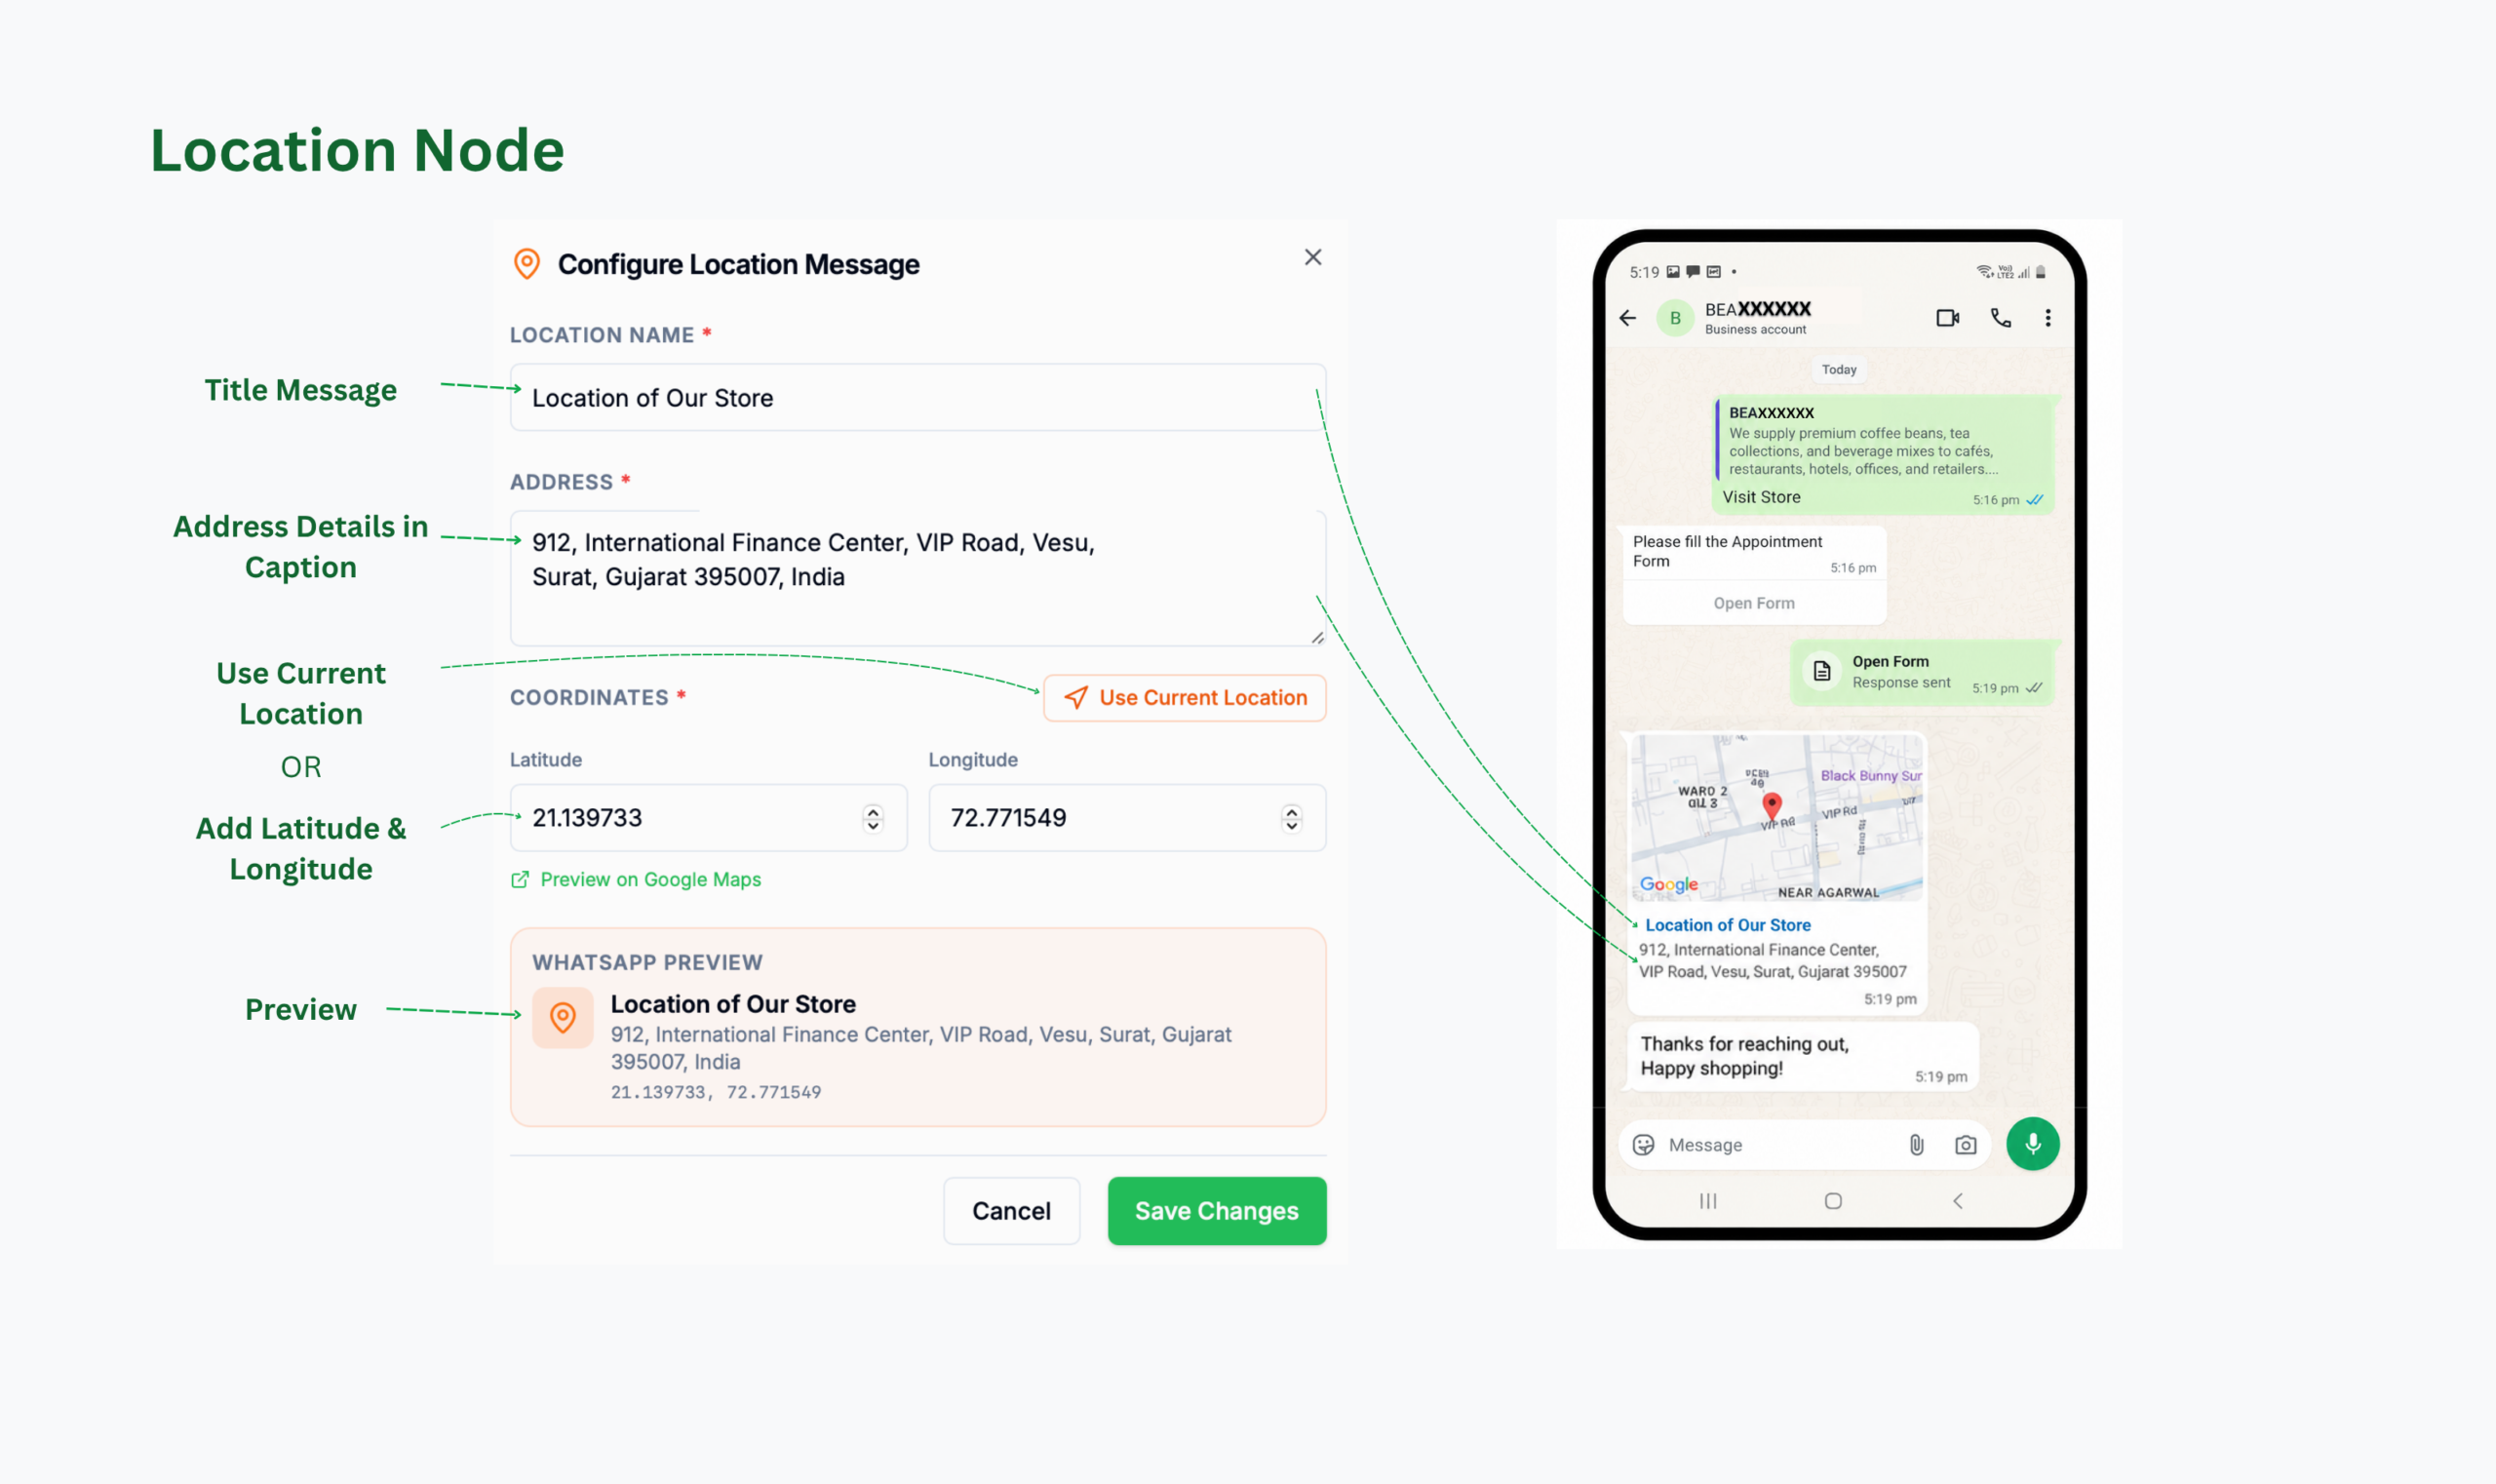
Location Shares a location pin with the customer — useful for pointing to a store or office.
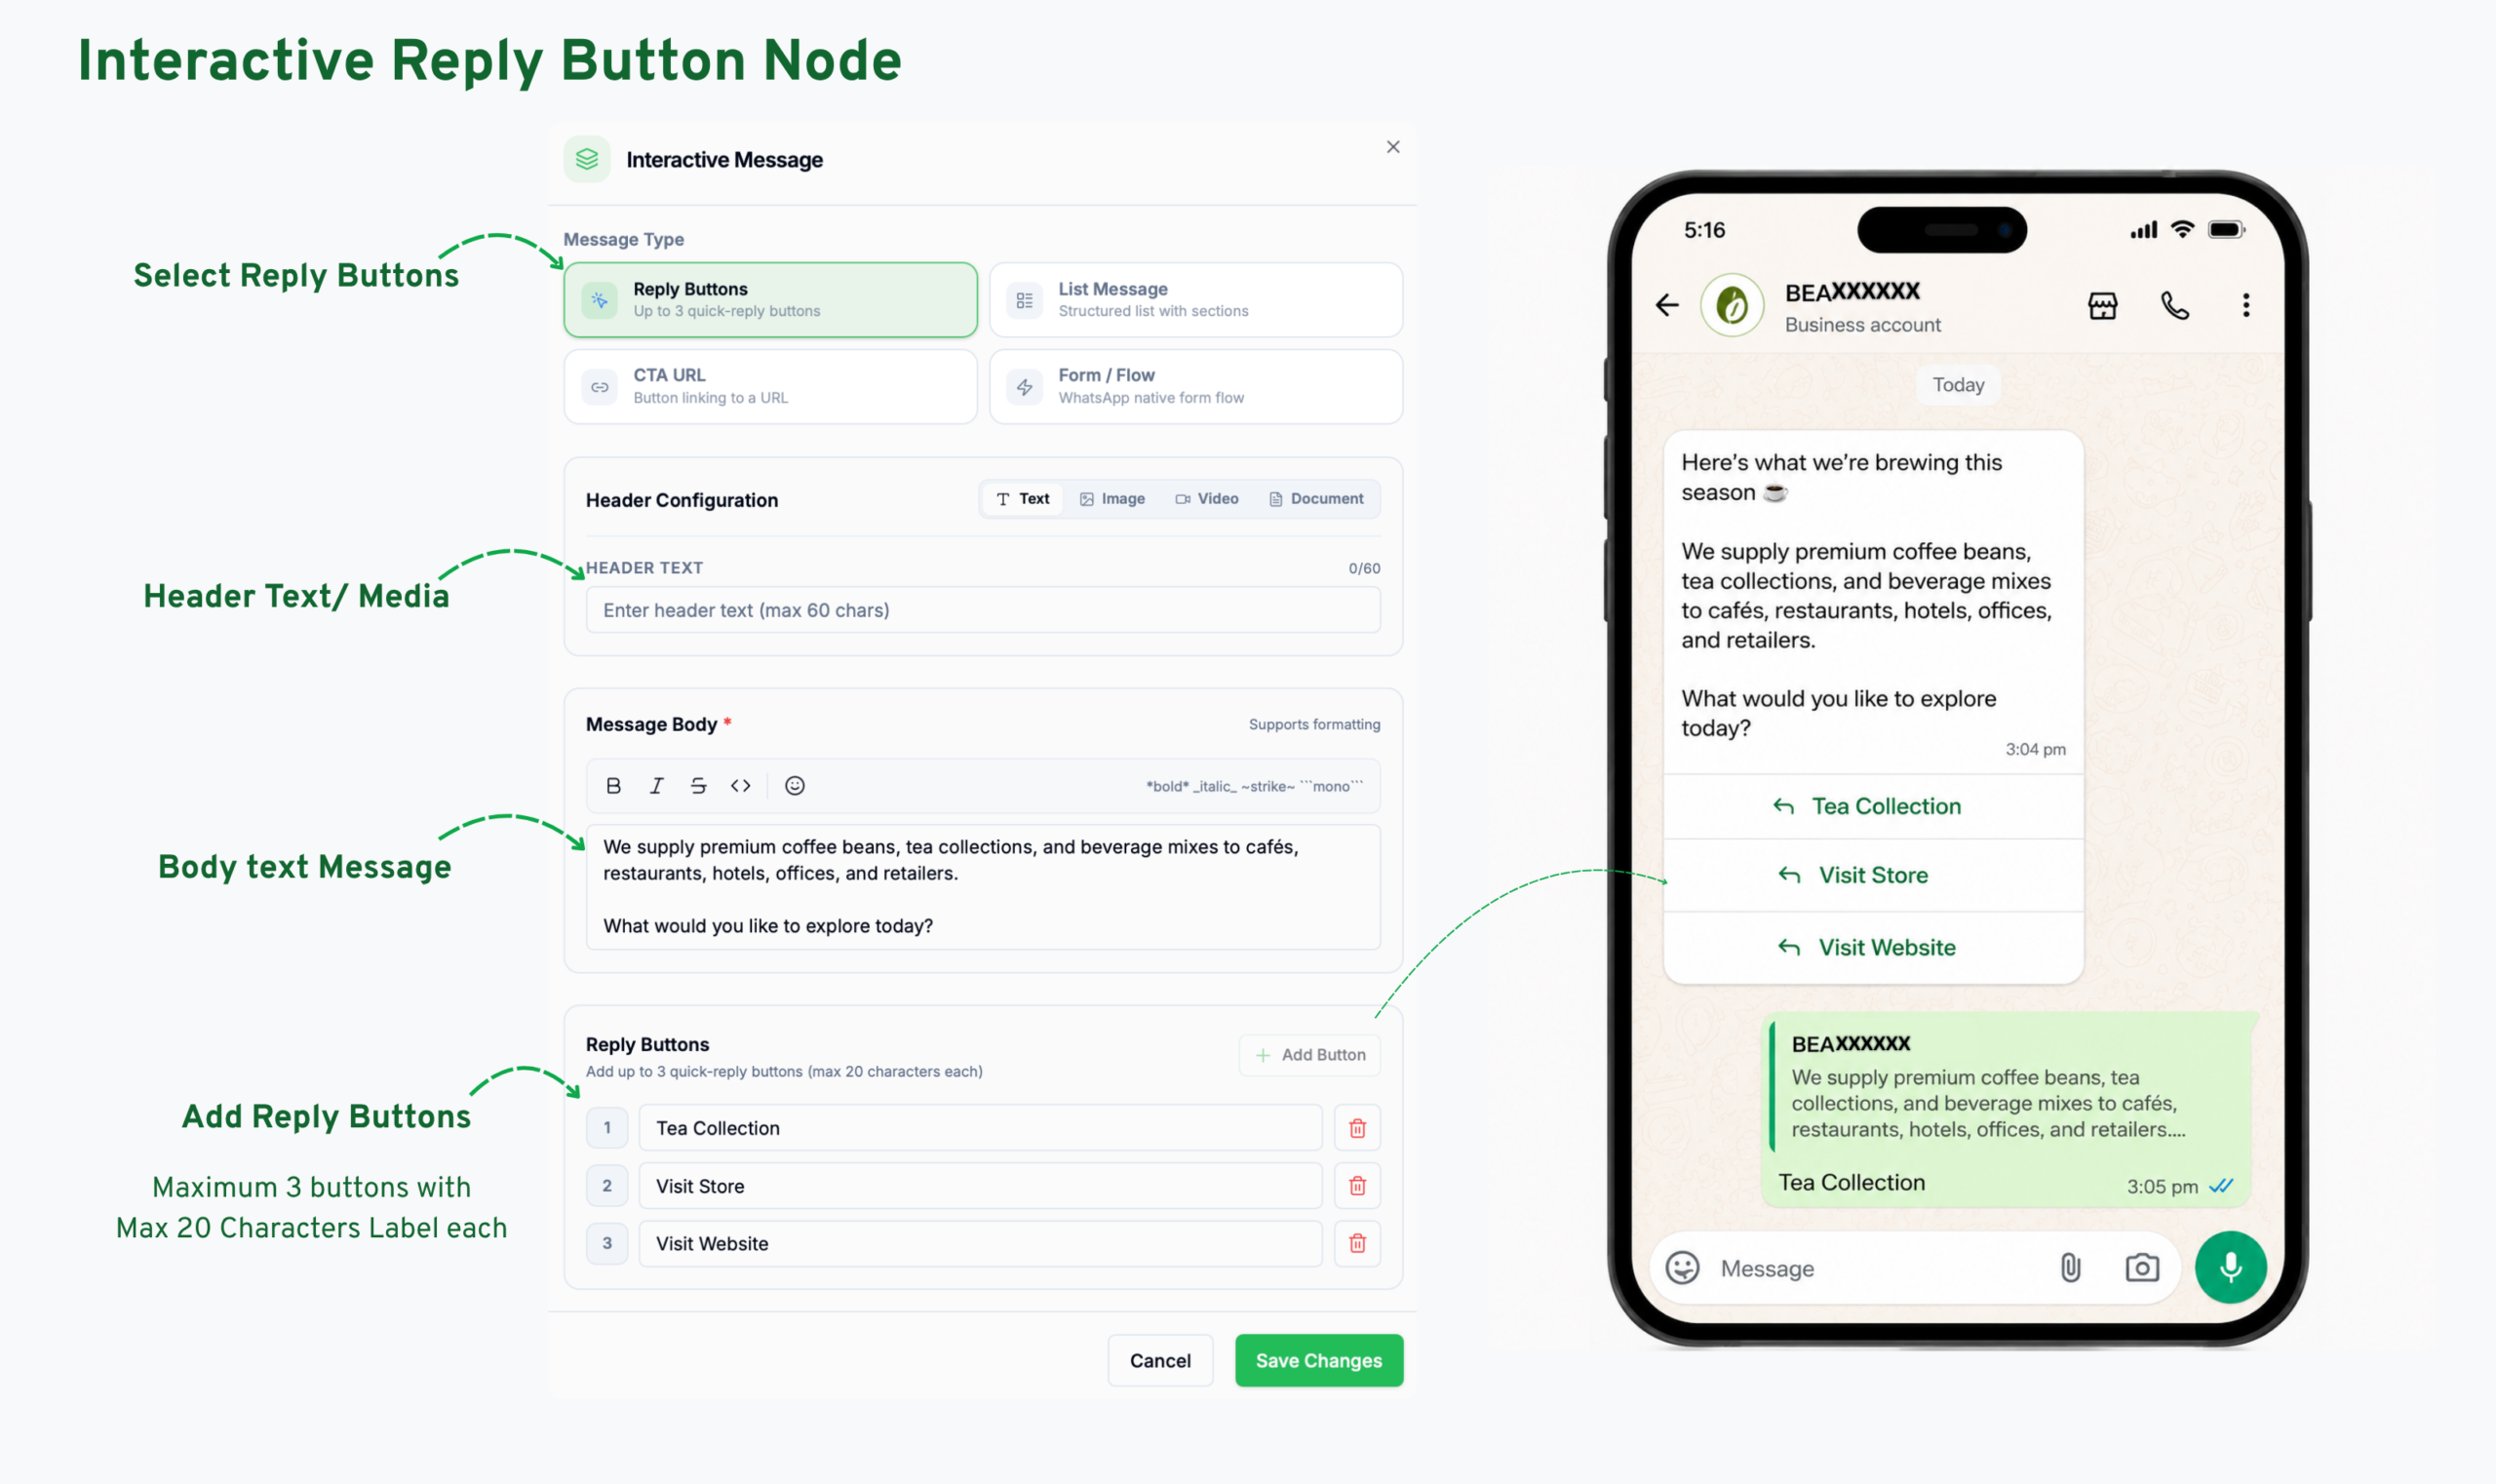
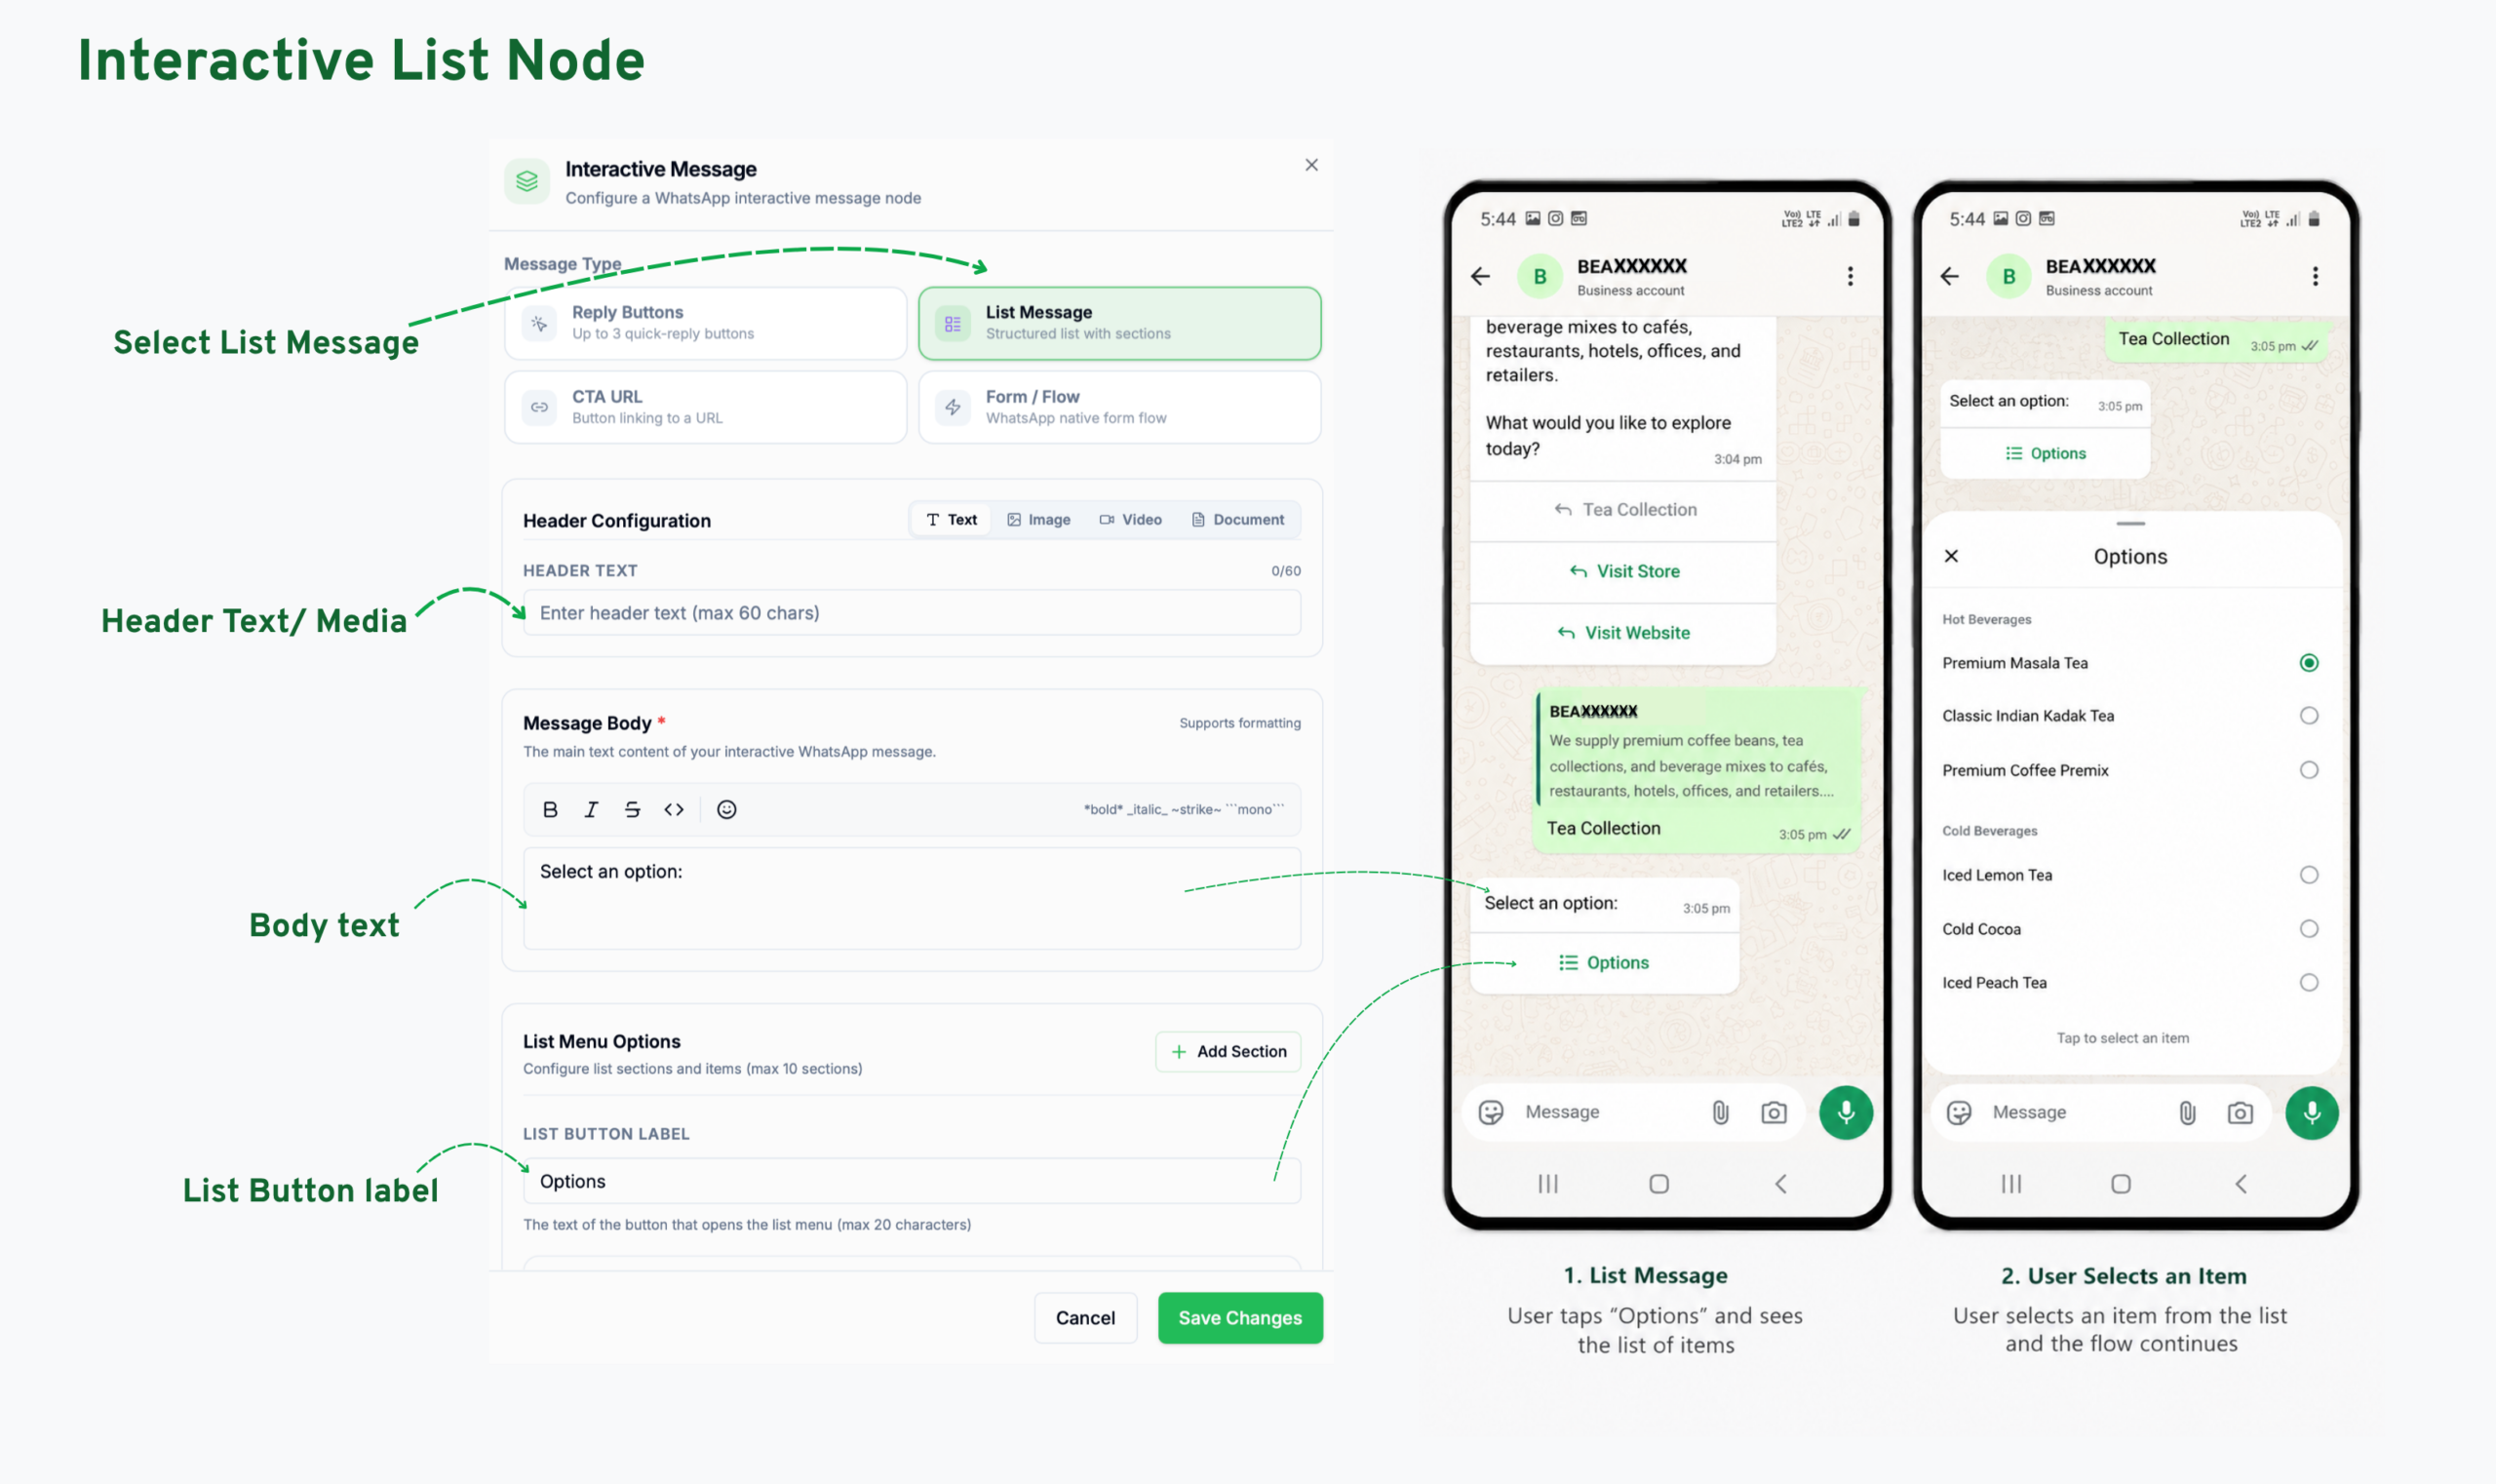
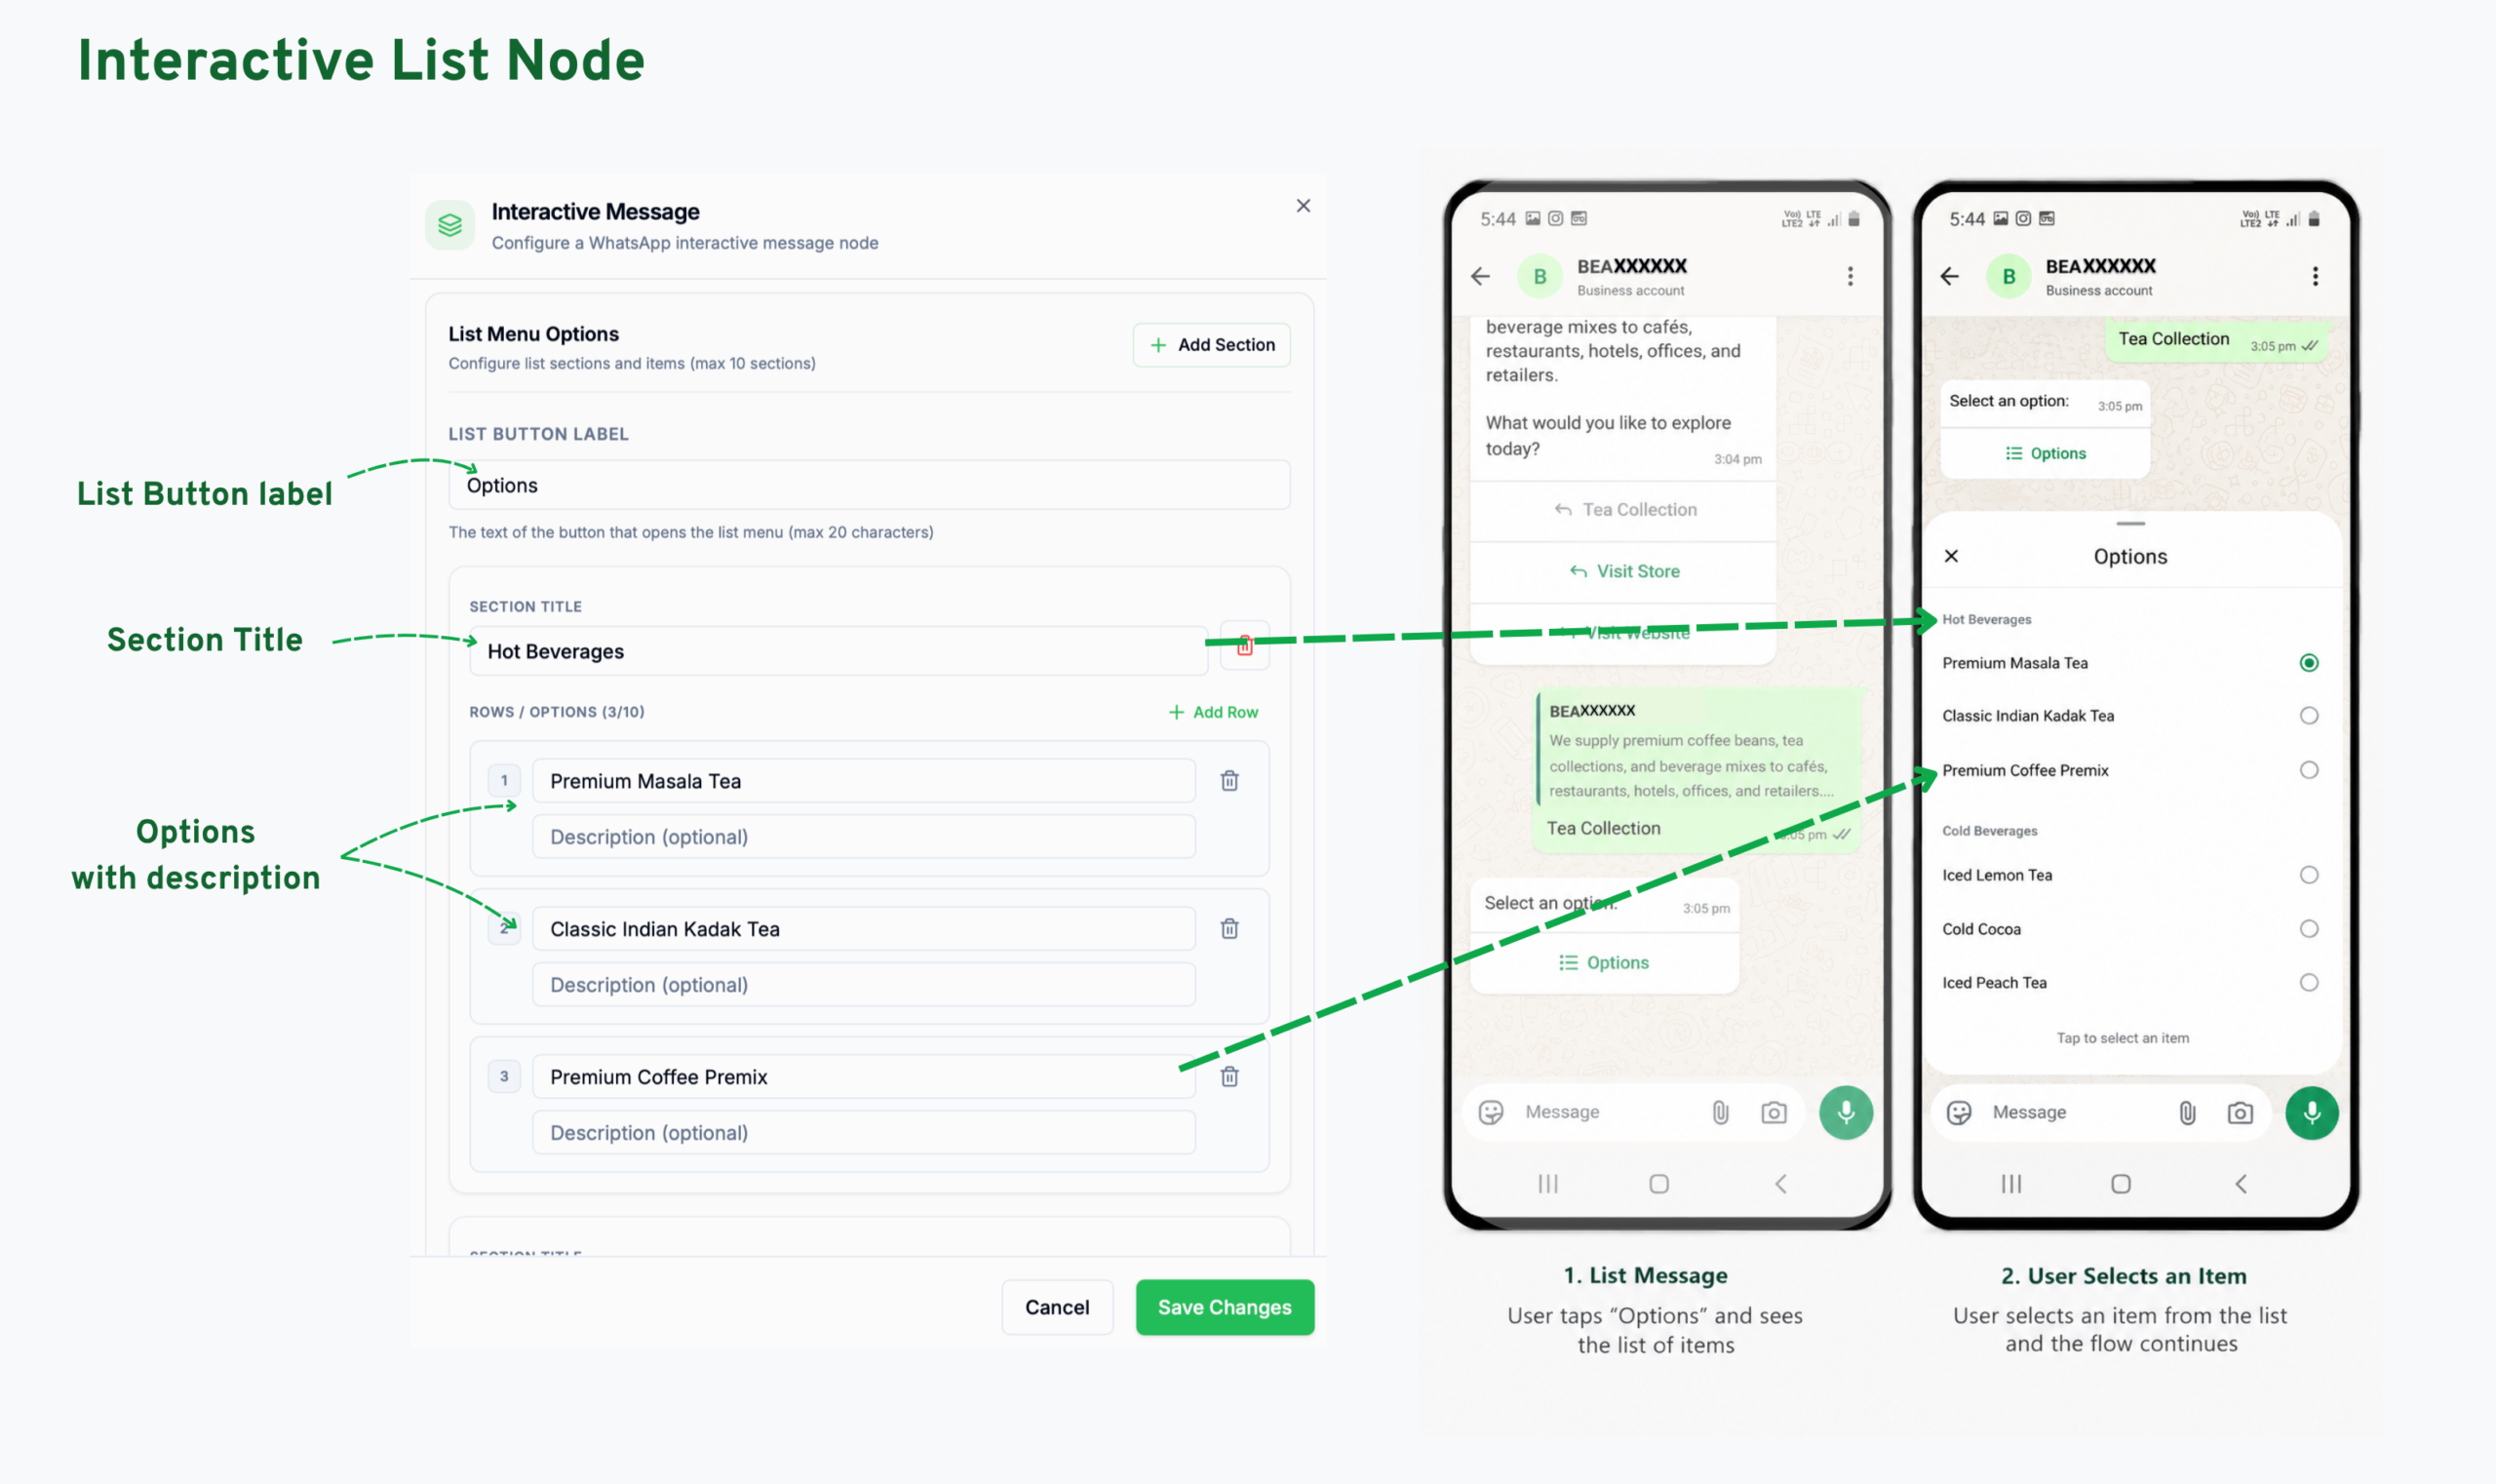
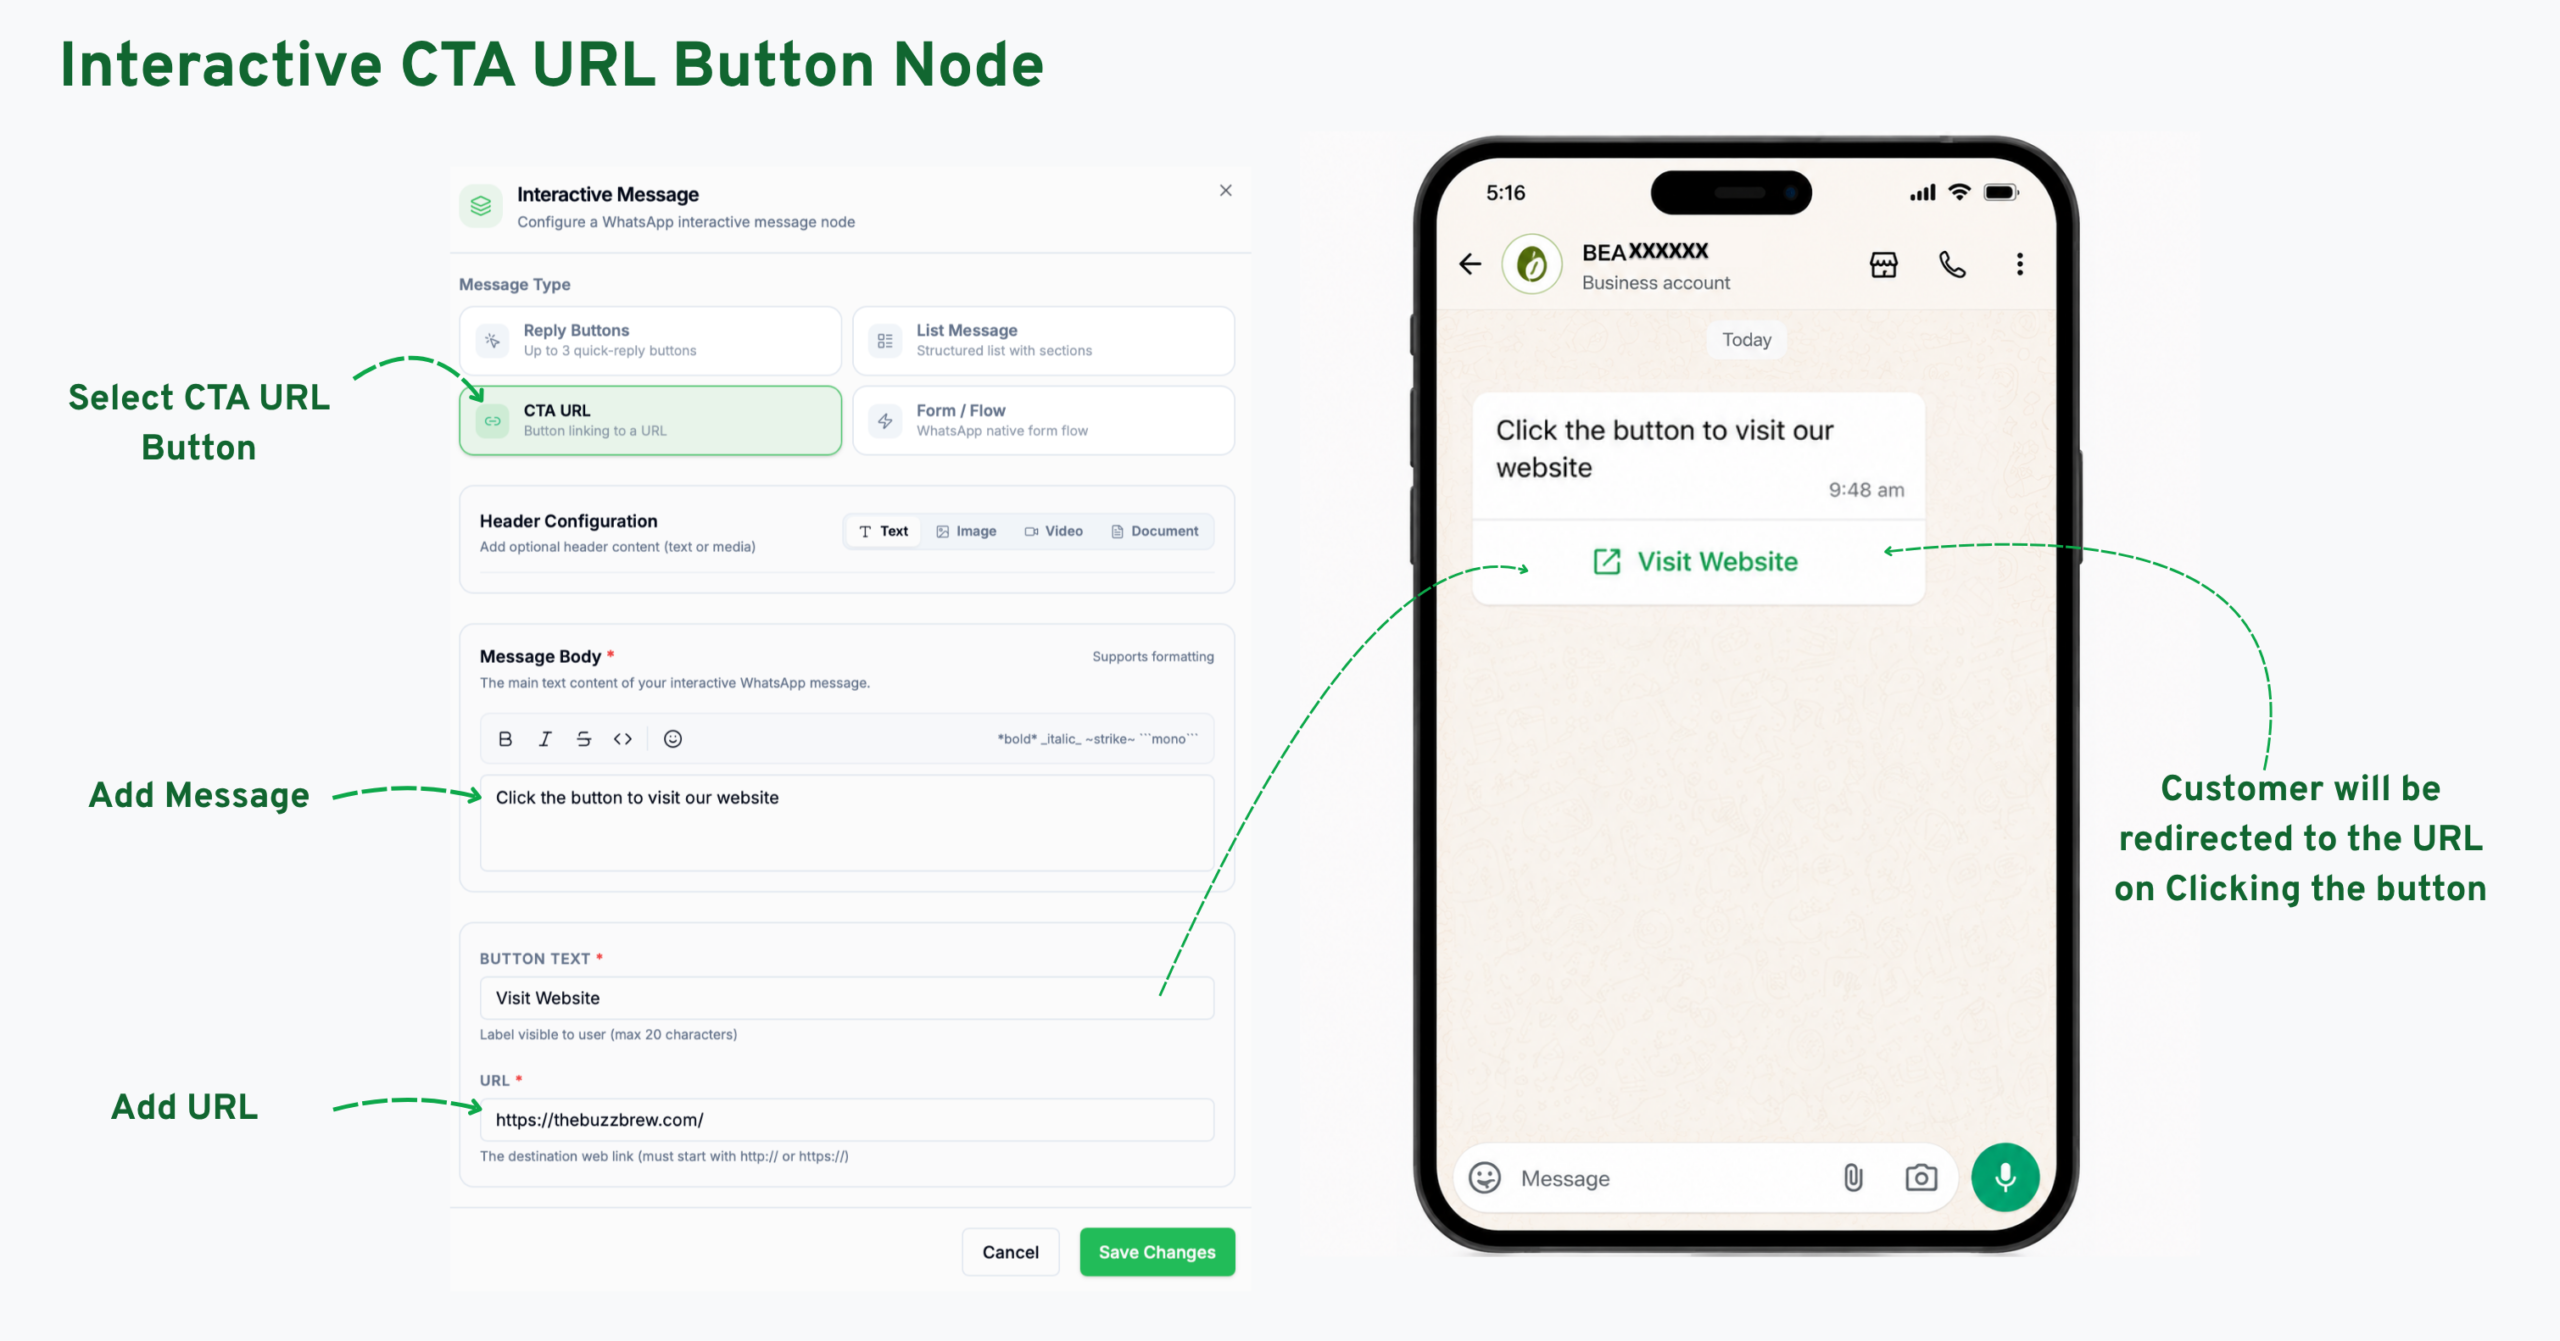
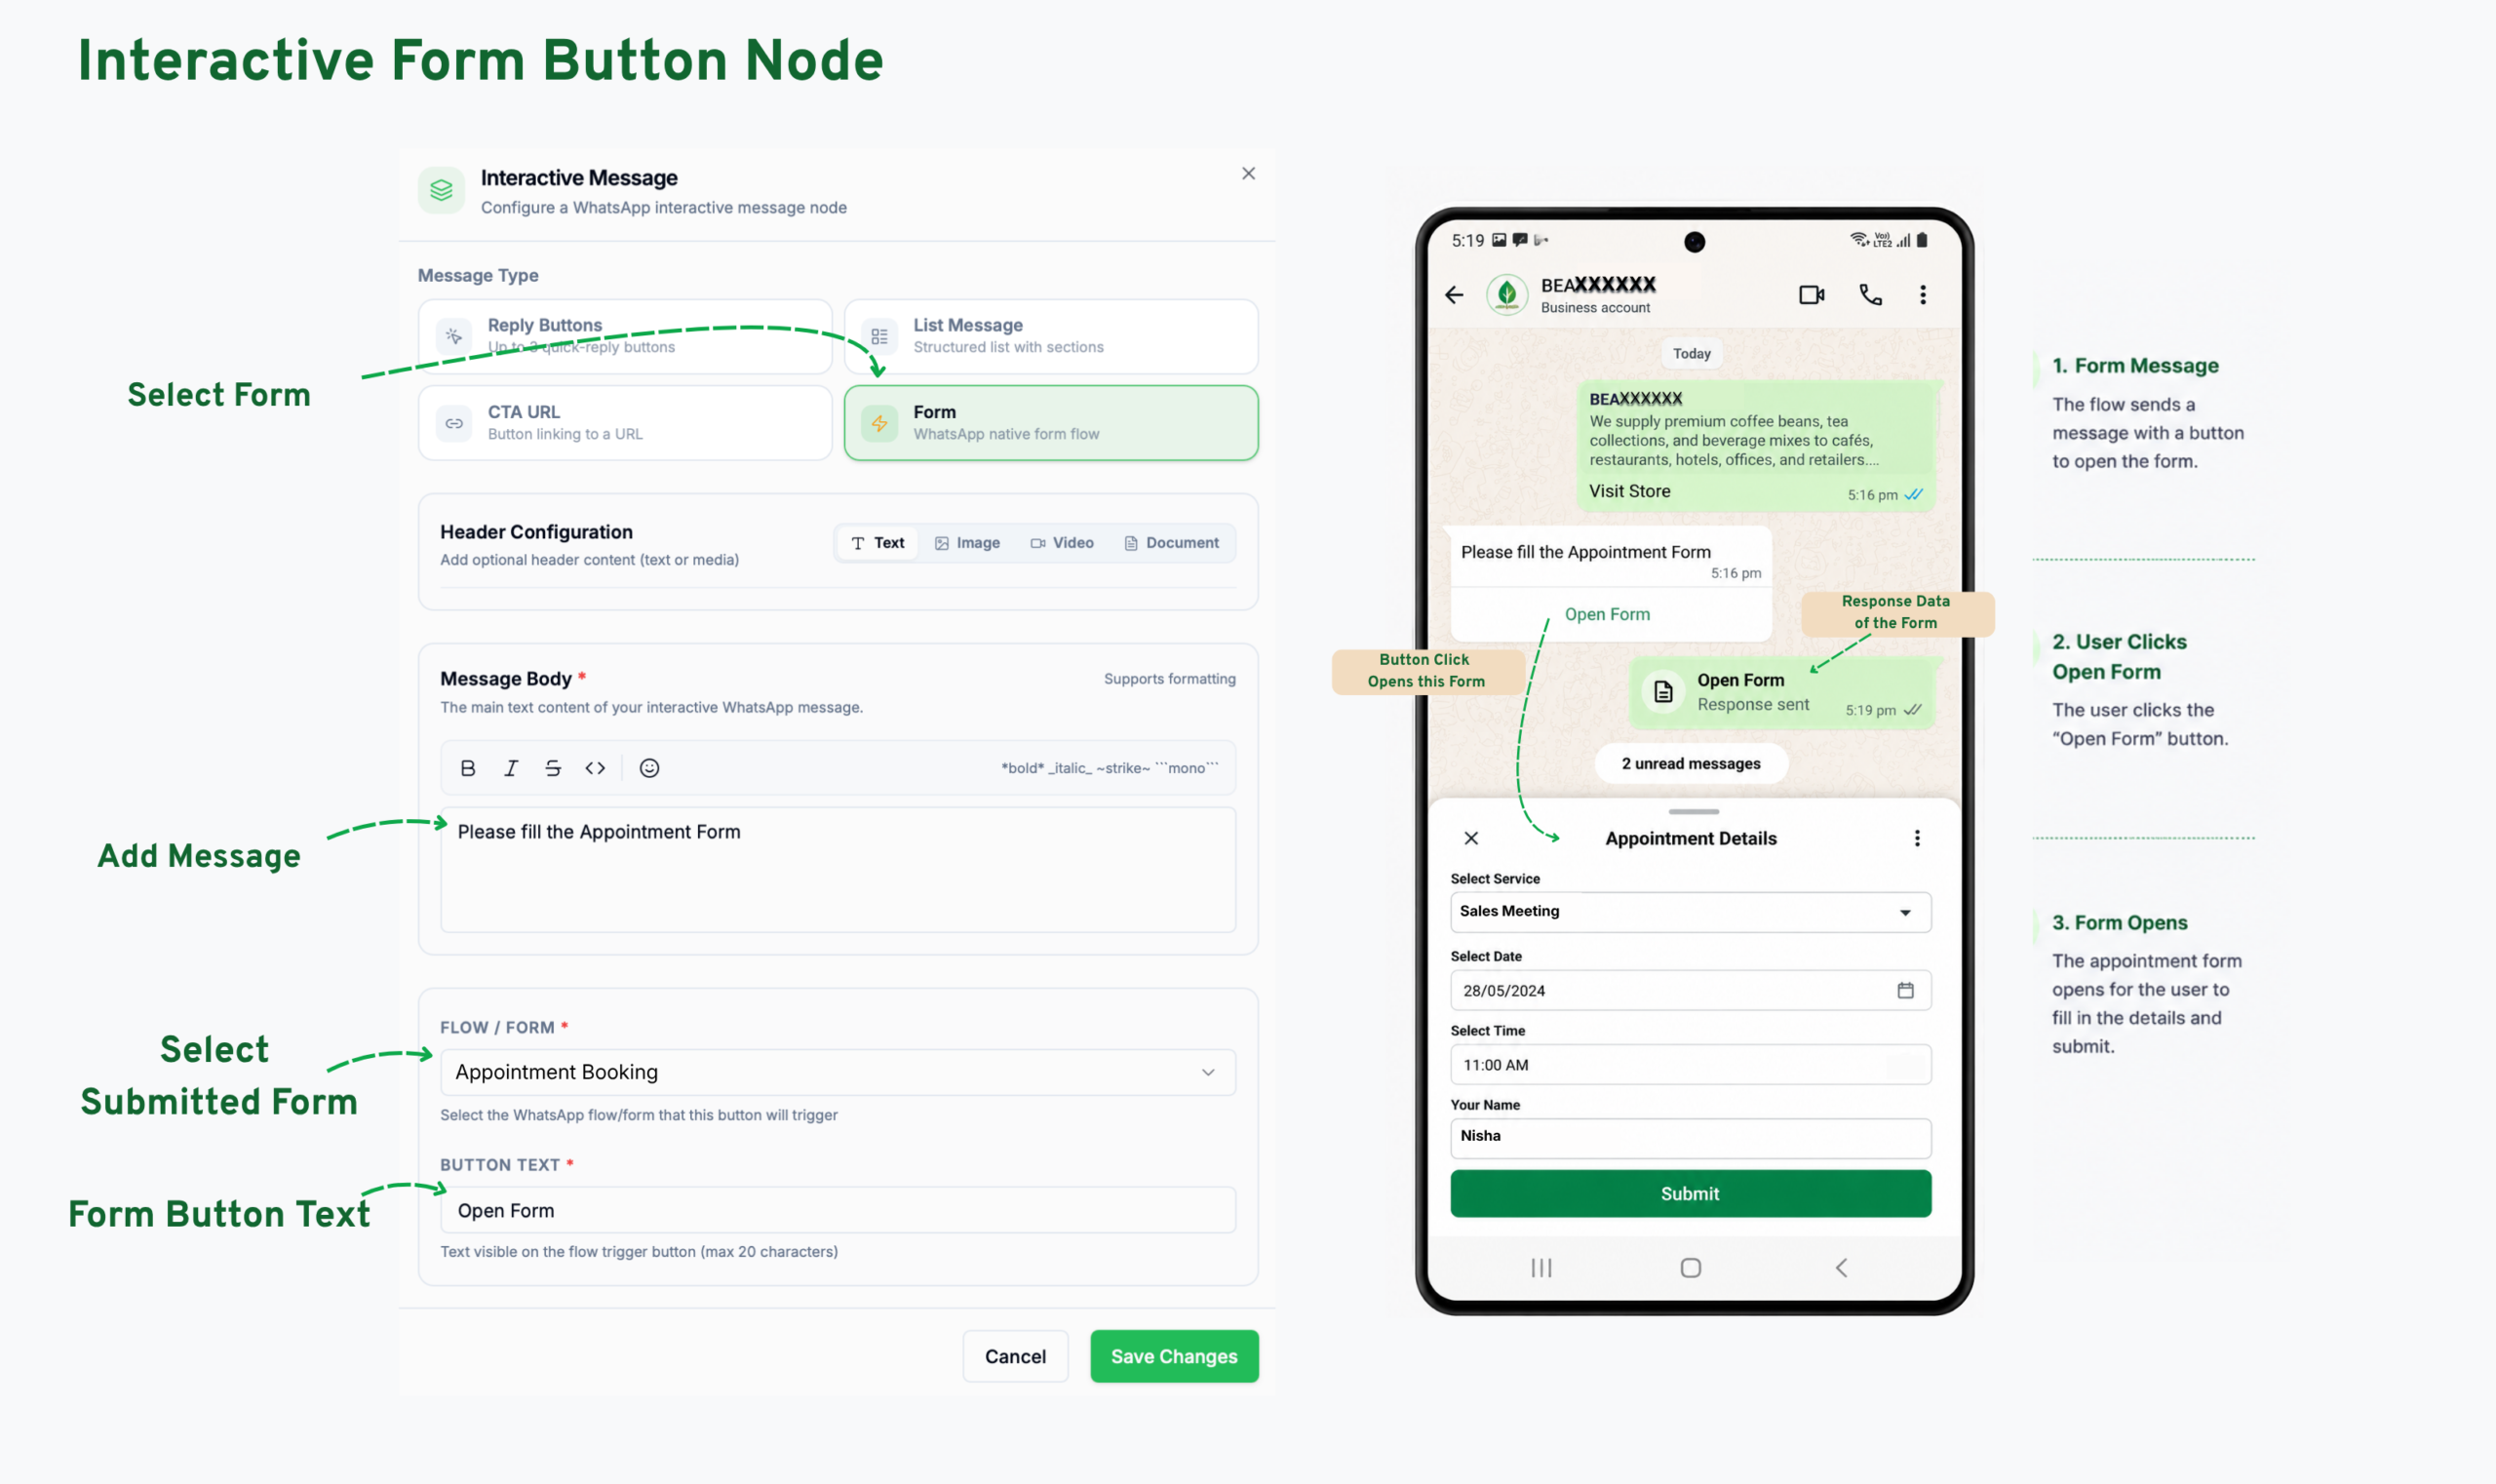
Interactive sends a message with tappable options. Optionally add a Header — Text, Image, Video, or Document — plus a required Message Body and an optional Footer.
Choose from four Message Types:
Question asks the customer a question and saves their reply. Configure the Question Text, then choose an Answer Mode:
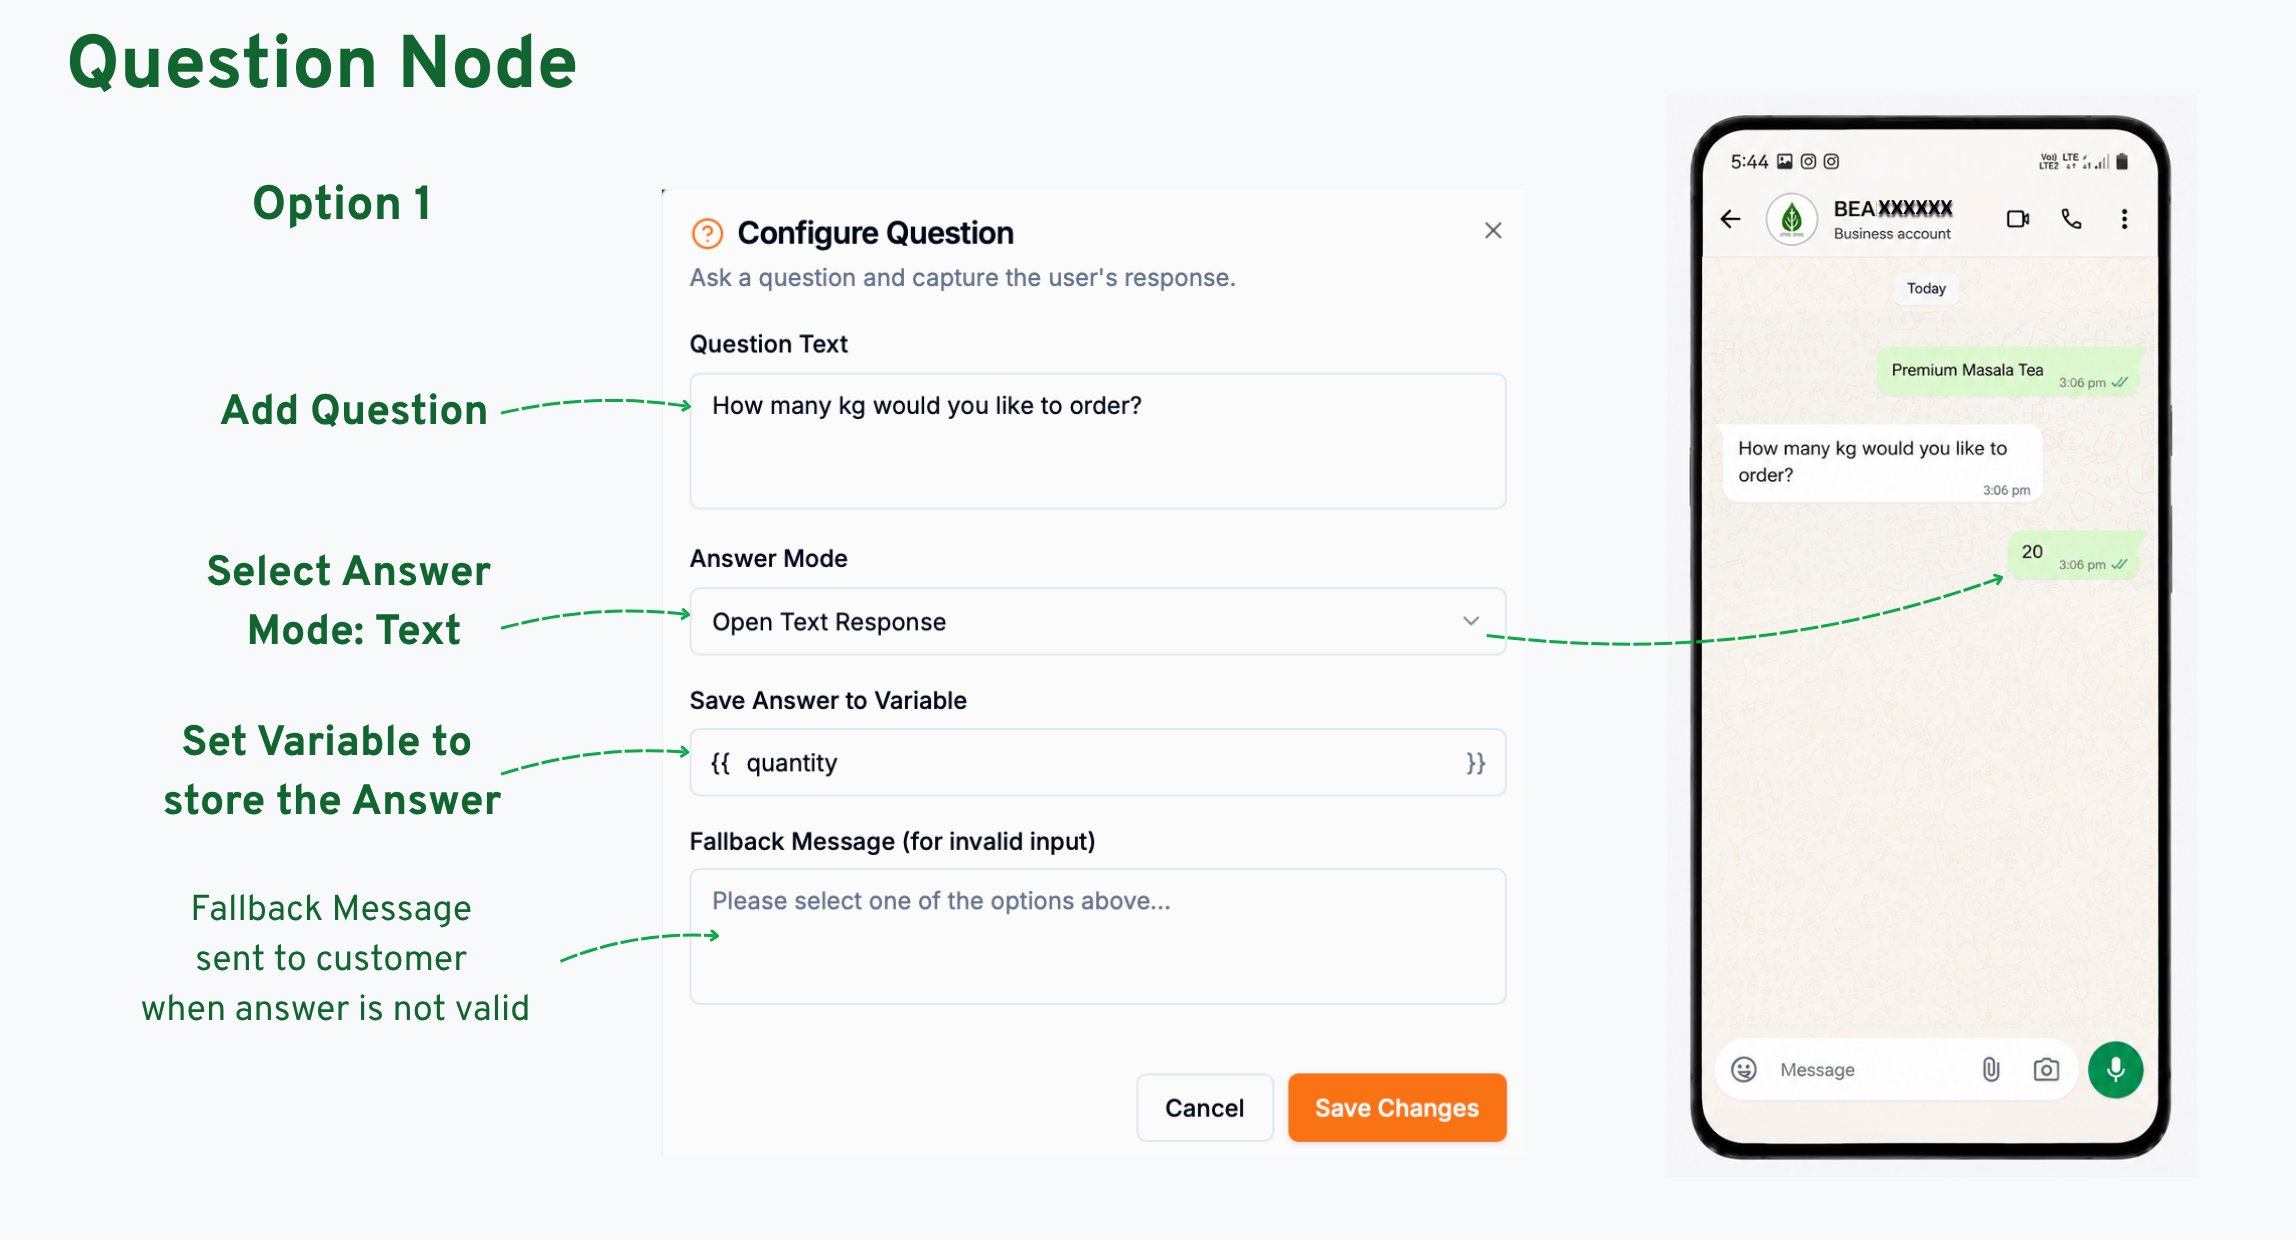
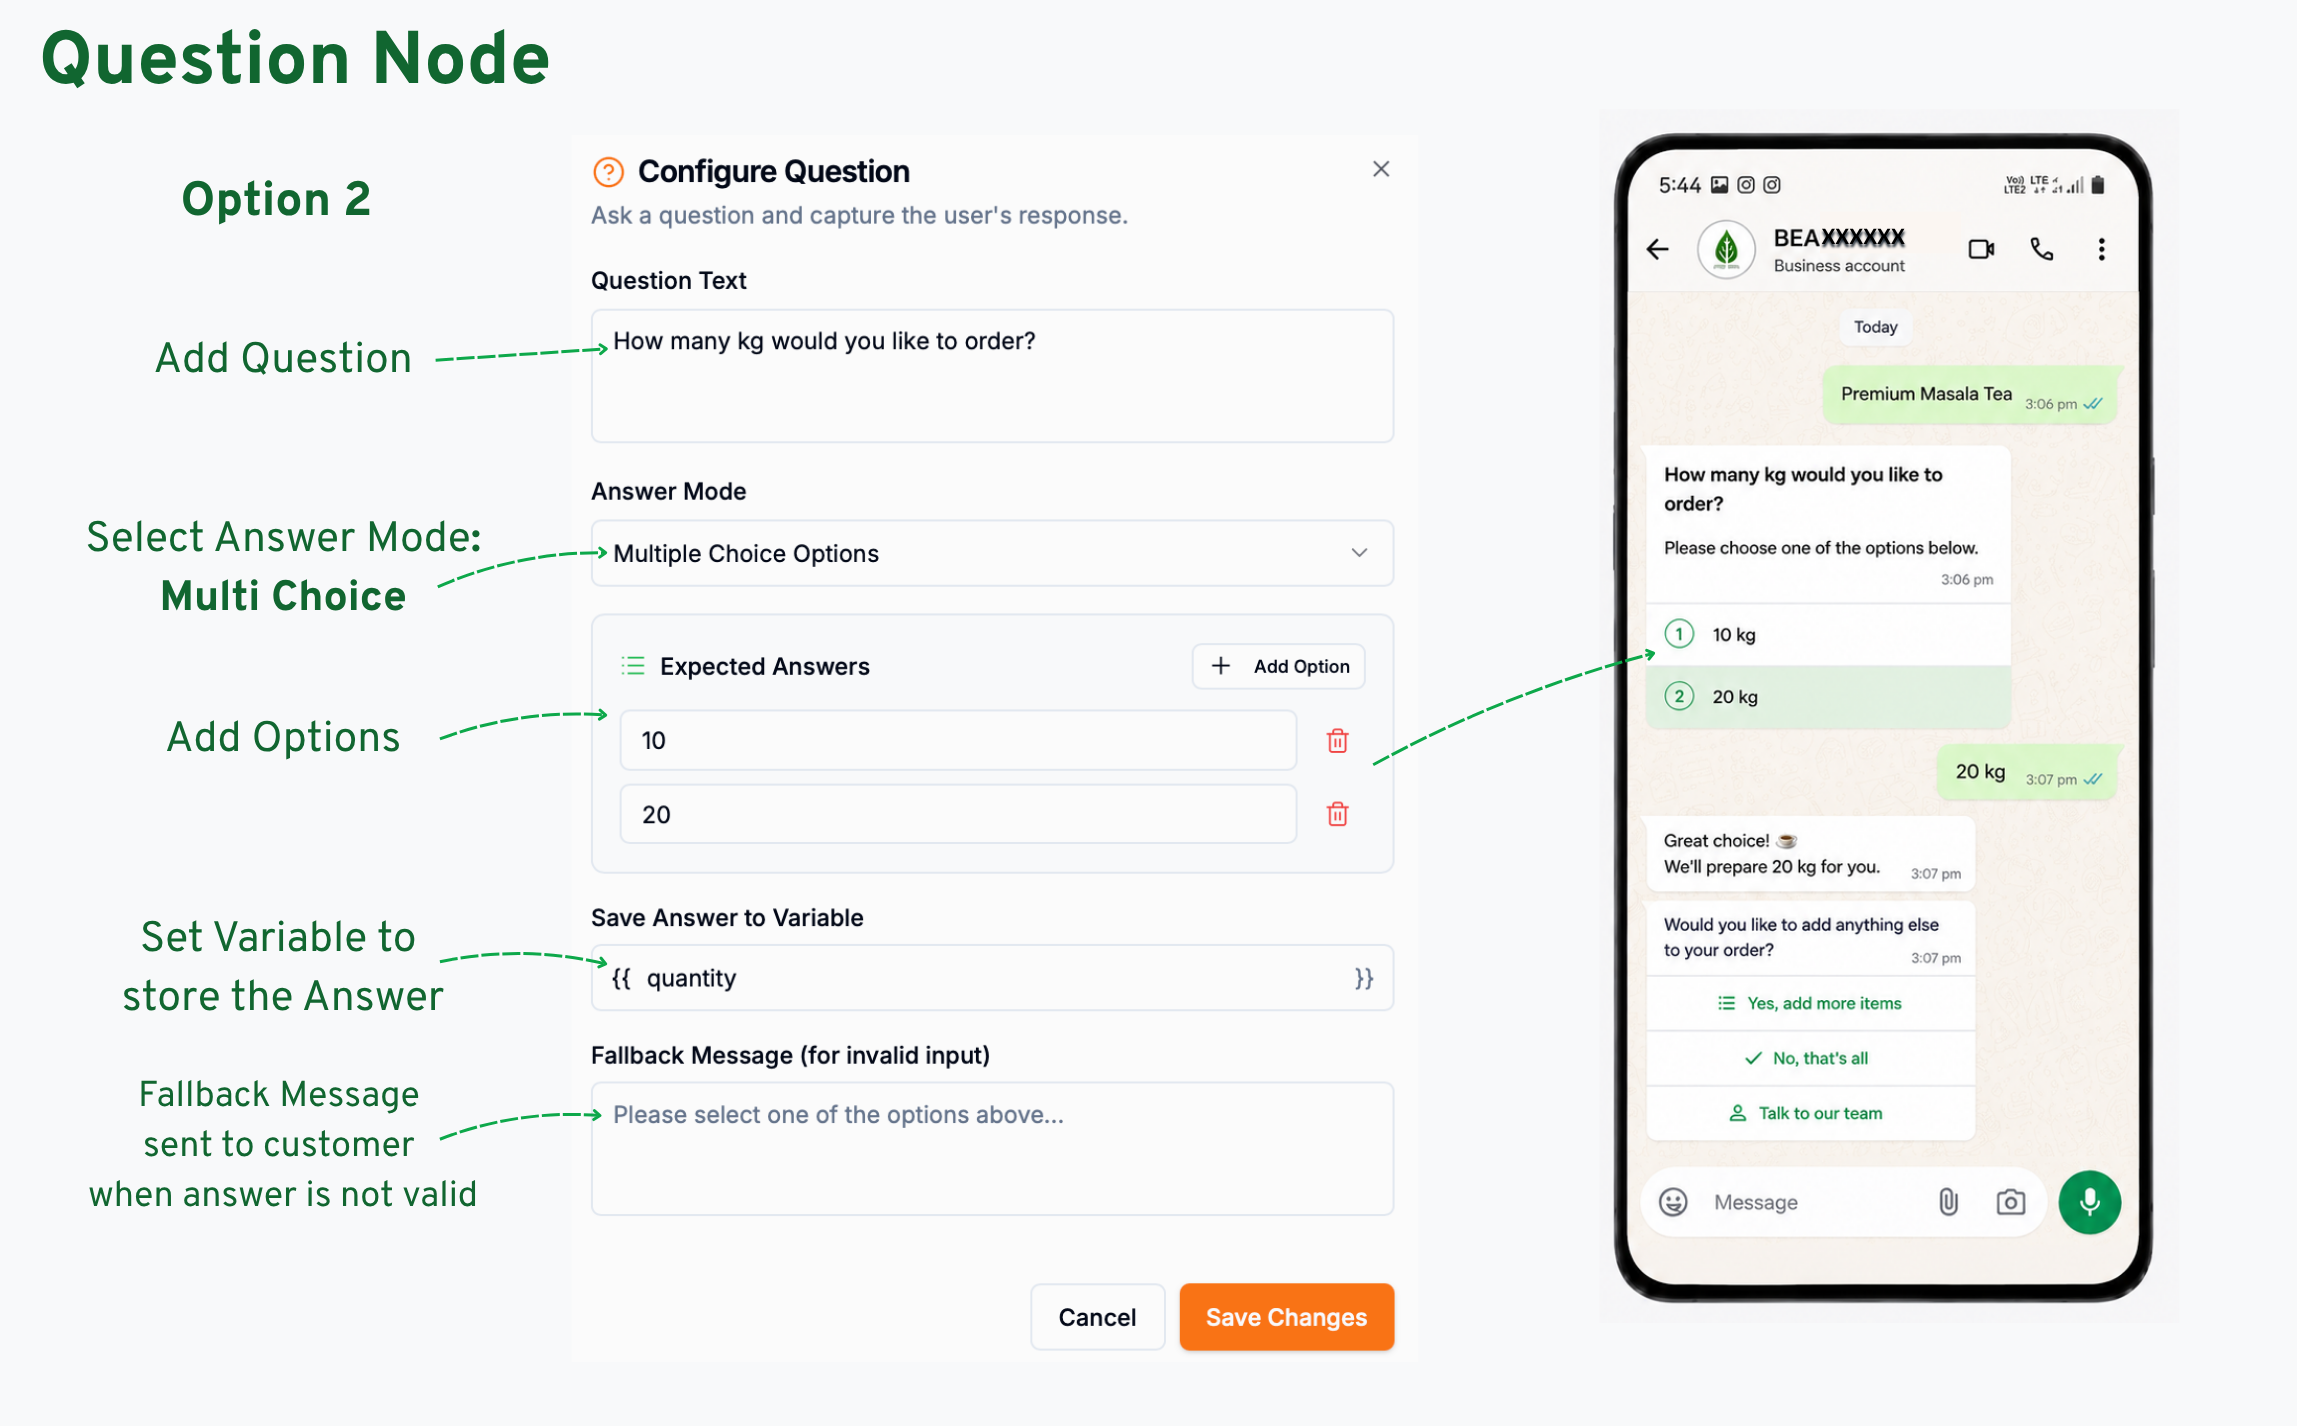
Under Save Answer to Variable, set the variable name to which the reply should be saved, so it can be reused later in the Flow.
You can also set a Fallback Message that is sent if the customer’s reply doesn’t match any of the expected answers.
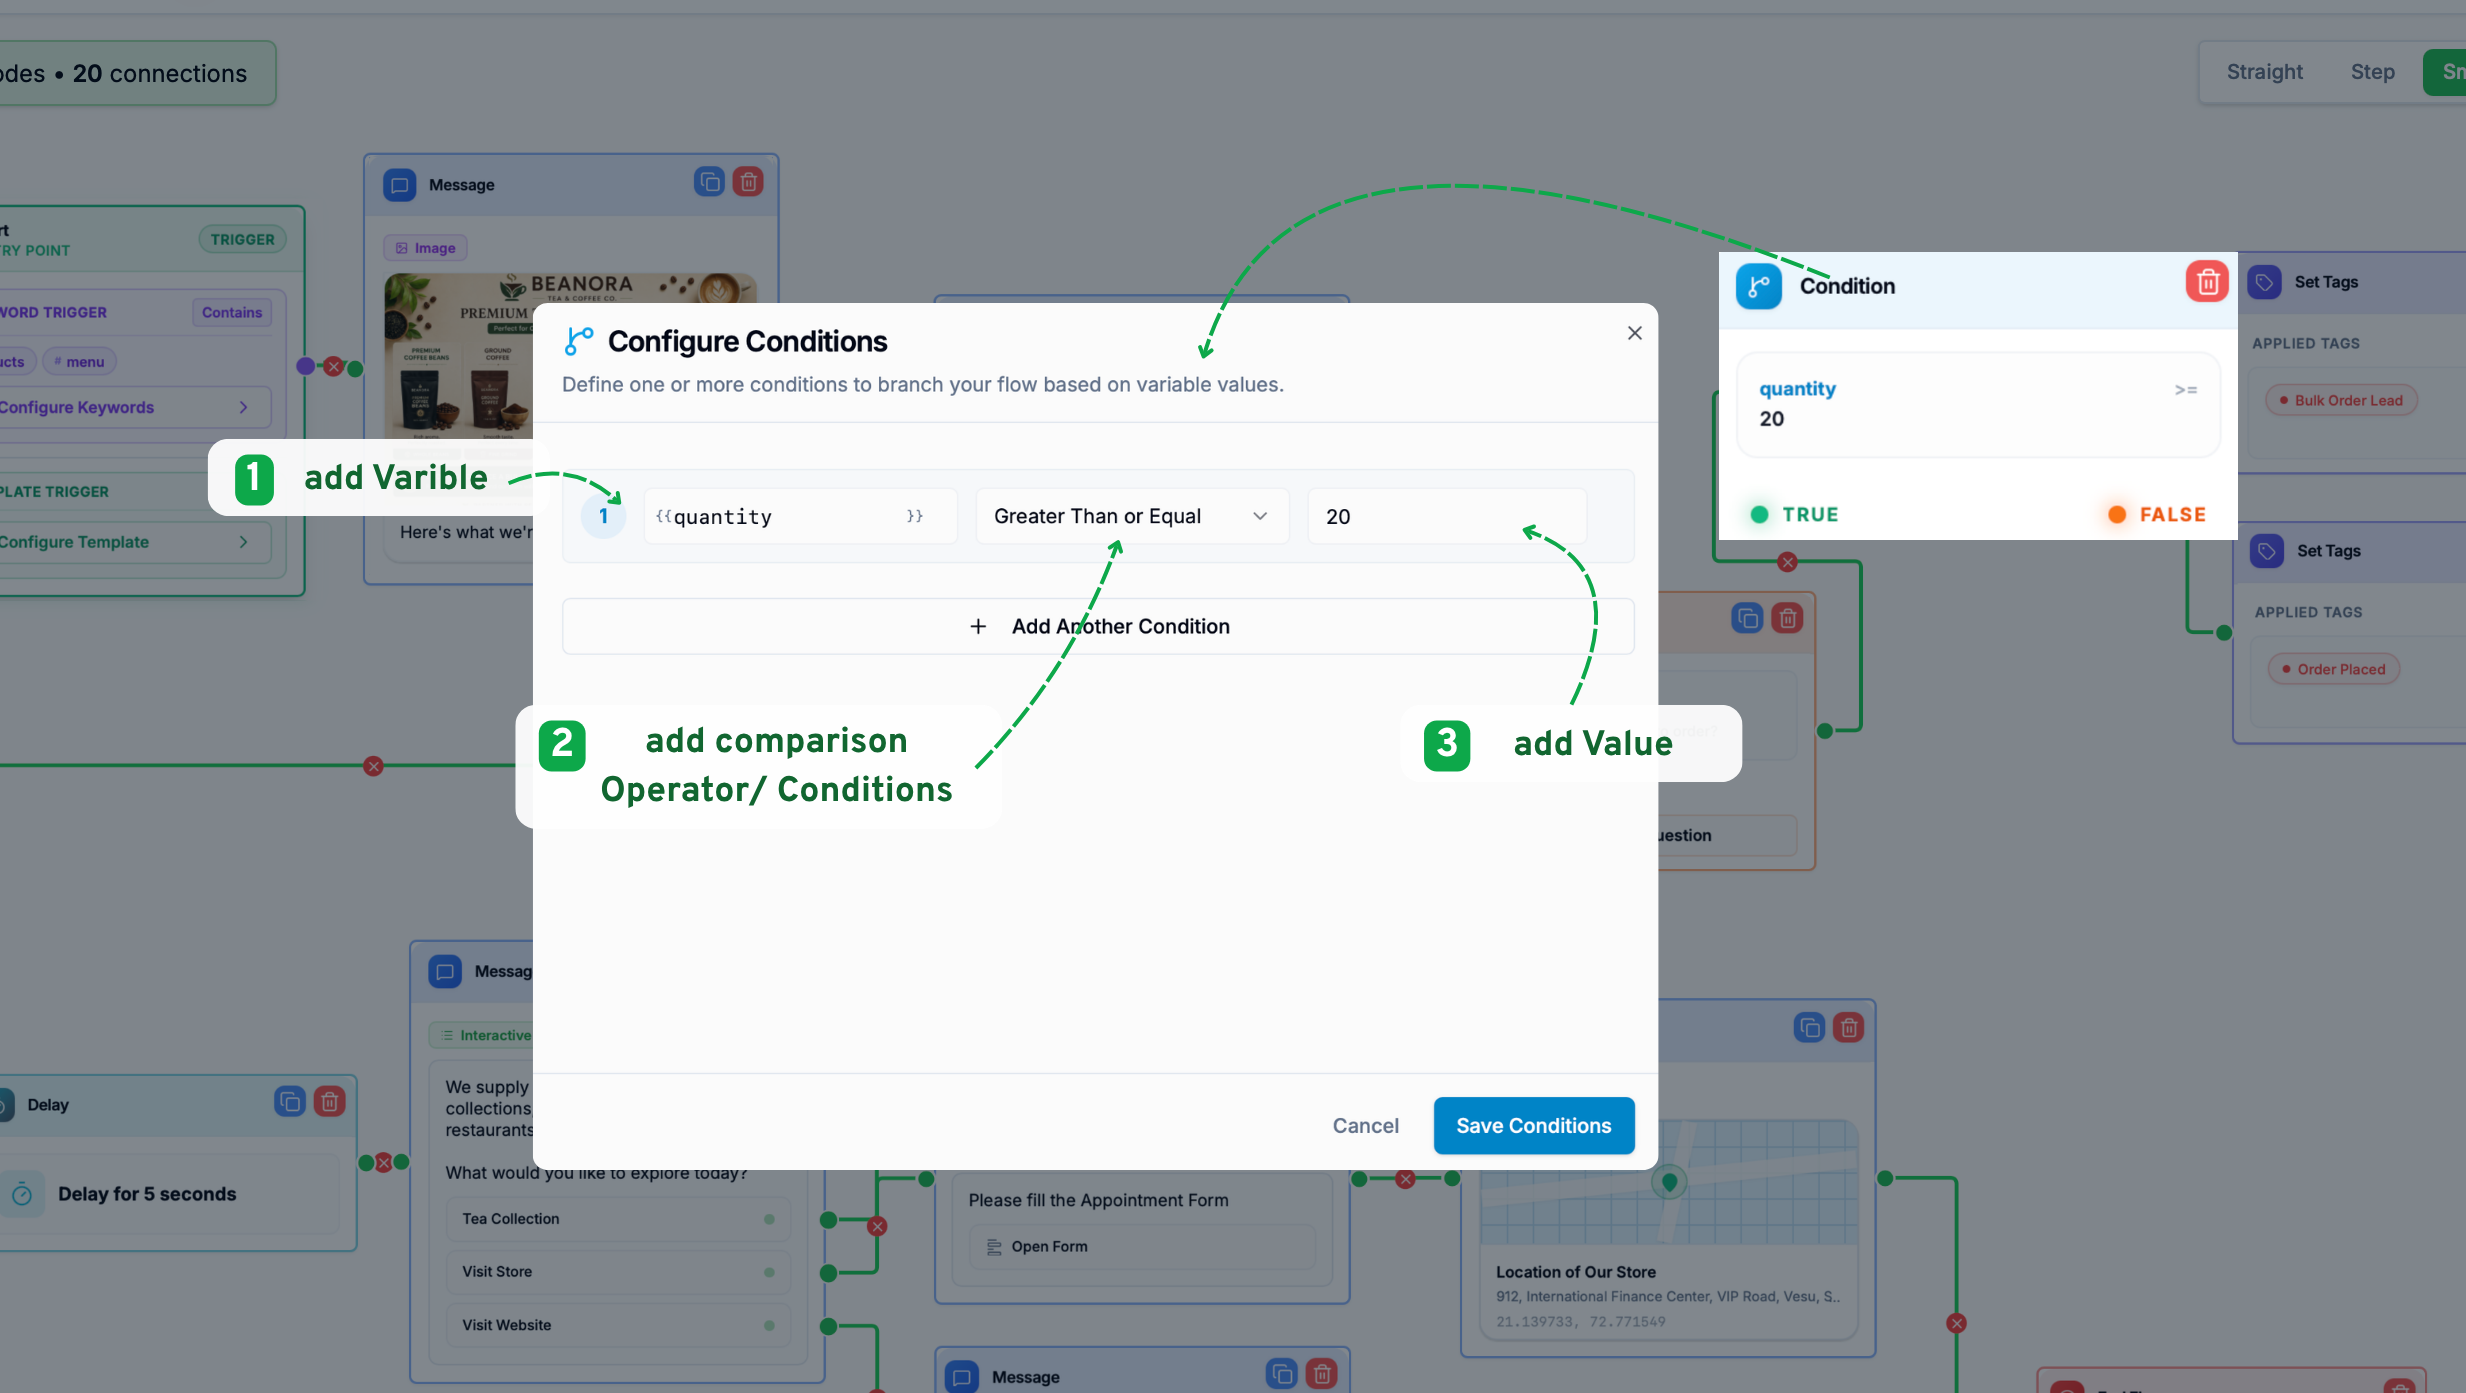
Condition Creates if/else branching based on one or more conditions.
The node then branches into TRUE and FALSE paths, so the Flow continues differently depending on the result.
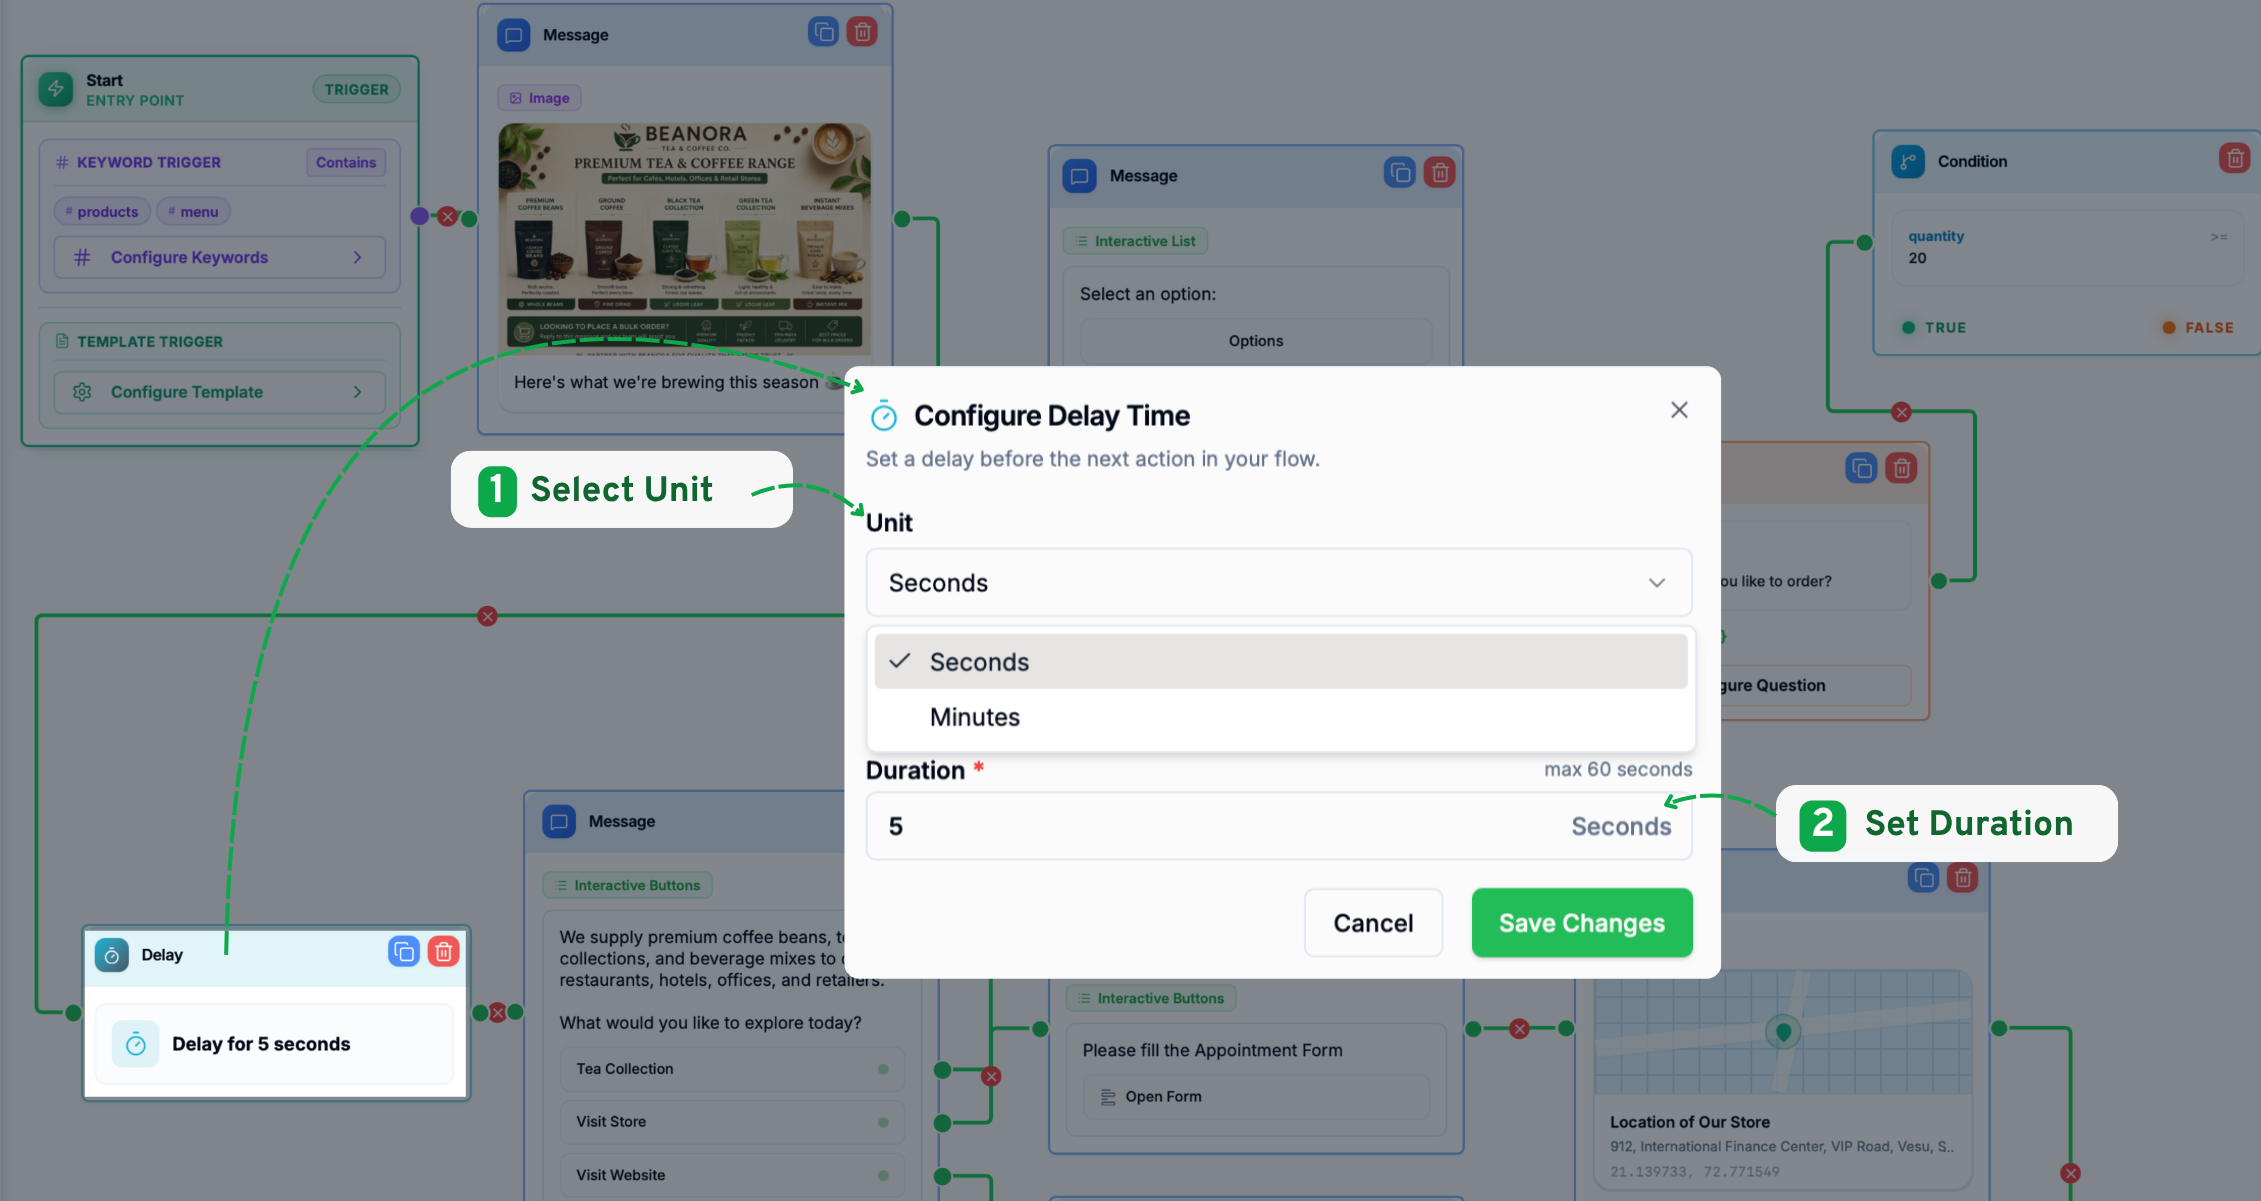
Delay pauses the Flow for a set amount of time before continuing to the next node. This is useful for spacing out automated messages so they don’t all arrive at once — for example, sending a message, waiting a few seconds, then sending a follow-up.
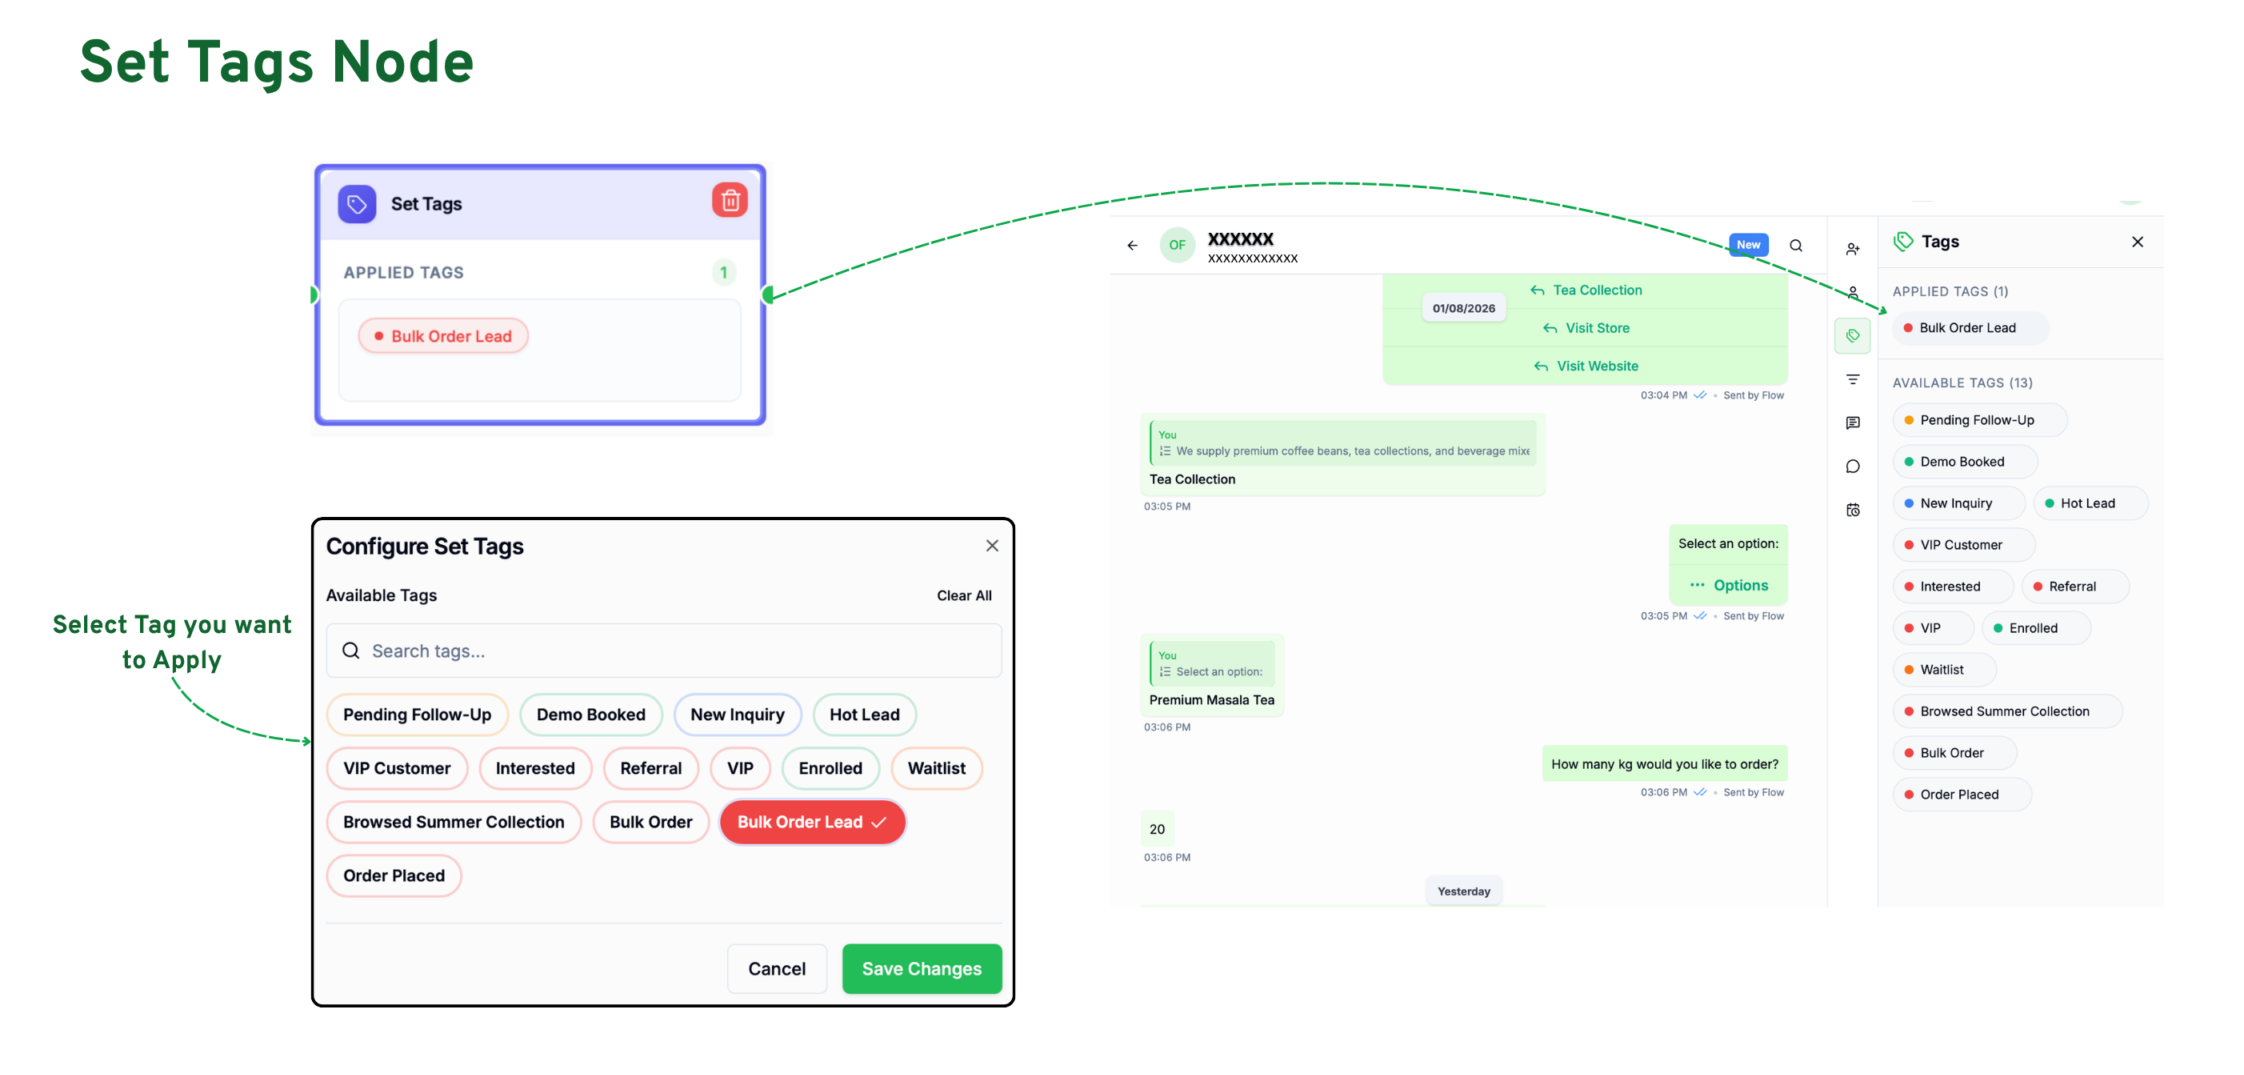
Set Tags applies one or more Tags to the current contact. Under Available Tags, search or browse existing Tags and select the ones you want this node to apply.
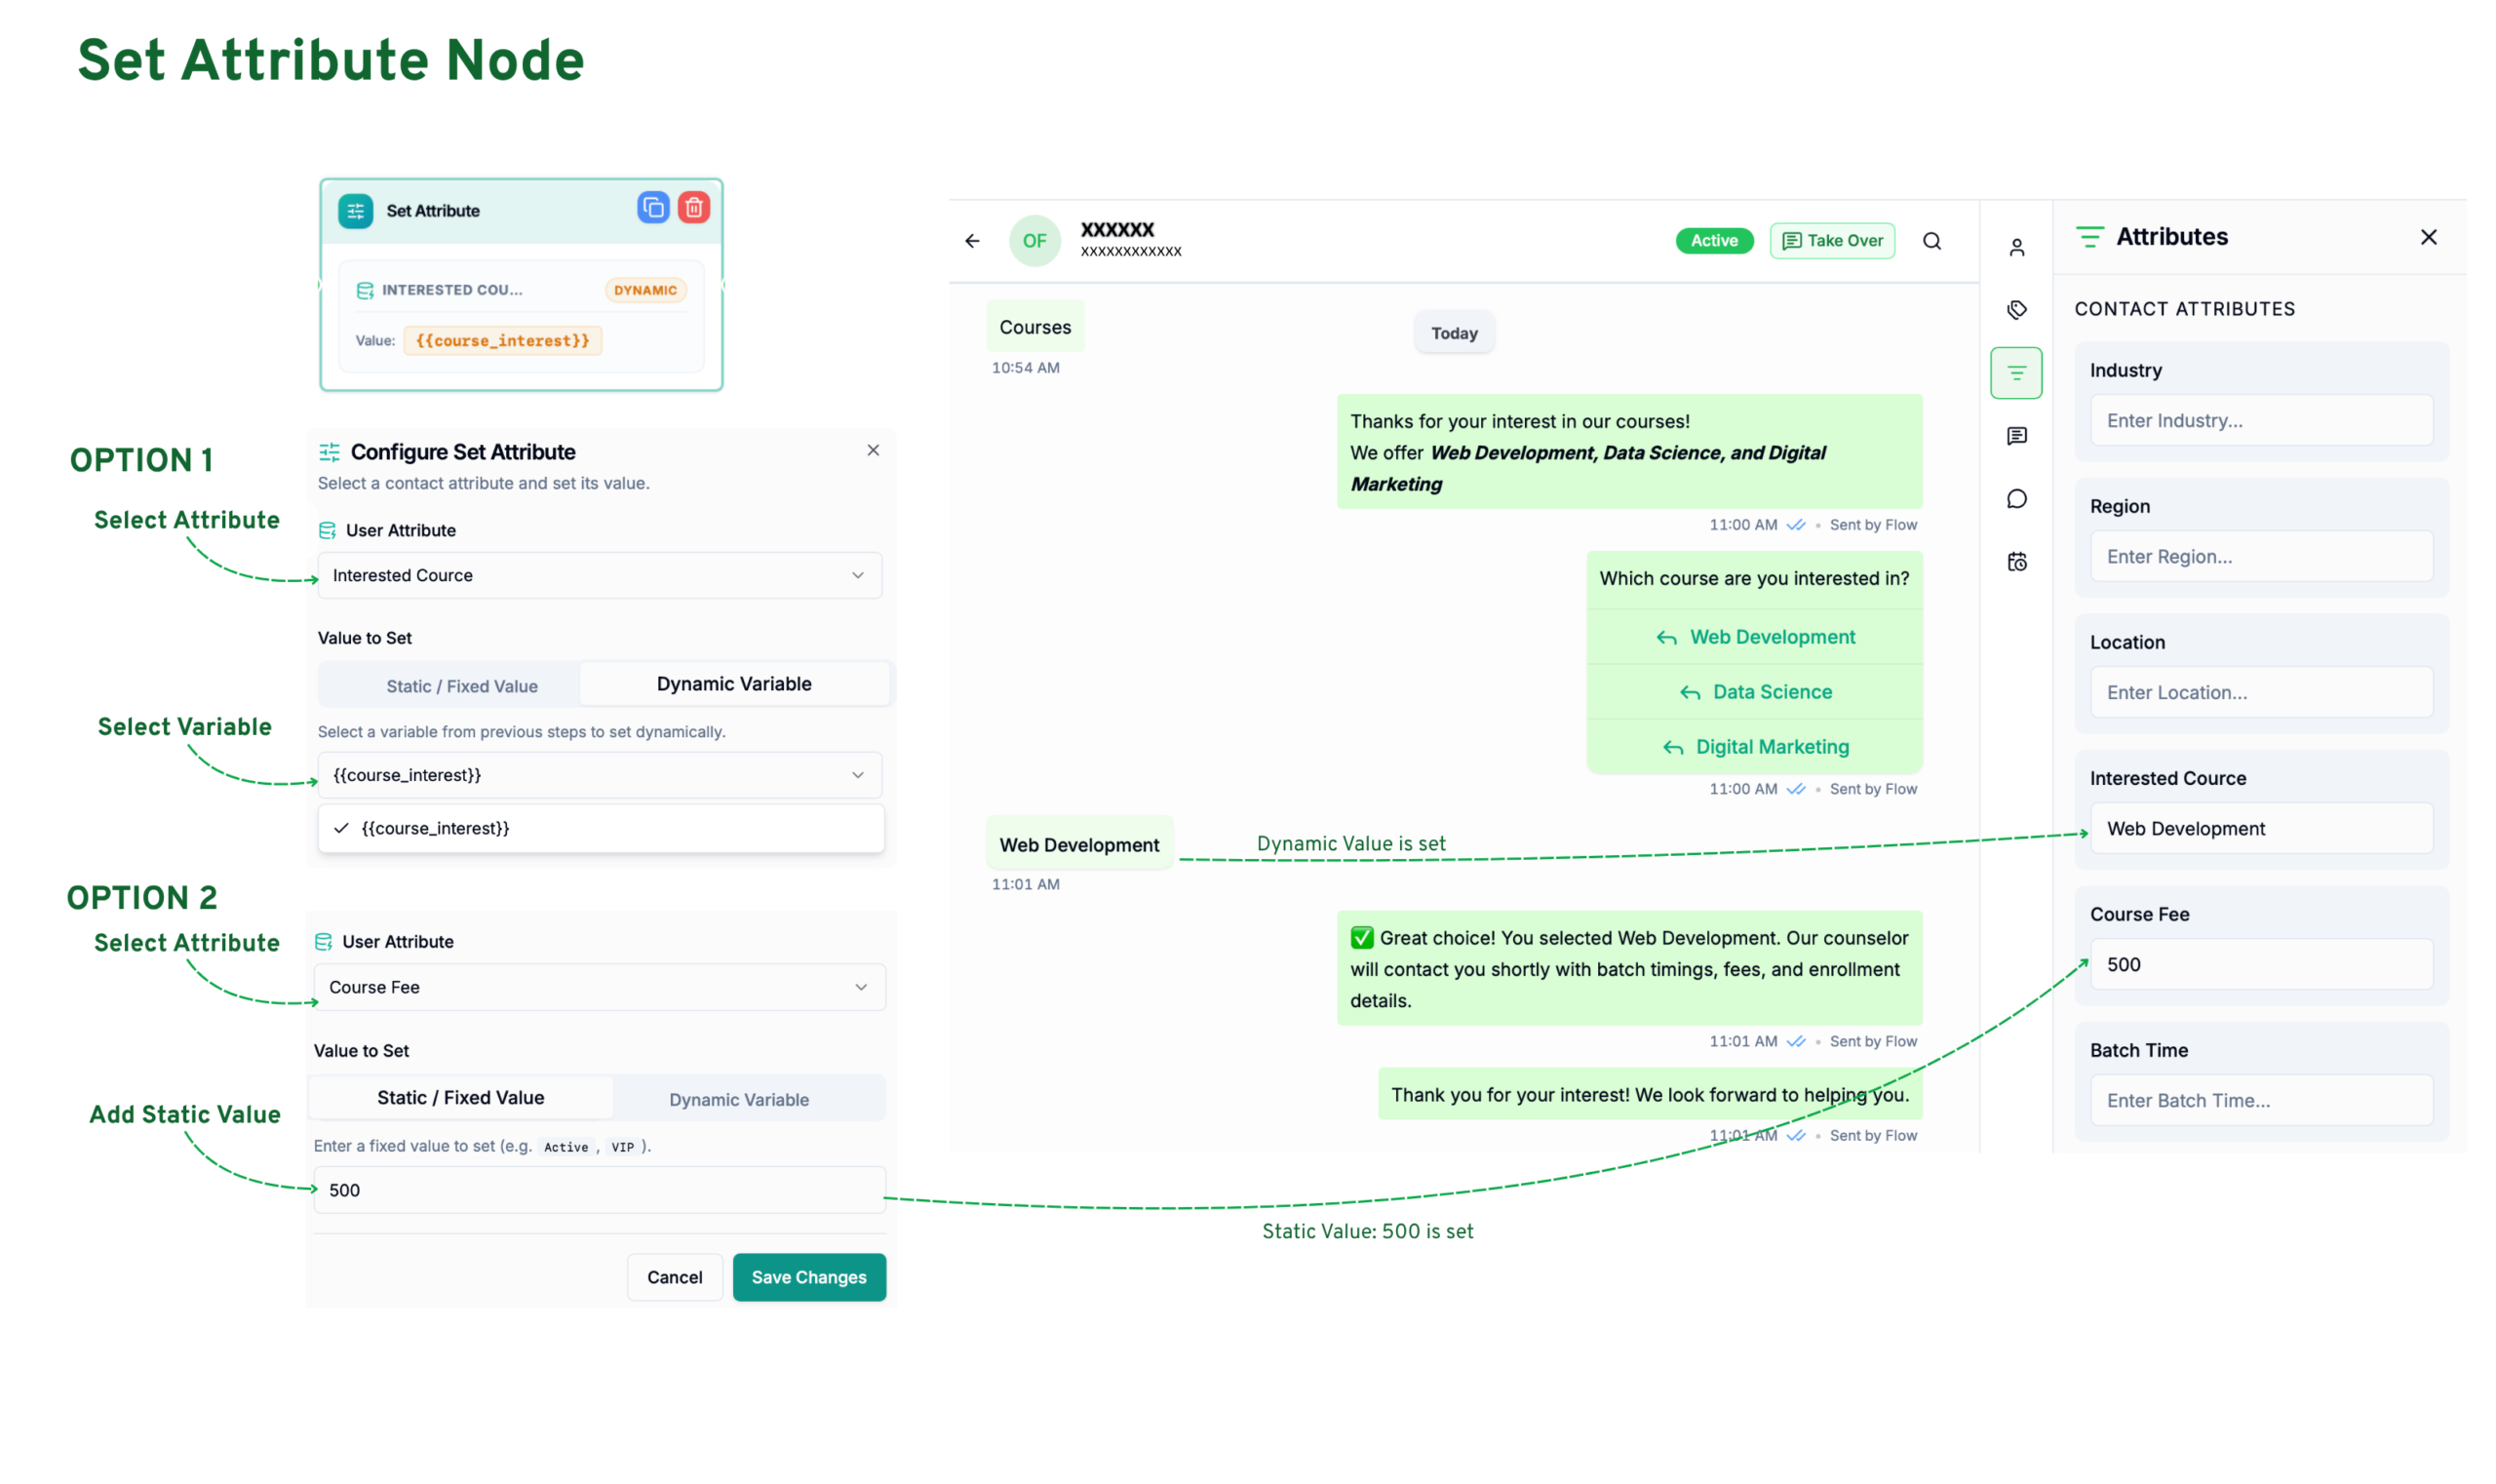
Set Attribute writes a value into a contact attribute. Choose the User Attribute to update, then set its Value to Set:
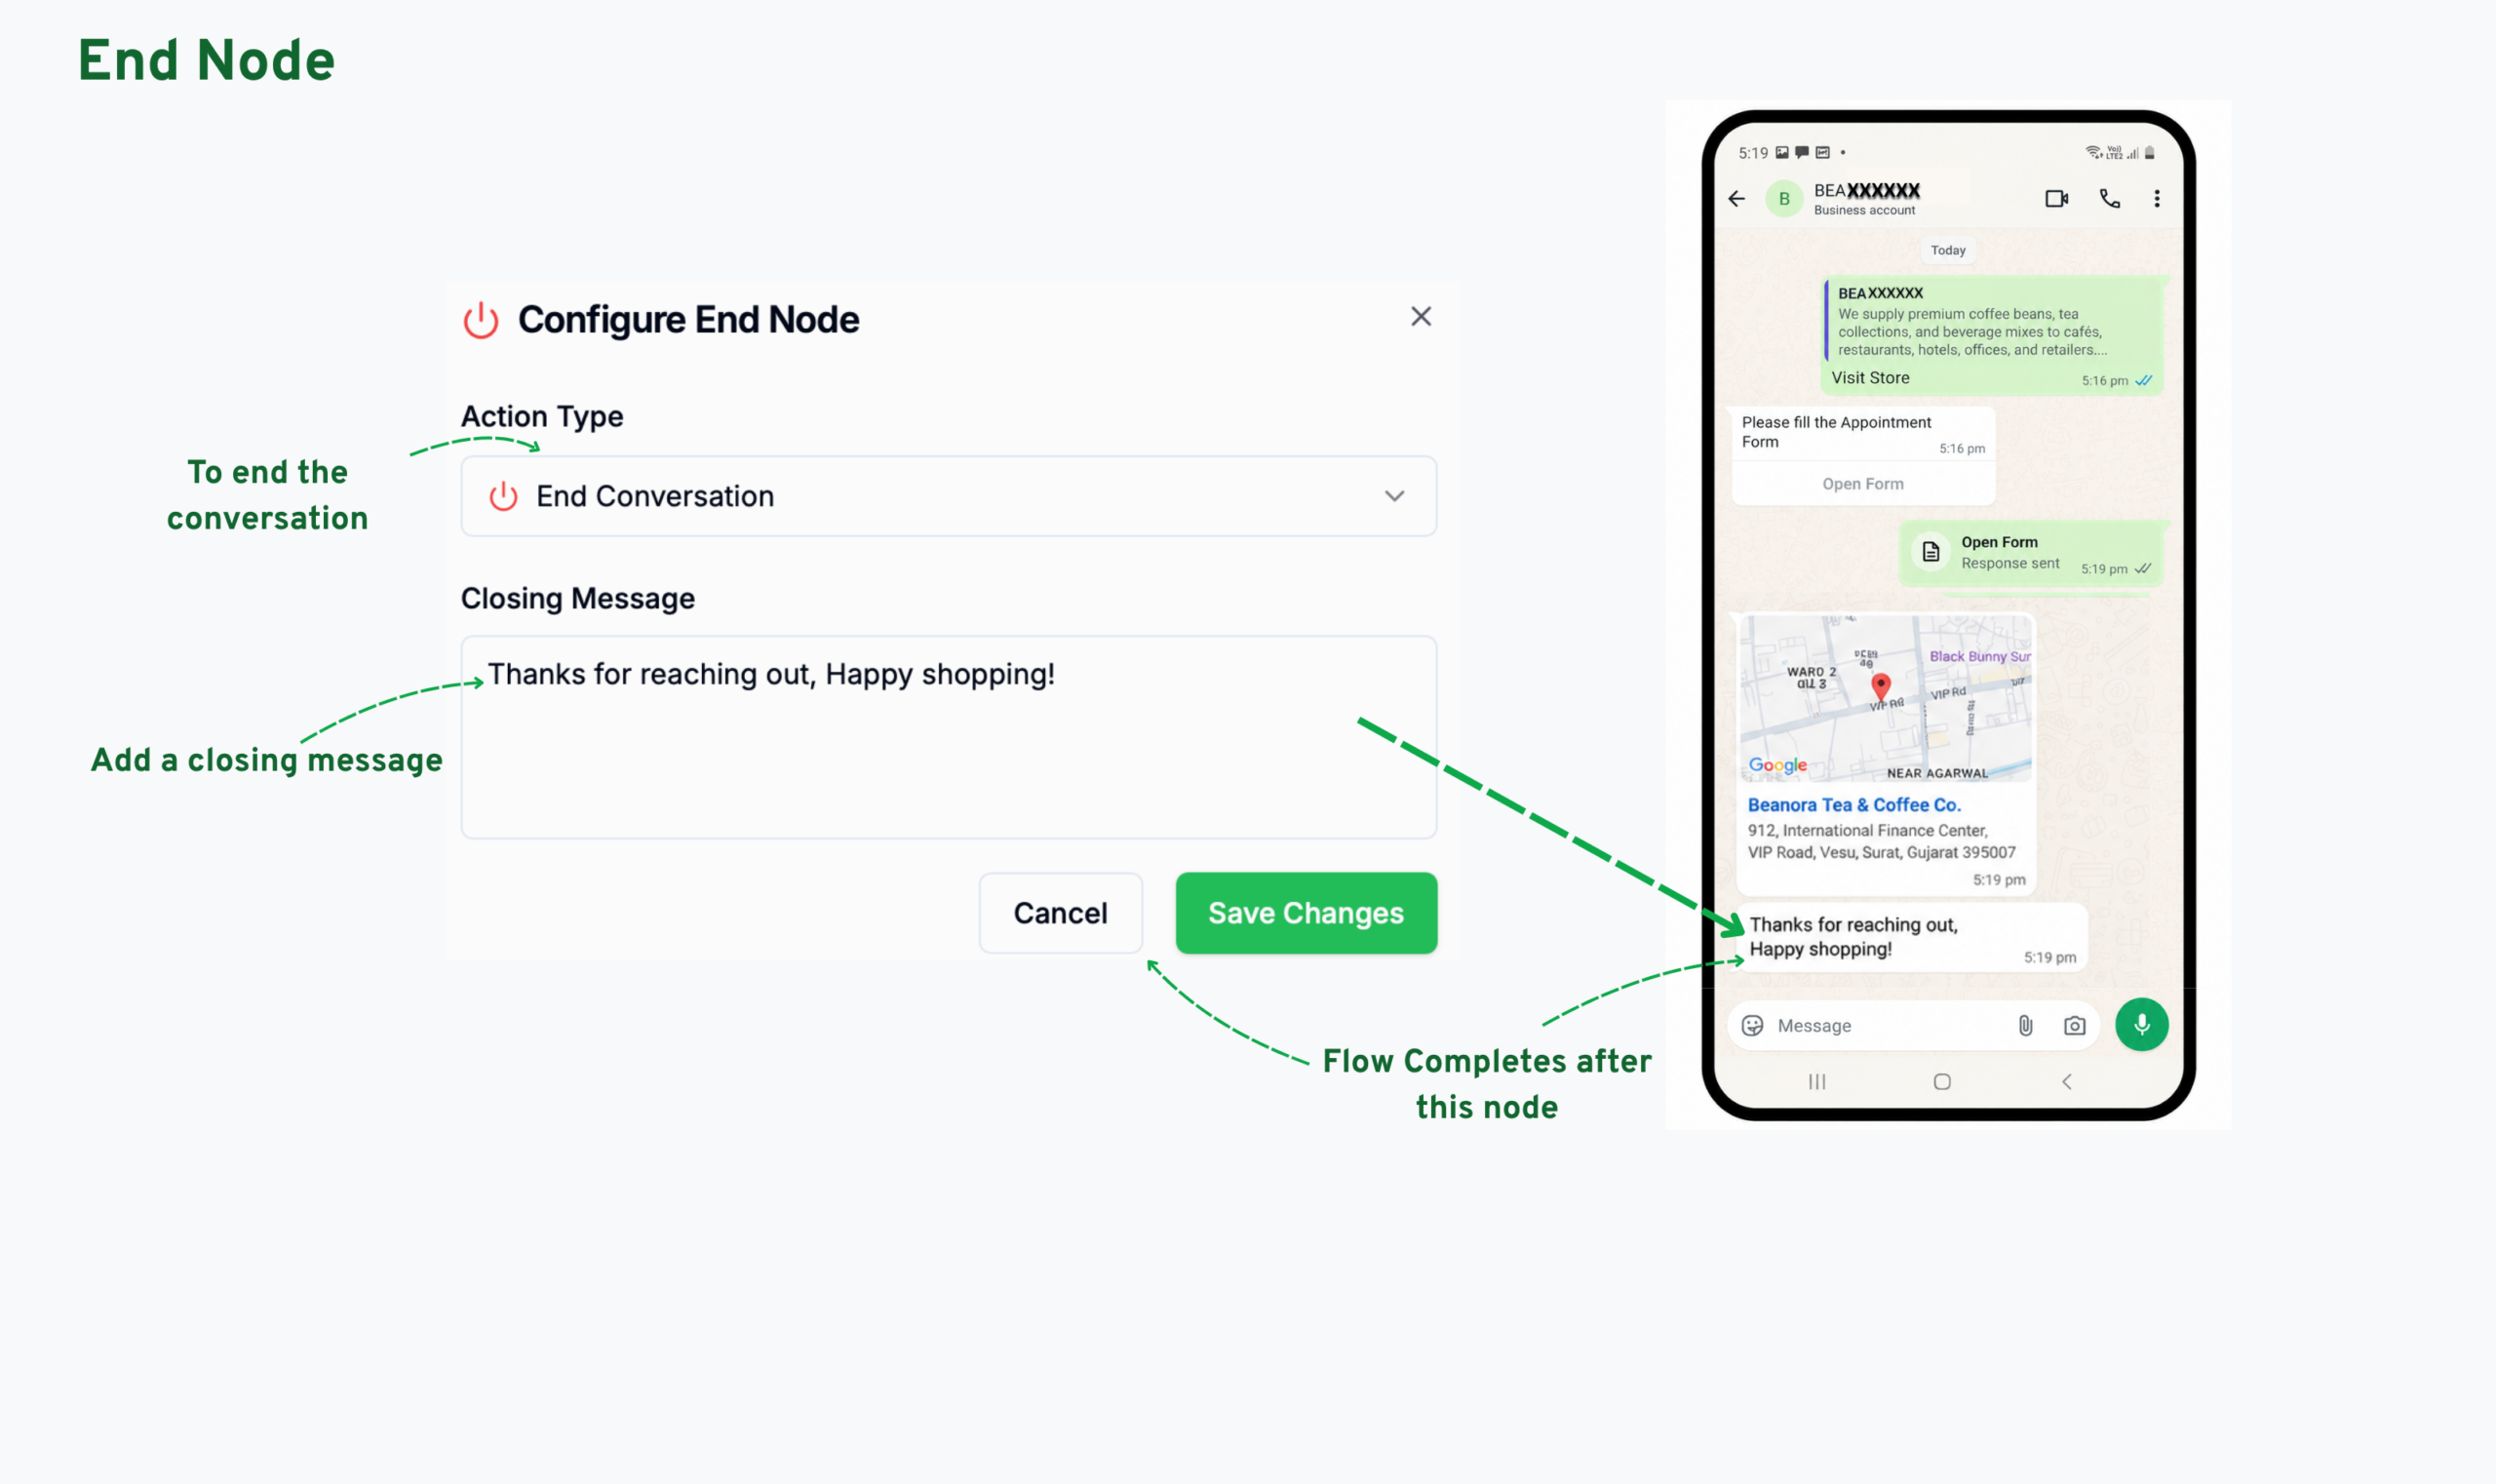
End Flow ends the conversation and closes the Flow. Write a Closing Message — the final message the customer sees before the Flow ends.
Use these Flow nodes to build engaging and interactive customer conversations.
Still Have Questions? Visit Our FAQ Page
Our support team is ready to assist you.
© 2026 ONBBITS. All rights reserved.