
OVERVIEW
FEATURES
INTEGRATION
SUPPORT
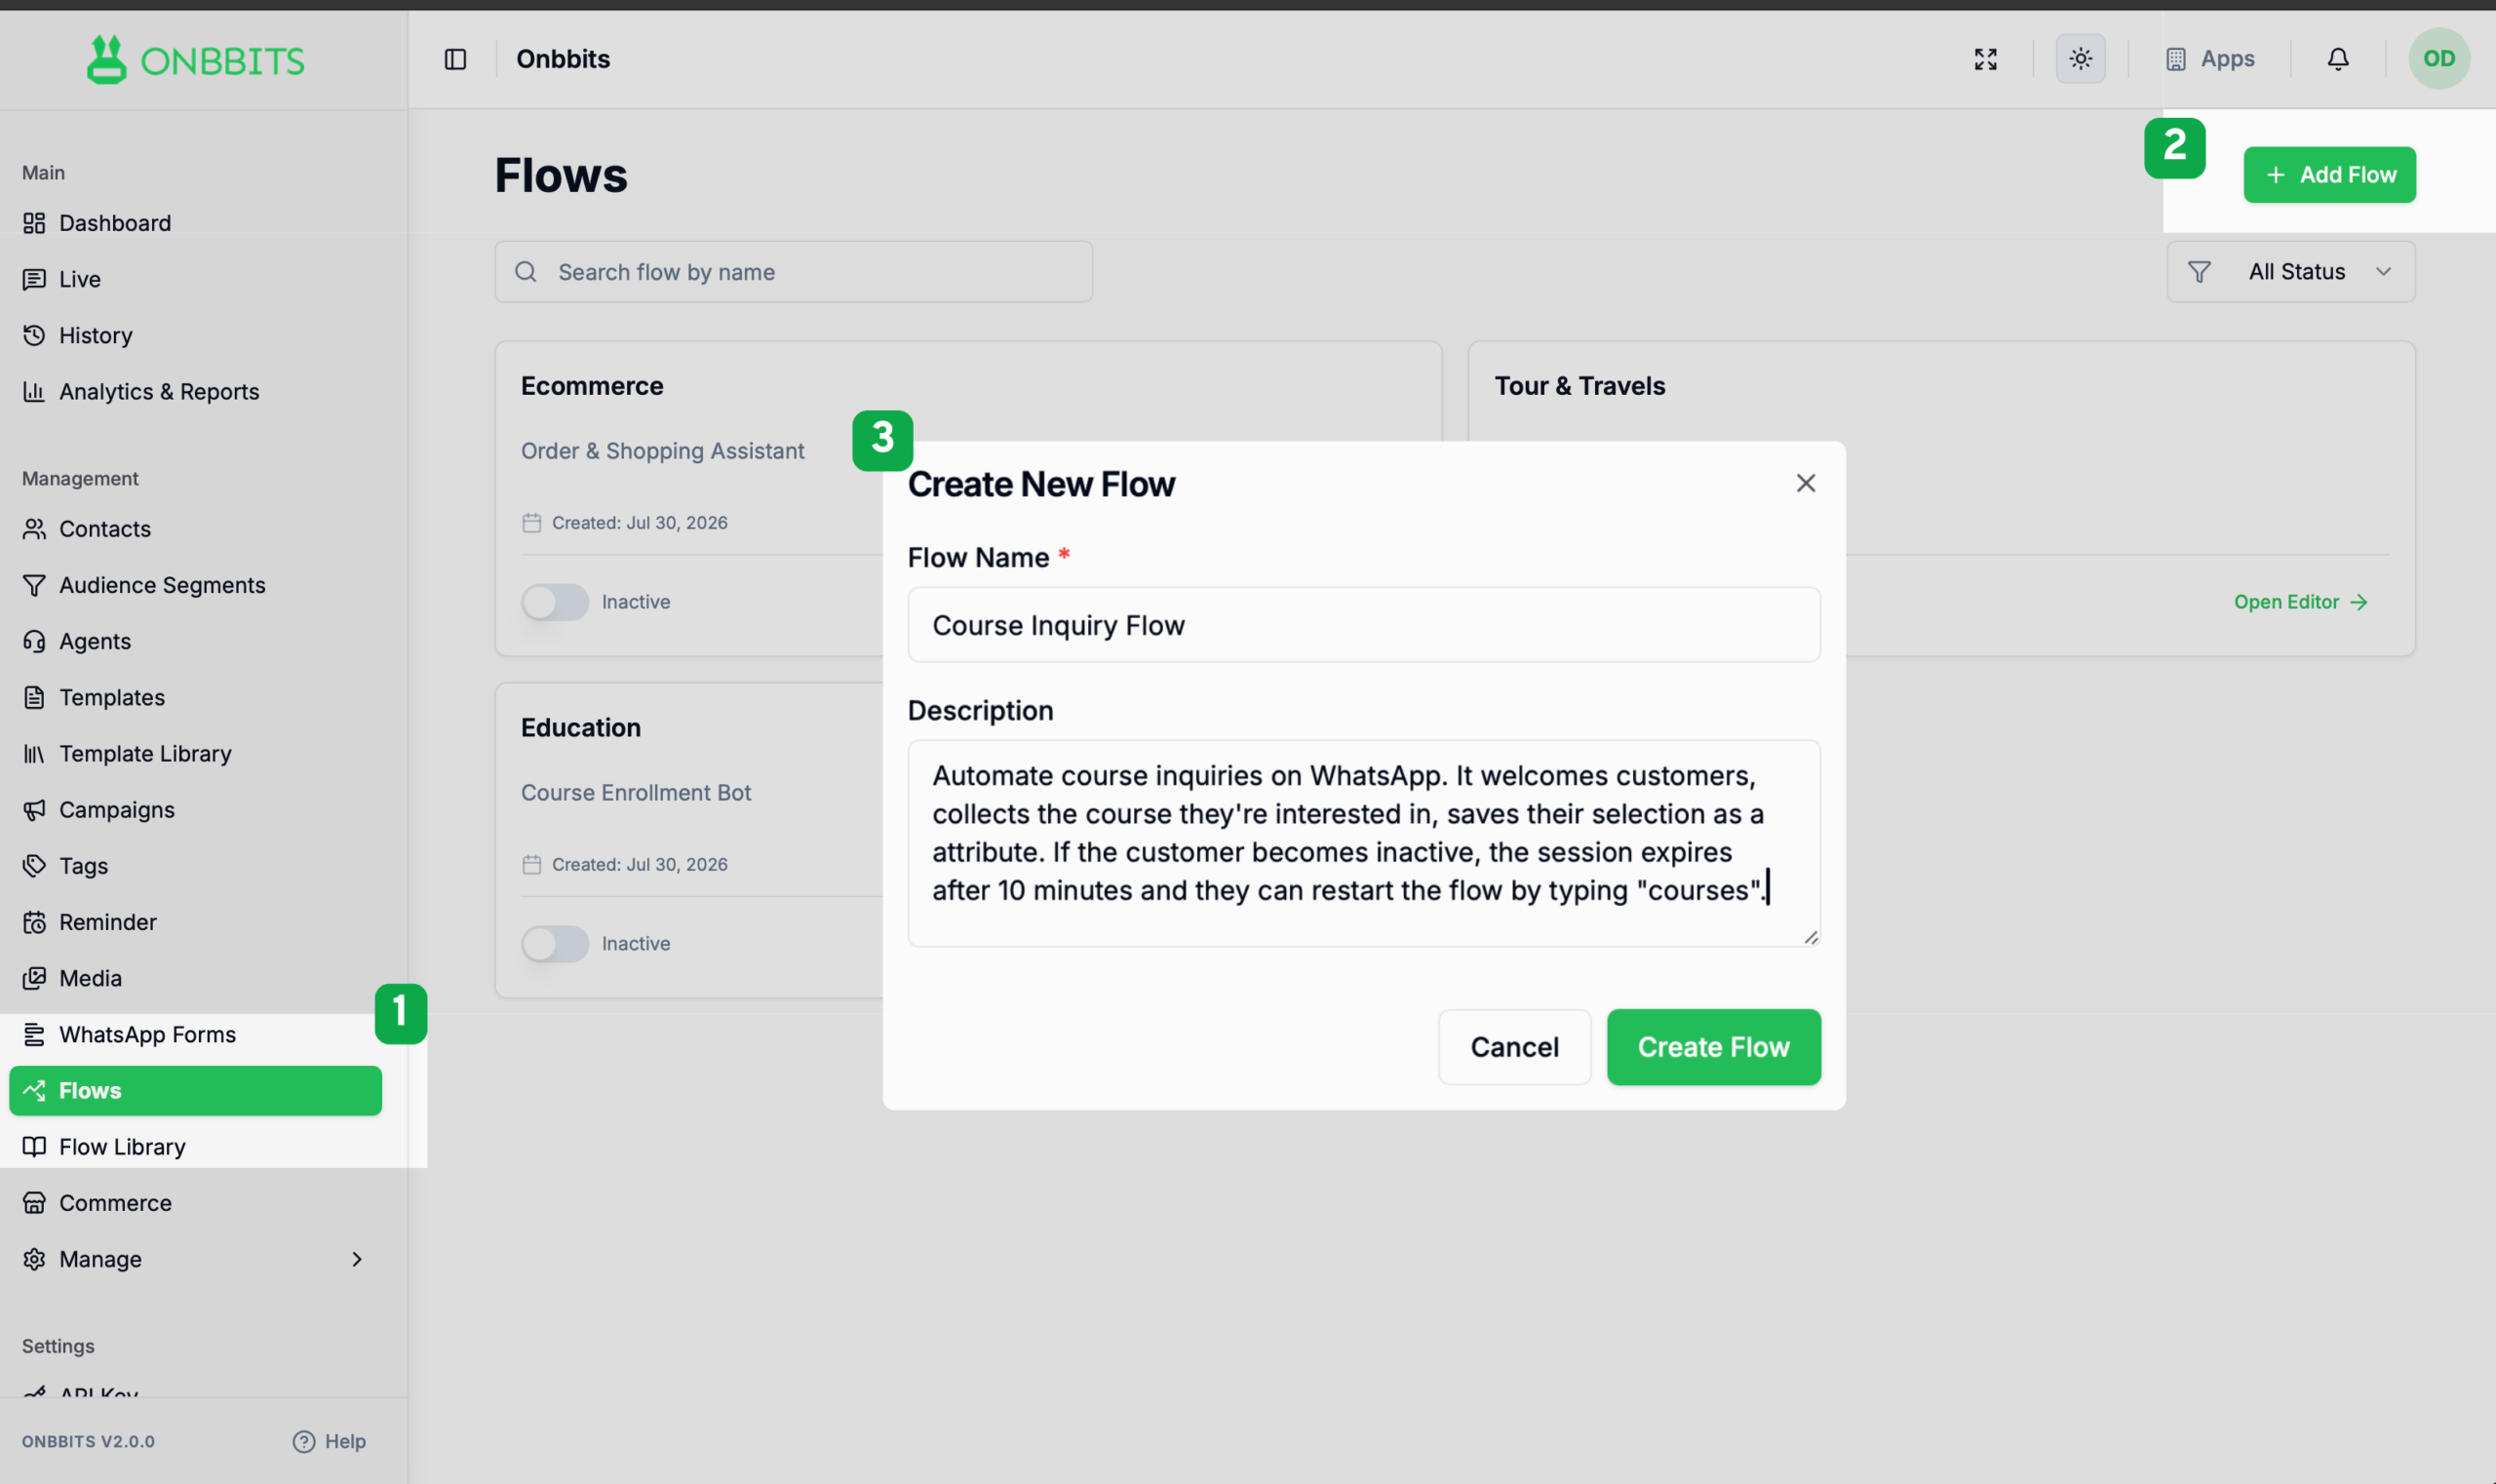
This guide walks you through creating a new Flow and setting up a simple version — a keyword trigger, a reply, and an endpoint — so you can see the basics before building something more advanced.
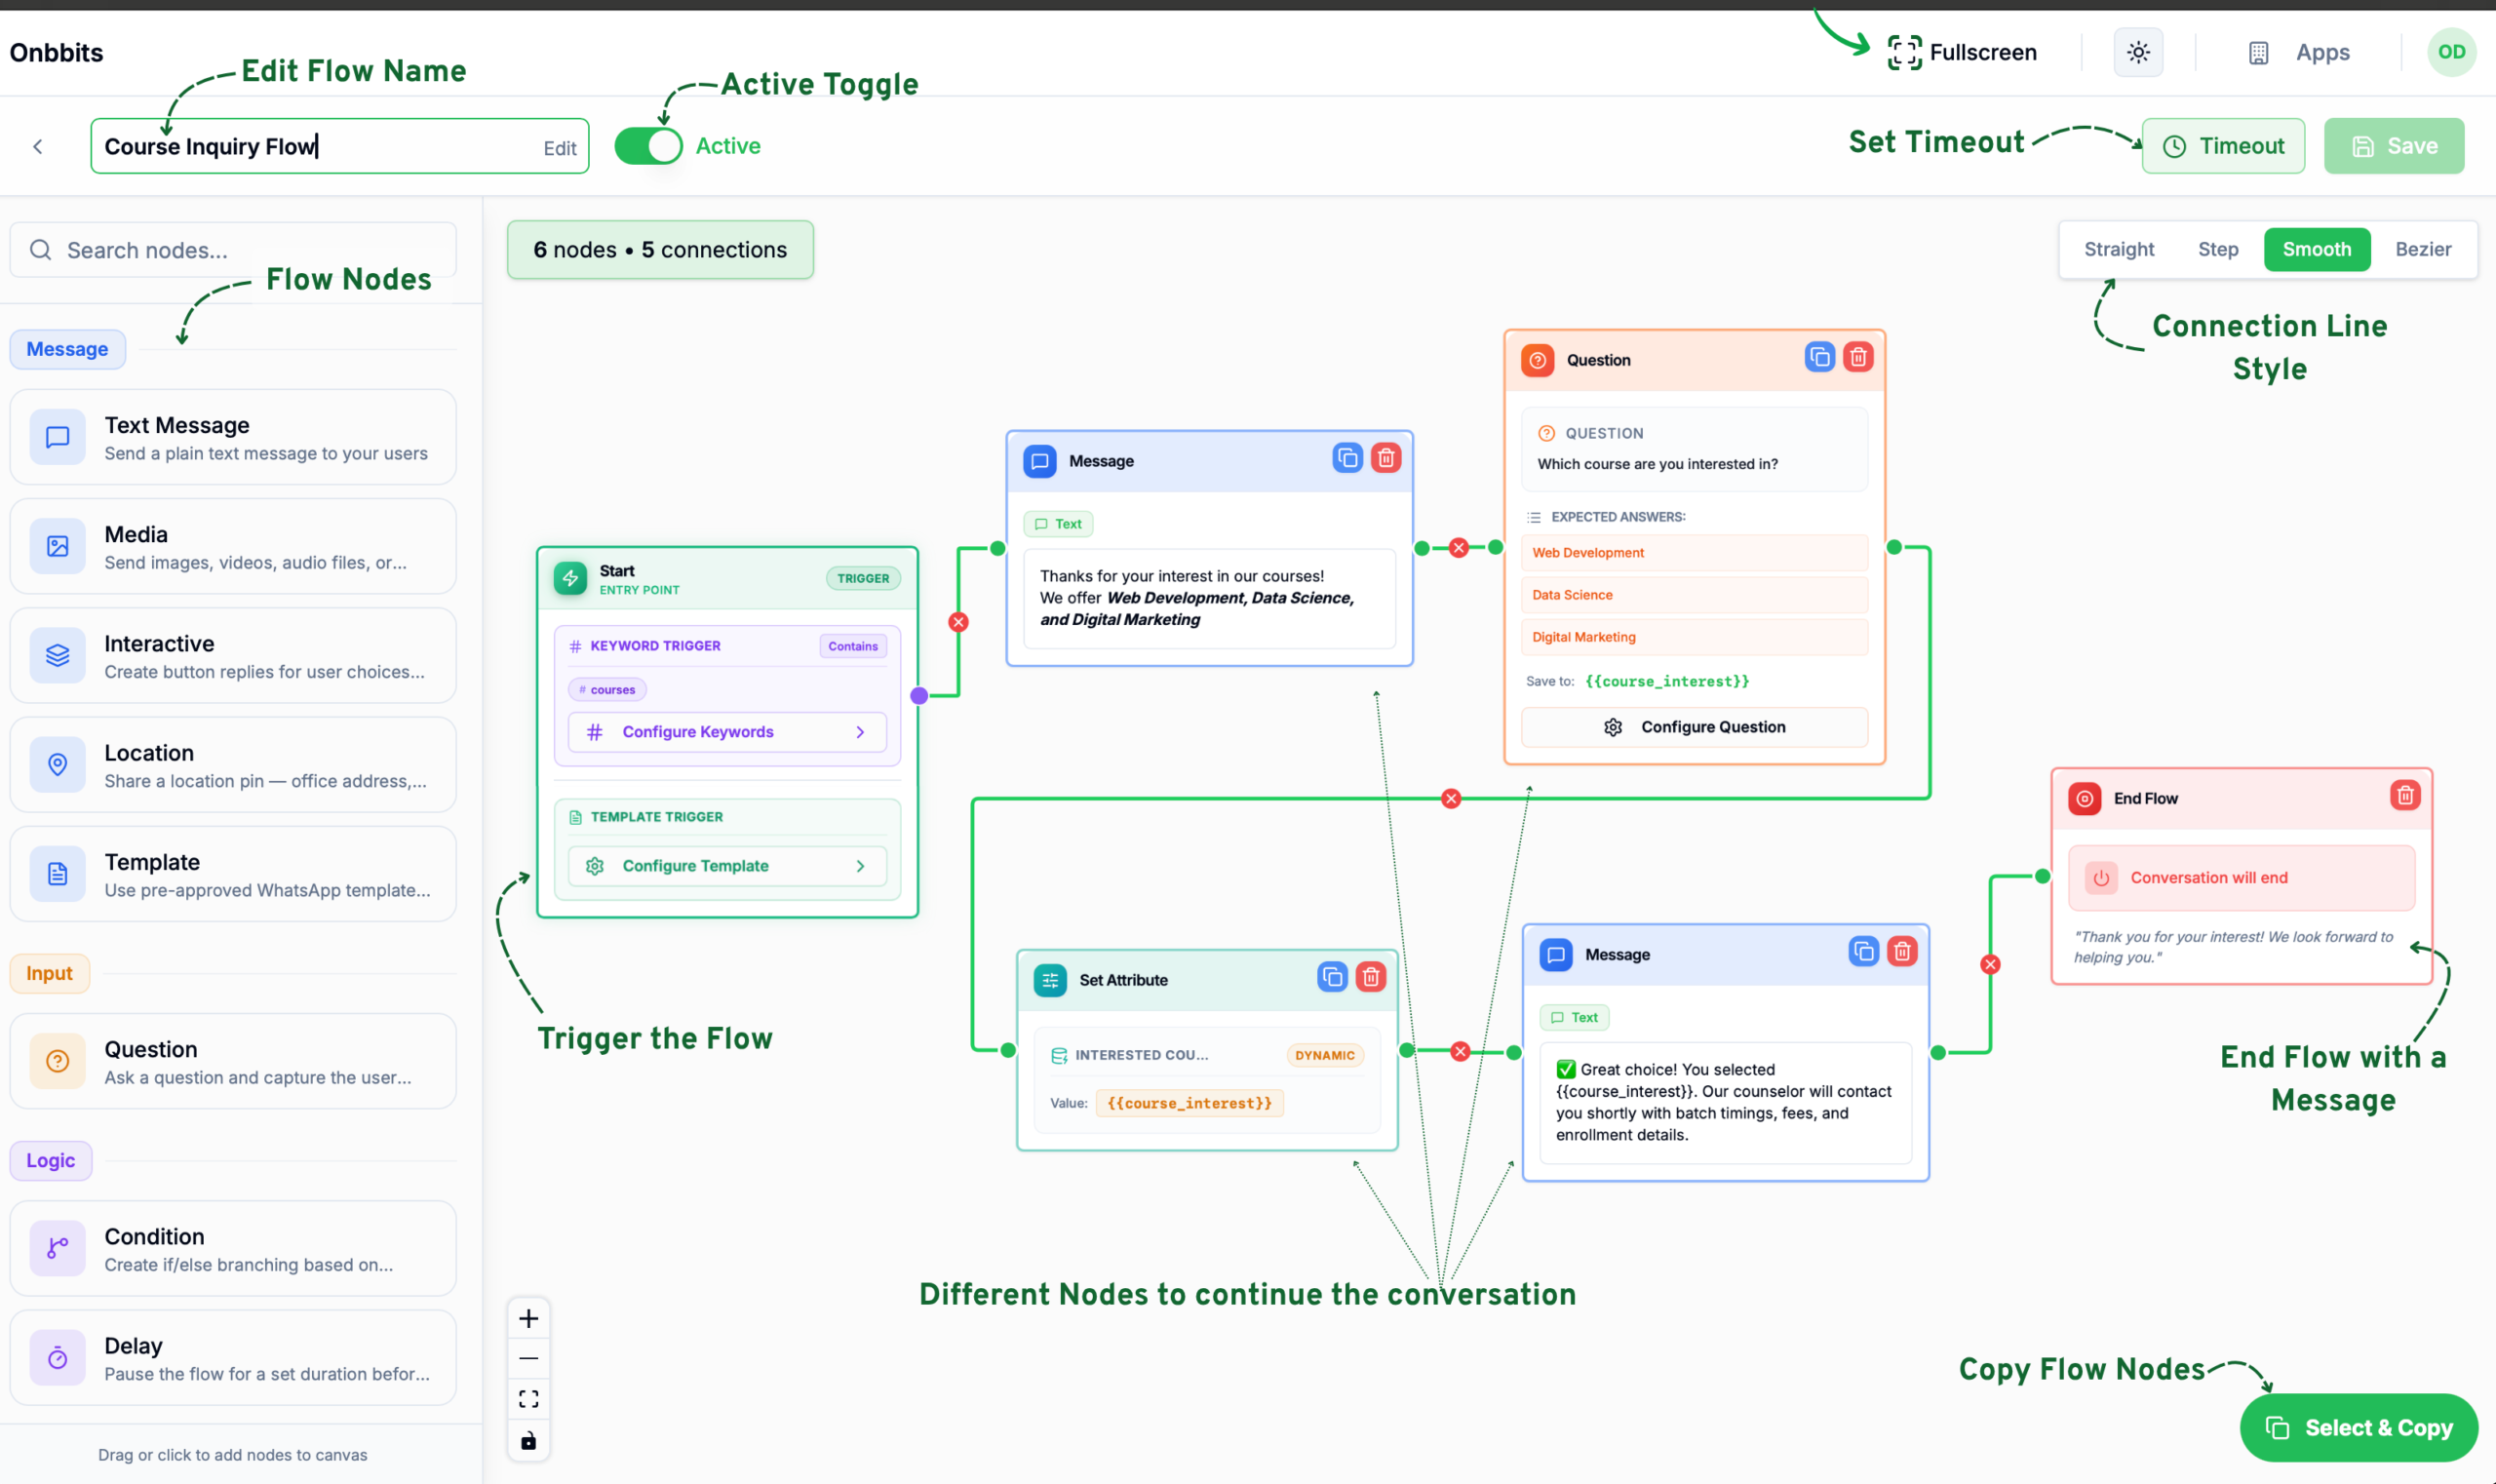
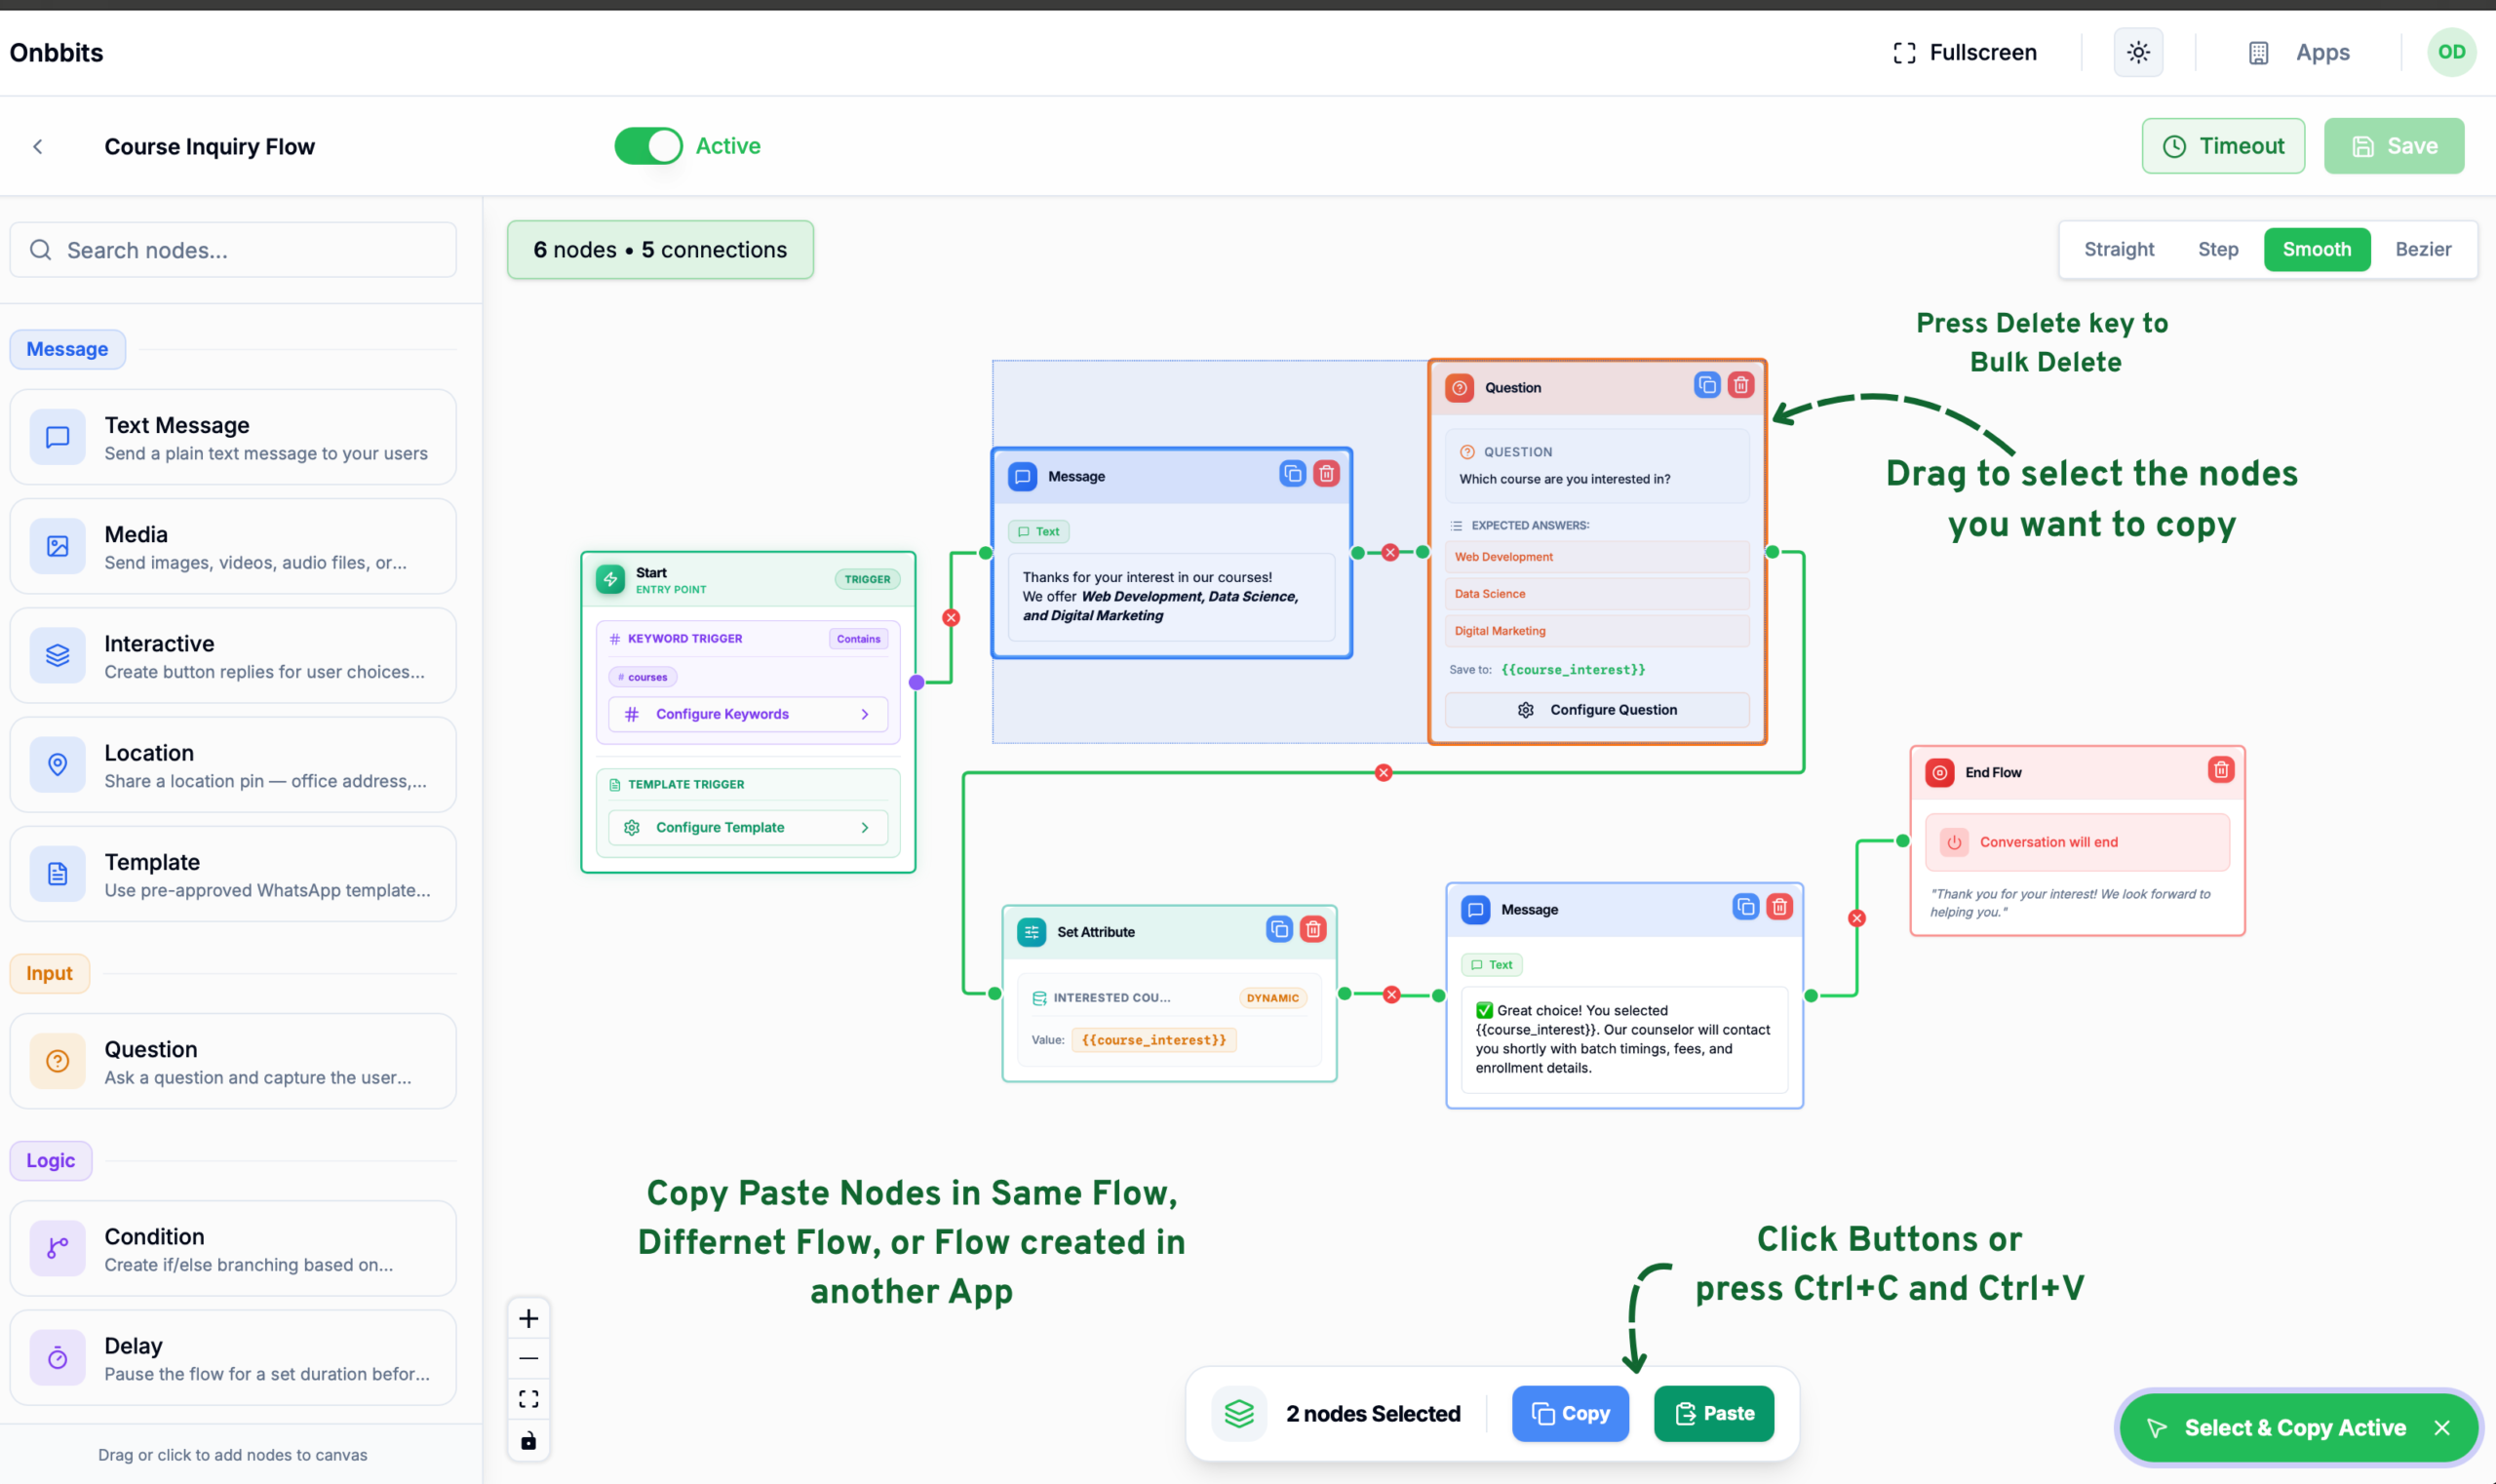
Here’s what a simple Flow looks like in practice for a business offering courses.
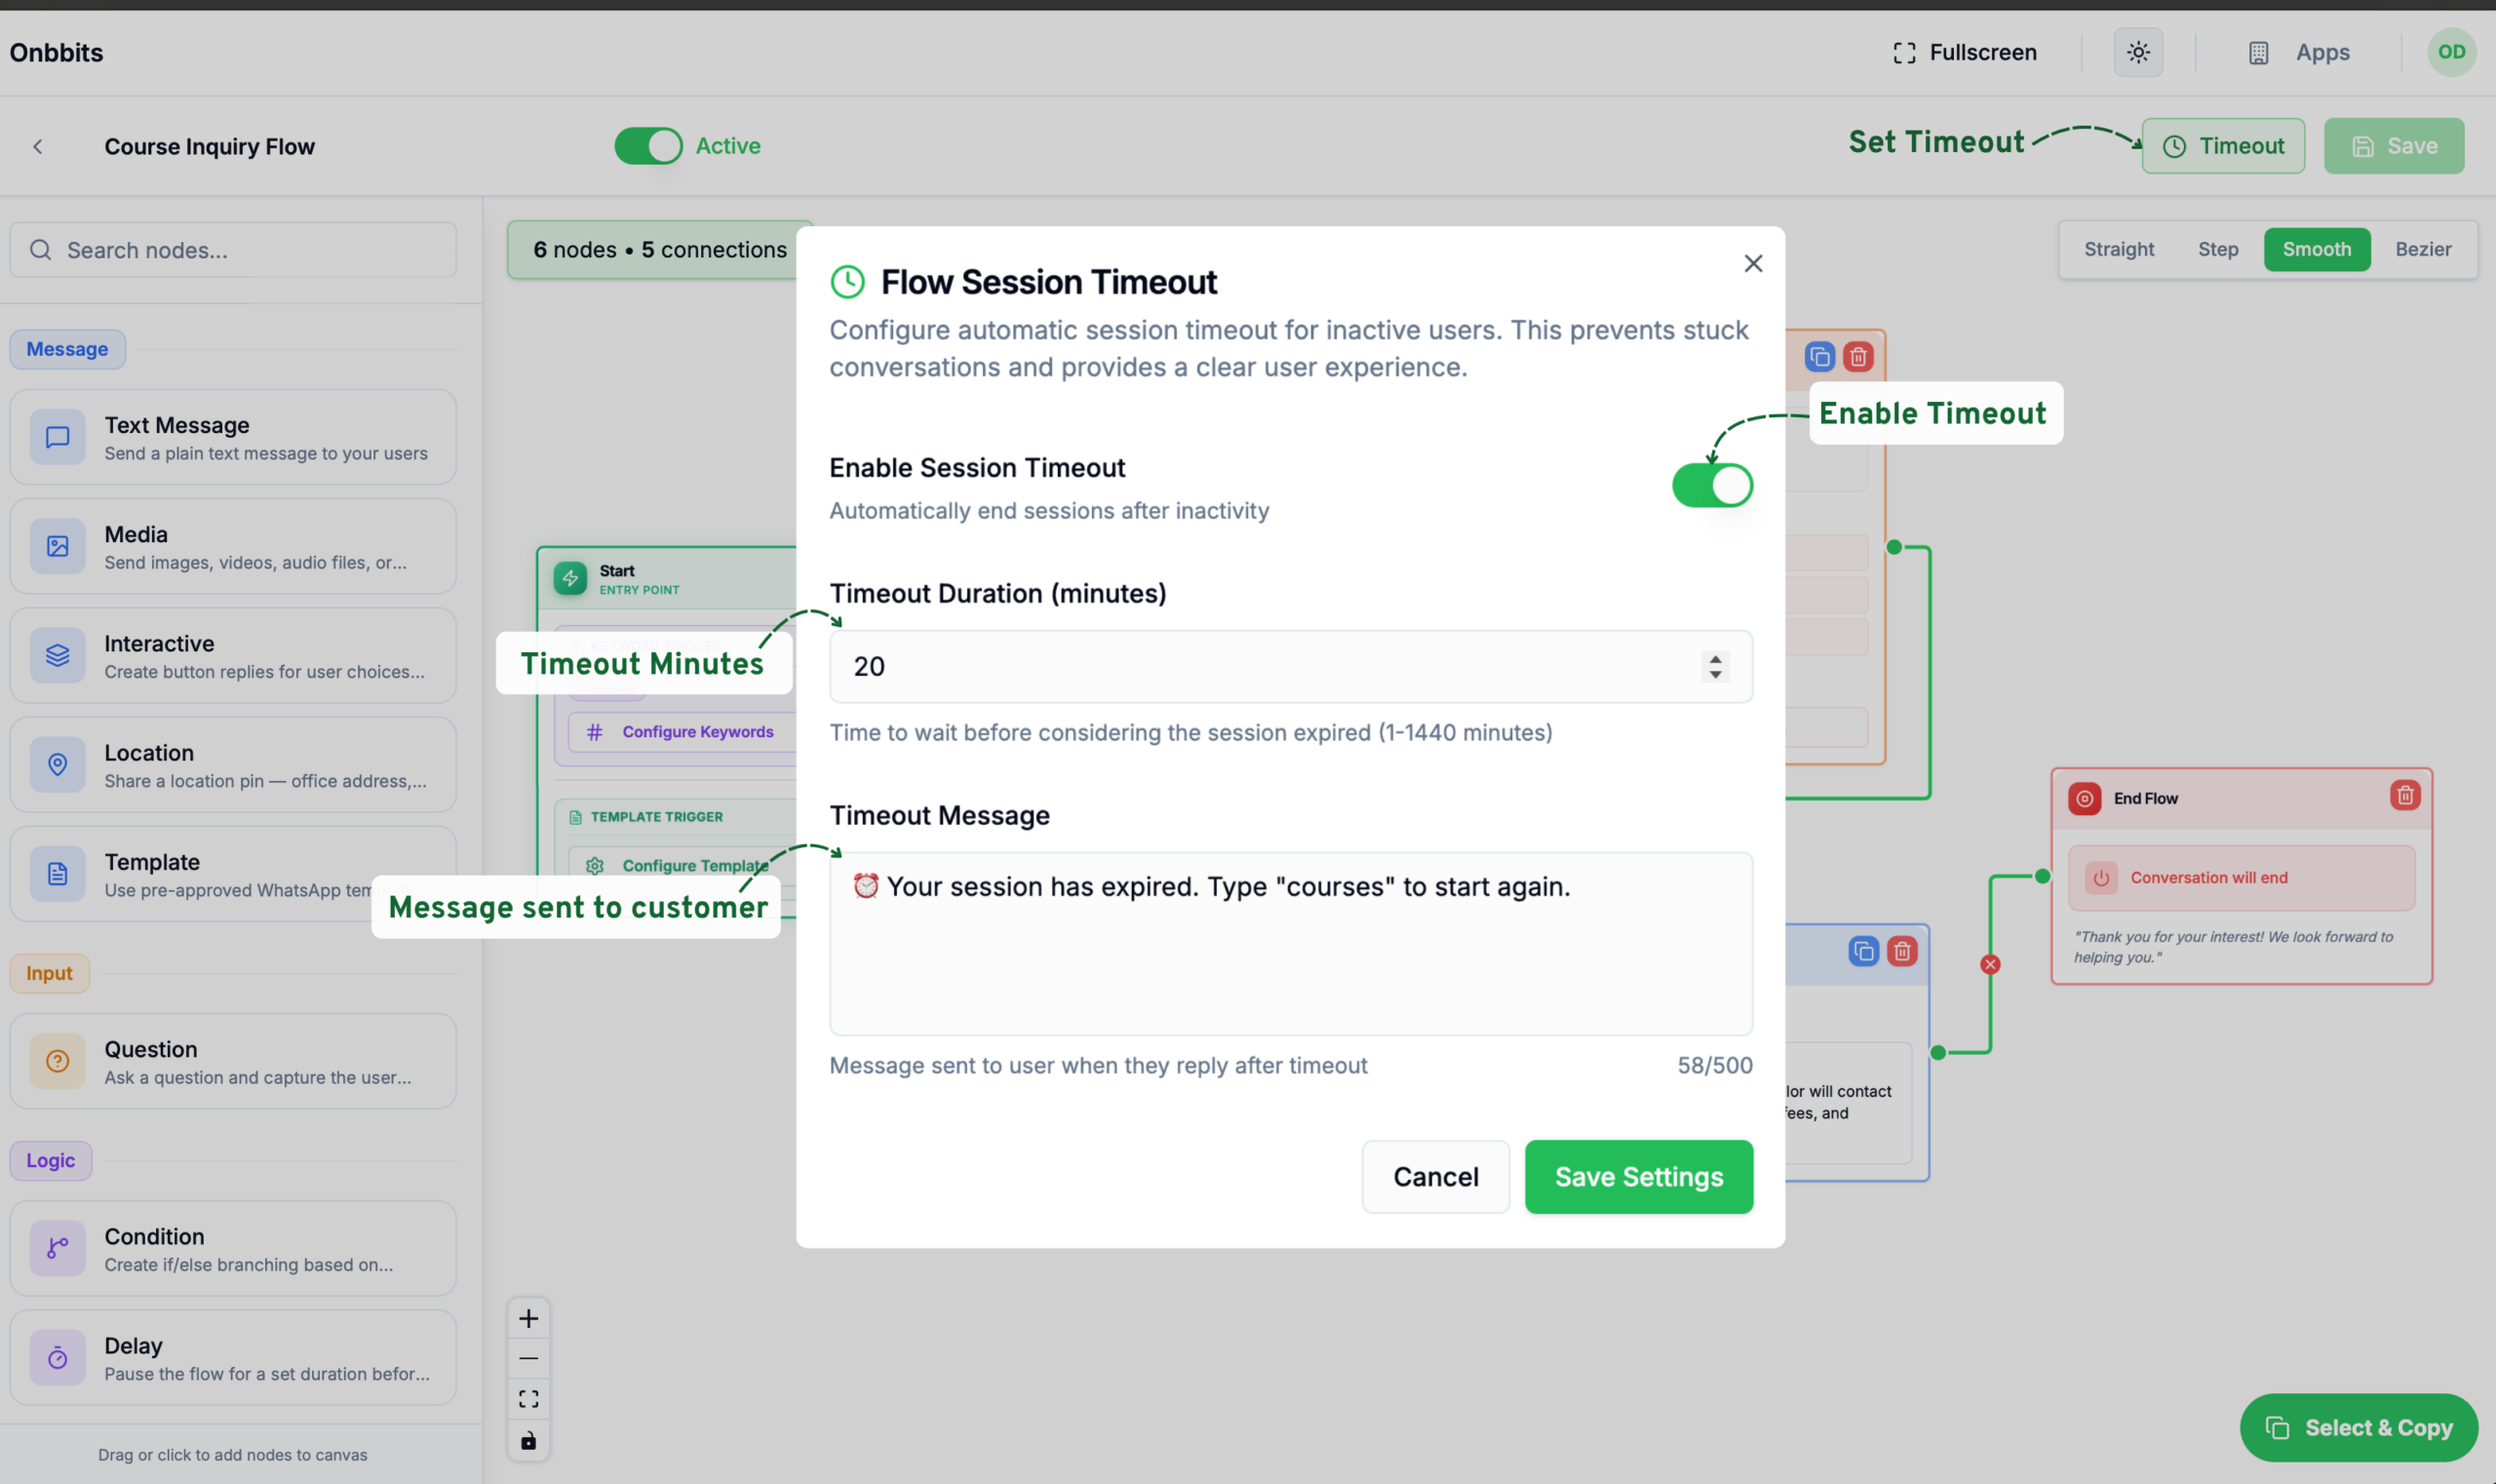
A Timeout gives customers a clear experience if they go quiet mid-conversation, instead of leaving the Flow open indefinitely.
Choose specific trigger keywords. General greetings like “Hi” or “Hello” work well for a basic welcome Flow, but a specific Flow shouldn’t use them. For example, if a Support Flow triggers on “Hi,” it’ll start even for customers who never asked for support. Keep keywords closely tied to what the Flow is actually for.
Build with a clear start and end. Place your Start and End Flow nodes first, then build the conversation between them, making sure every node is connected.
Keep the conversation short. Ask only what you truly need. Long back-and-forth conversations without a clear payoff tend to lose customers partway through — the shorter and more focused the Flow, the more likely someone is to finish it.
Use Fullscreen for bigger flows. Click Fullscreen in the top right to give yourself more room to work as your Flow grows.
Once active, your Flow runs automatically whenever a customer’s message matches its trigger keyword. You can come back and edit it anytime from the Flows page.
Our support team is ready to assist you.
© 2026 ONBBITS. All rights reserved.